A Mac is a personal computer designed by Apple. An iPhone is a smartphone designed by Apple. Sometimes you may want to have the same contacts on both devices. With this need in mind, Apple itself provides ways to help users sync contacts. There are also third-party methods. This article will show you how to sync contacts from iPhone to Mac easily in 6 ways.
 Cisdem ContactsMate
 Free Download
A cloud service from Apple, iCloud can help users sync contacts and other data between Apple devices. It is built in to iOS and macOS. Thanks to this service, the synchronization of contacts between an iPhone and a Mac can be so simple, easy and quick.
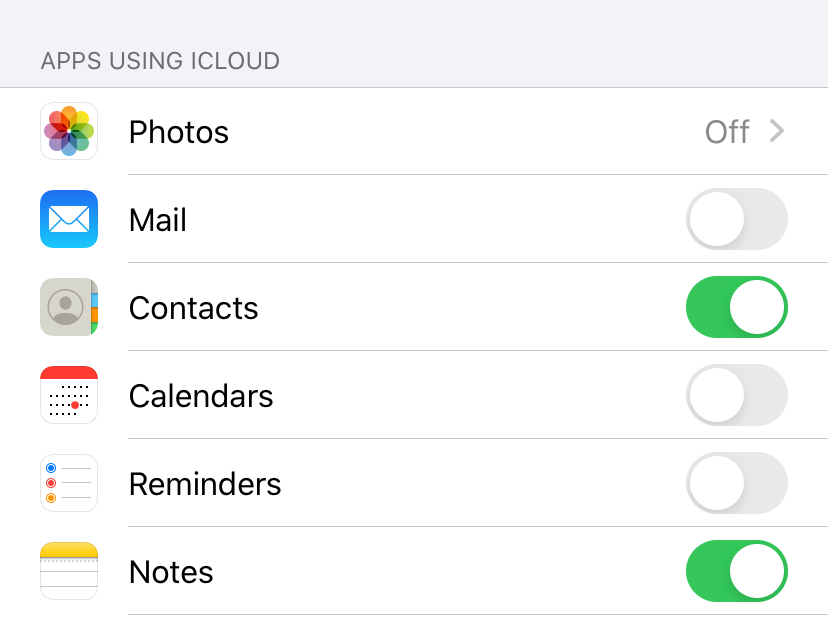
1. On your iPhone, open Settings. Tap your name.
2. Tap iCloud.
3. Turn on Contacts.
4. On your Mac, from the Apple menu, choose System Preferences.
5. Click Apple ID. If your Mac is running an older macOS version, click iCloud.
6. In the sidebar on the left, click iCloud.
7. Select the Contacts checkbox.
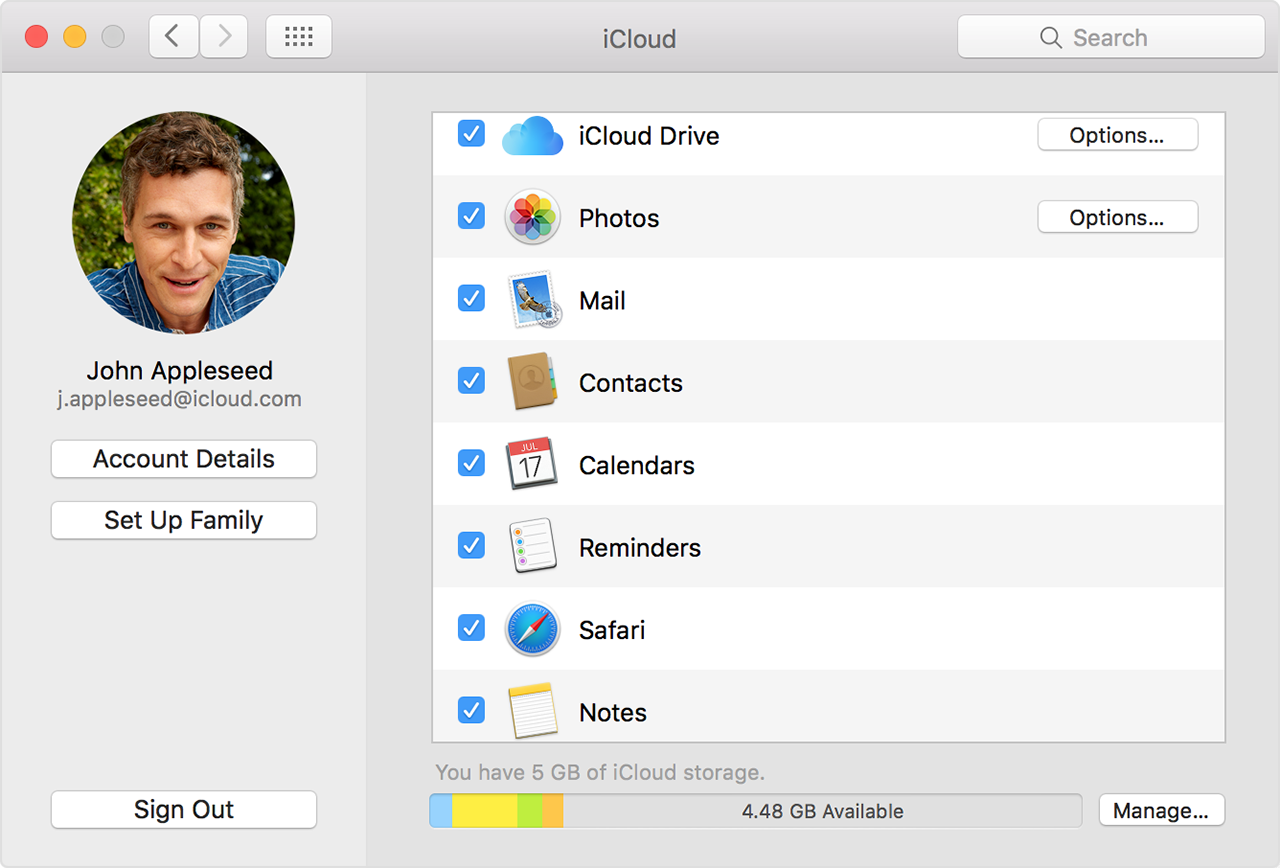
Now all contacts are synced from your iPhone to your Mac.
Tip: Fix the “iPhone contacts not syncing to Mac” issue
Sometimes this method may not work. If so, there are a few things that you can check.
If contacts still don’t sync between iPhone and Mac, try signing out of iCloud on both devices and then signing in again. Or, you can check out the methods that don’t involve iCloud.
ContactsMate is the best contact management app for Mac, helping you efficiently view, transfer, organize and manage contacts. The steps below will show you how to set up the sync in ContactsMate. This method also uses iCloud.
1. On your iPhone, go to Settings > [your name] > iCloud. Turn on iCloud.
2. Download and install ContactsMate.
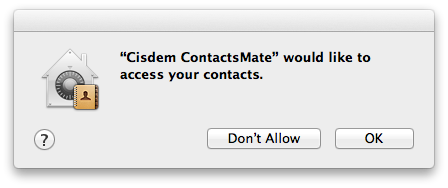
3. Click OK to allow access when you open it for the first time.
4. Click Add Account.
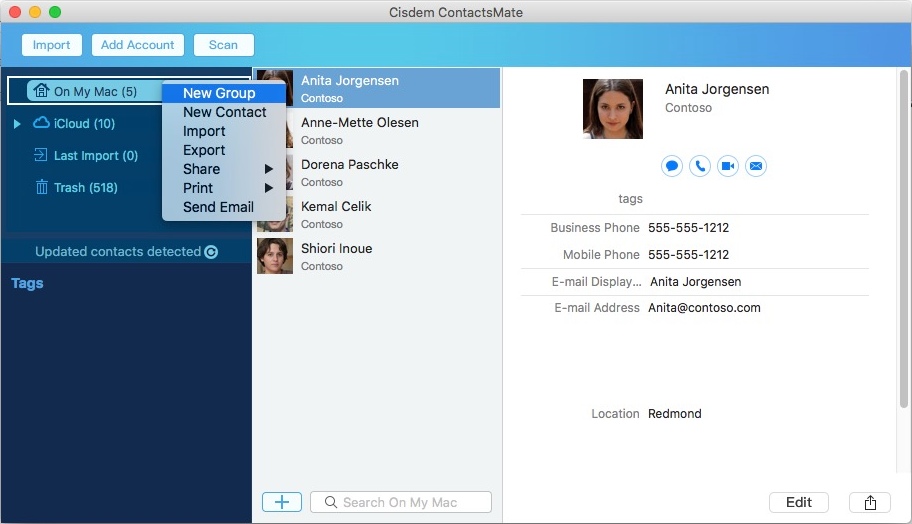
5. Choose iCloud and sign in it with your Apple ID and password.
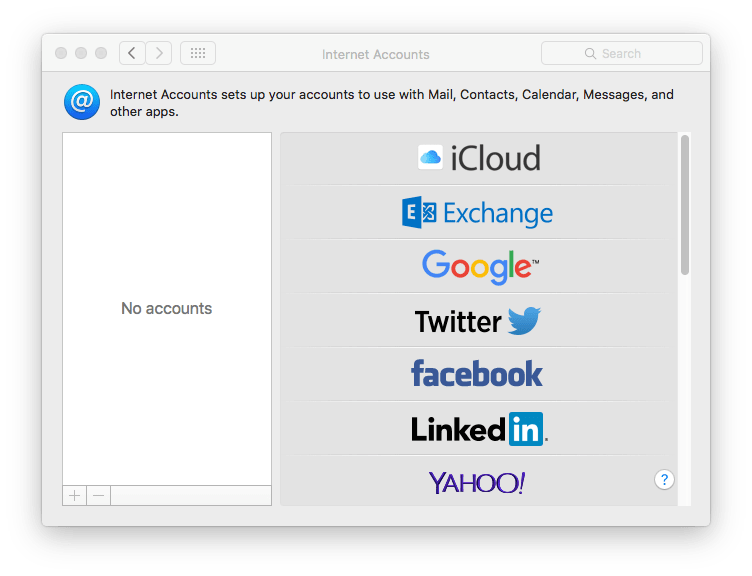
6. Make sure the Contacts checkbox is selected.
.png)
Now you can effortlessly access, use and manage your iPhone contacts on Mac. When you make changes (such as adding, editing or deleting) to contacts on iPhone, the changes will be synced to Mac right away.
If you only need a one-time transfer of contacts instead of a real-time sync, then you can export iPhone contacts to a vCard via iCloud.com and then import the vCard to Mac.
1. In iPhone’ Settings, go to [your name] > iCloud and then enable iCloud.
2. On your Mac, go to iCloud.com and sign in.
3. Choose Contacts to go to www.icloud.com/contacts.
4. Click the gear icon in the bottom left corner and choose Select All.
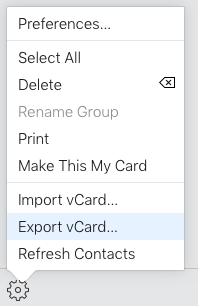
5. Click the gear icon again and choose Export vCard.
Now all your iPhone contacts are transferred to Mac. You can import them to the Contacts app on your Mac if needed.
If you don’t have an iCloud or Apple ID or you are not a fan of iCloud, you can do the sync with Finder or iTunes, which doesn’t require iCloud at all.
1. Connect your iPhone to your MacBook Pro, MacBook Air or iMac using a USB cable.
2. Open Finder on your Mac. If your Mac is running macOS Mojave or earlier, open iTunes instead.
3. In the sidebar on the left, select your iPhone.
4. Click Info.
5. Select the Sync contacts onto [your] iPhone checkbox. Here you can choose to sync all contacts or only the contacts in selected groups.

6. Click Apply.
As you can see, this method is pretty straightforward and quick. It’s flexible too, letting you sync all or certain contacts.
AirDrop is a service included with iOS and macOS, enabling users to wirelessly transfer contacts, photos and more between Apple devices. Note that it only allows you to transfer a single contact at a time. If you have only a few contacts to transfer, then this method is for you.
1. On your iPhone, go to Settings > General > AirDrop.
2. Choose Everyone.
3. Make sure that Bluetooth is turned on.
4. On your Mac, open Finder. Select AirDrop in the sidebar on the left.
5. Turn on Bluetooth.
6. In the Allow me to be discovered by setting, choose Everyone.
7. On your iPhone, open the Contacts app. Tap the contact that you want to transfer and tap Share Contact.
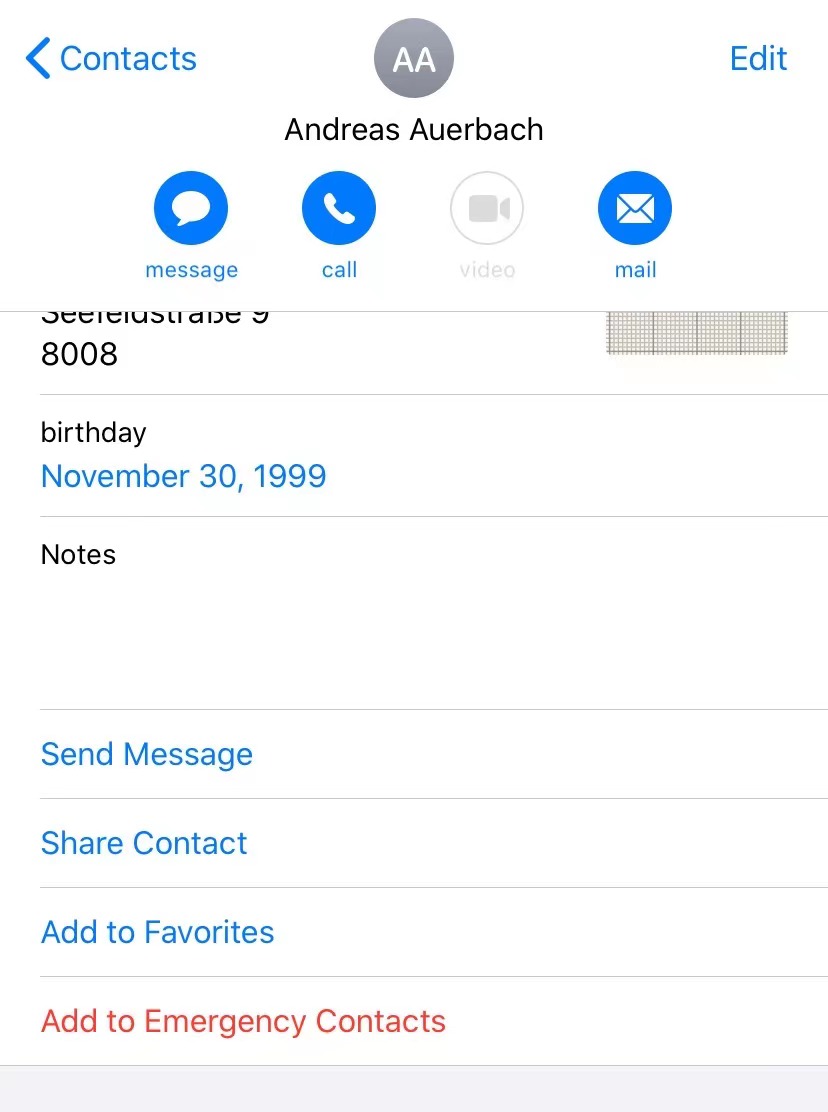
8. Tap AirDrop and then tap your Mac.
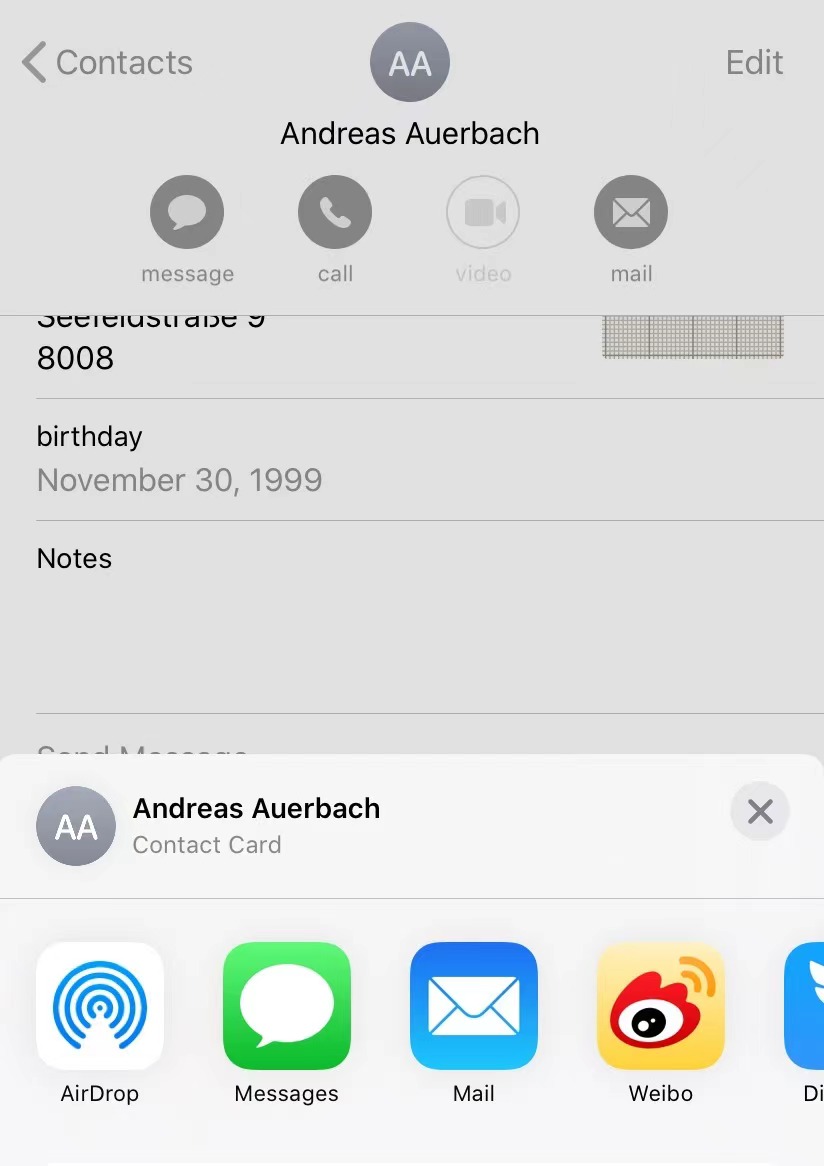
Now this contact is transferred from iPhone to Mac. It’s that easy. You can continue transferring other contacts one by one.
If you have a Google account, you can actually use it to help you do the sync. Below is how this method works.
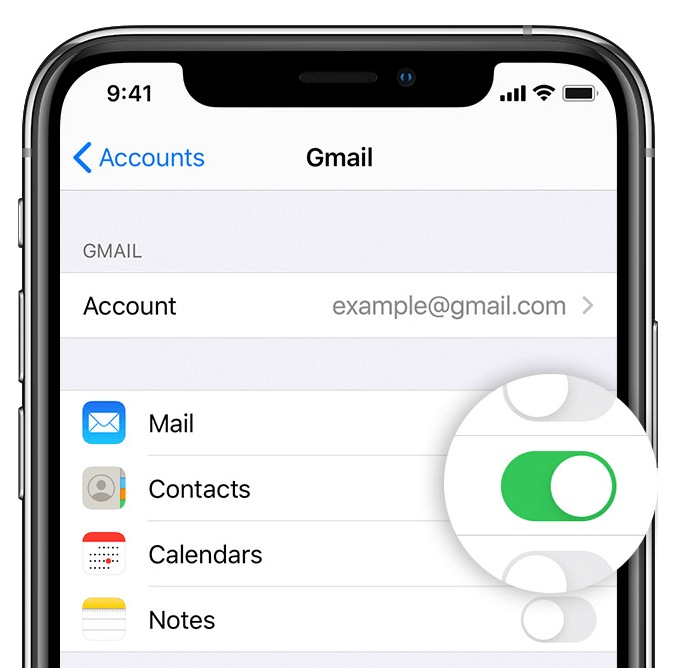
1. On your iPhone, go to Settings > Passwords & Accounts.
2. Tap Add Account.
3. In the Add Account screen, tap Google.
4. Sign in with your Google account.
5. In the Gmail screen, make sure that Contacts is turned on.
6. On your Mac, open the Contacts app and go to Preferences.
7. Under the Accounts tab, click the plus icon in the corner.
8. In the Choose a Contacts account provider list, select Google. Click Continue.
9. Sign in with the same Google account.
10. Make sure that the Contacts checkbox is selected. Click Done.
This article shows you how to sync contacts from iPhone to Mac without iCloud or with it. If it’s a real-time sync, once a change is made to contacts on your iPhone, the change will be synced to Mac immediately. If your purpose is to back up your current iPhone contacts to Mac, then a one-time transfer can be what you need.

With a passion for tech and writing, Sarah joined Cisdem, where she focuses on creating articles about using utility tools to enhance file management and simplify contact management.


Simily
Pretty good post. I have many contacts on my iPhone, and will try these ways to transfer them to my macbook pro.
Ledior
Hi Rosa, your posts are excellent.
Ishara
I have more than 500 contacts on my iPhone,and I always sync my iPhone contacts to Mac via iCloud.
Tim
There are many third-party data transfer for us to transfer contacts, messages, photos, etc. from iPhone to Mac, can you recommend me some?
Rosa Reyes
Hi, Tim, most of third-party data transfer are not free, and the prices are high. So i would suggest you transferring iPhone contacts to Mac via iCloud or Airdrop.
Ivy
I bought Cisdem iPhone Recovery for recovering my deleted iPhone messages, and i always use it to backup my iPhone contacts and messages.
Eudora
Transferring contacts from iPhone to Mac can be regarded as a kind of good method to backup iPhone contacts. Thanks for sharing.