Video files can be large in nature. Compressing videos to reduce their size on Mac can help save storage space and make sharing and transfering easier. This guide will show you the 6 easy ways to compress videos easily and quickly on Mac, from built-in tools to professional video compressors and online tools.
| Ways | OS Supported | How it Works | Preview Video? |
|---|---|---|---|
| 1. QuickTime Player X | OS X 10.6+ | Reduce video resolution | No |
| 2. iMovie | Most Macs | Lower video quality & resolution | No |
| 3. Keynote | Most Macs | Reduce video resolution | No |
| 4. Cisdem Video Compressor | macOS 10.13+ | Set a target size with optional settings | Yes |
| 5. Vimeo | Web | Reduce video quality | No |
| 6. FreeConvert | Web | Set a target file size or resolution or quality value | No |
Native tools like QuickTime Player and iMovie are straightforward way to compress screen recordings and album movies.
A third-party software like Cisdem Video Compressor can definitely provide more advanced features and options to achieve a perfect balance between size and quality. And it offers batch compress feature.
Web-based compressors are convenient but are the least recommended for privacy and security reasons.
No matter which compression tool you choose, the compression techniques remain the same. To reduce a video file size, most common methods are either to reduce the bitrate for a lower resolution, or re-encode the video with a more efficient compression codec, such as HEVC.
If the video you want to compress can be opened with QuickTime Player, you can try to reduce the size using the native Mac feature without a third-party tool.
But do note that it will export video in MOV format only, so it’s not suitable if you want MP4 or want to keep the source format. I compressed a 1080p HD video by 20% by exporting it to 720p.
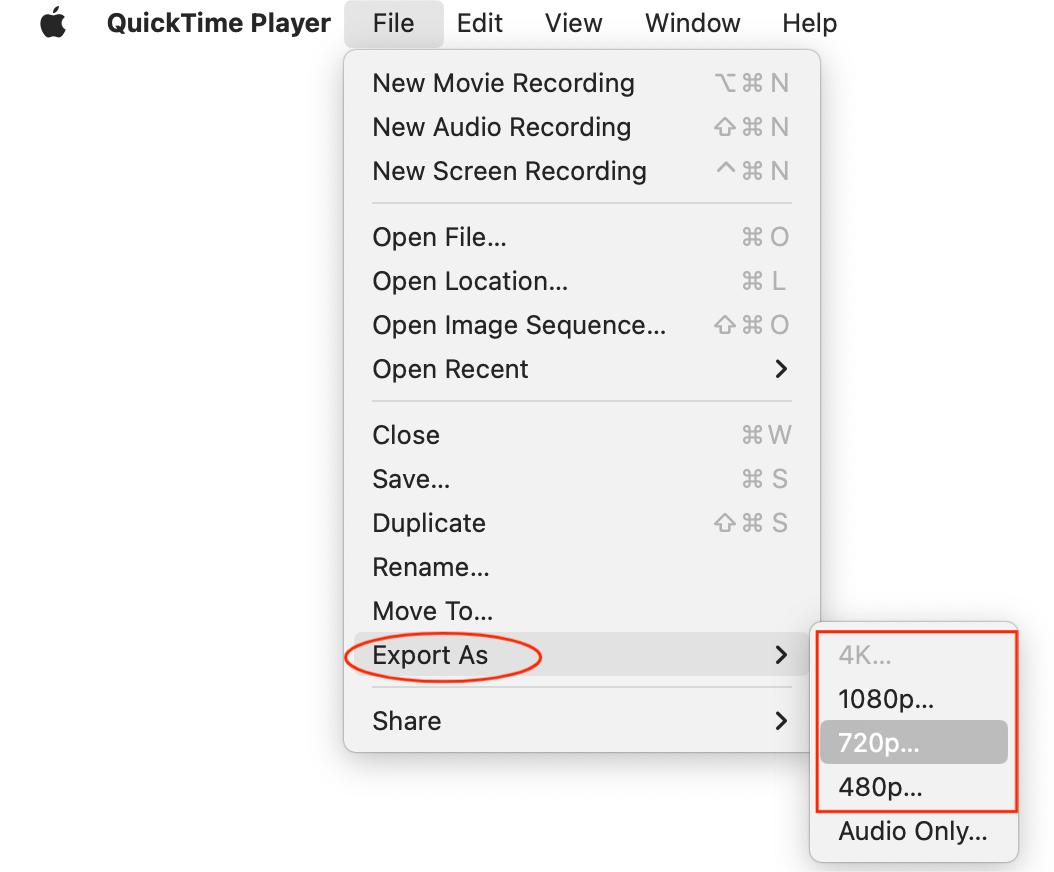
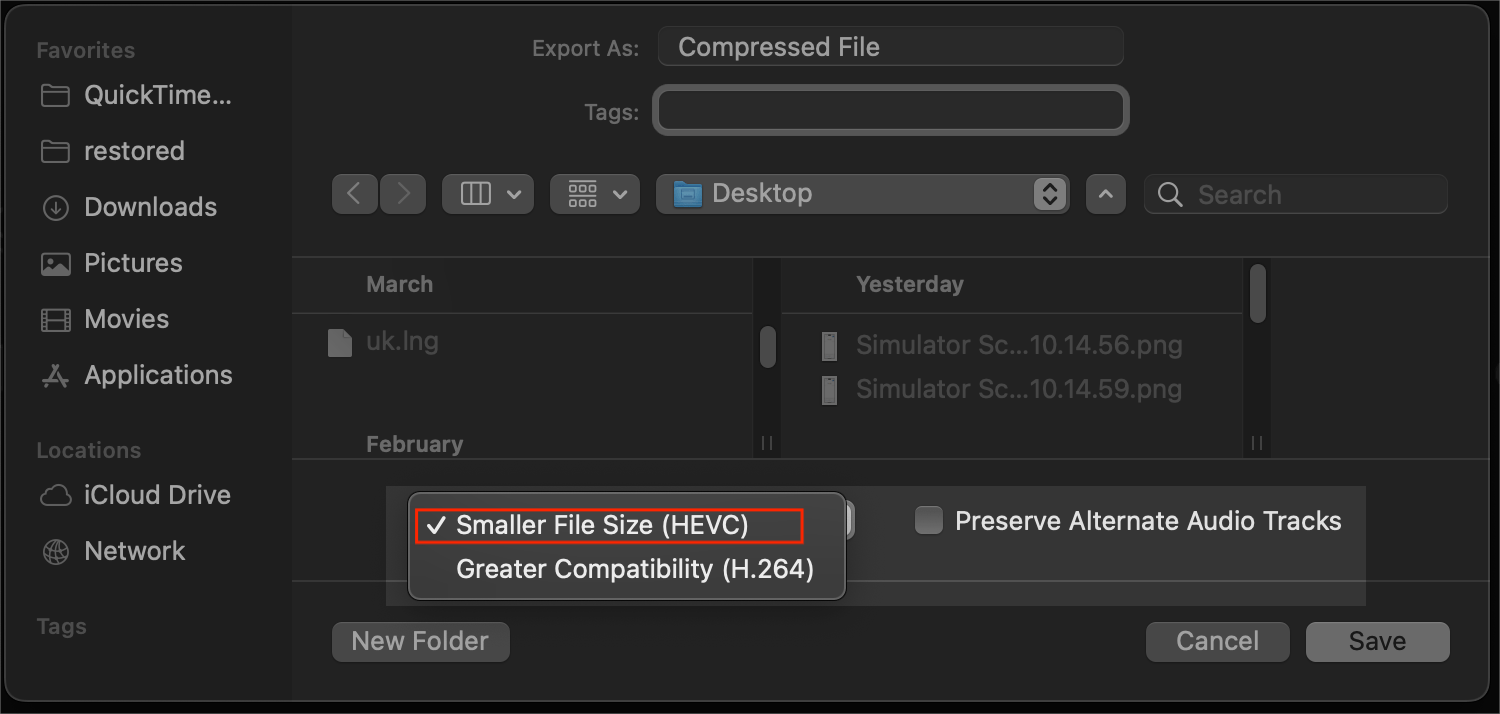
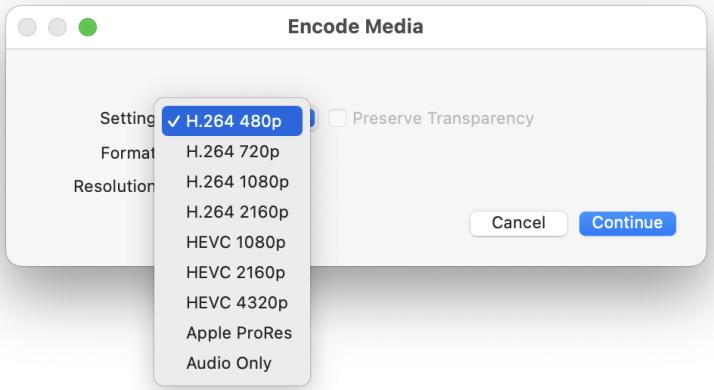
Note: Sometimes, the “Export As” option of QT is grayed out due to compatibility issues. You may try another Mac shortcut: right-click on the video file and select “Encode Selected Video Files” option. In the Encode Media window, it will provide similar export options.
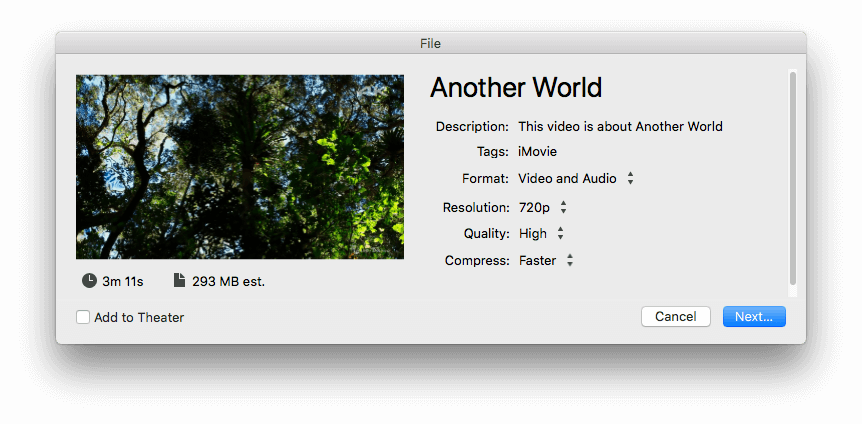
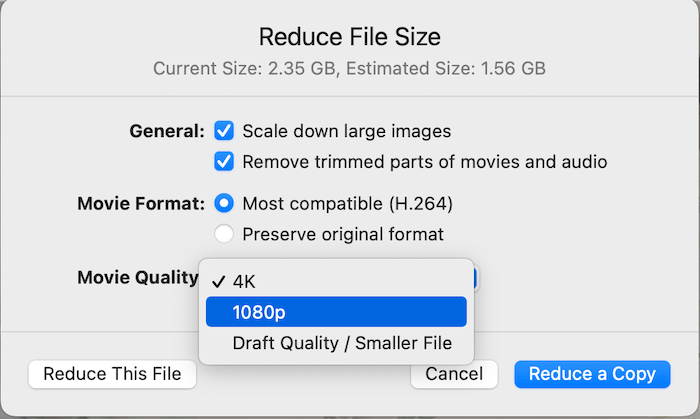
We can use video editing software to compress a video by adjusting export settings, and iMovie is a handy option for Mac users. It’s simple and preinstalled on many Macs.
It can display an estimated file size before exporting the video file, and it can compress video in MP4 with good compatibility. But like the QuickTime Player, it only accepts limited supported formats.
How to compress a video with iMovie:
Keynote is another built-in Mac application that lets you add video to your slides and compress the file size. Similar to QuickTime, it only accepts Apple-supported videos and only exports in MOV format. Keynote offers fewer export options, but can display an estimated file size. If you need to compress a video for smooth presentation, Keynote can be a good option for seamless workflow.
And if you use PowerPoint on a Mac, you can use it to compress your video as well. Check my how to compress a video with PowerPoint guide.


Above are 3 ways to compress videos on Mac with included tools. They may not meet the your needs of video compression in most cases, for example, the output video may still be too large, the video quality is blurred and the compressed format is not compatible for further use. To get rid of all these issues, consider using a professional video compression program, such as Cisdem Video Compressor in the next section.
Cisdem Video Compressor is a dedicated video compressor software, available for Mac and Windows. It compresses any added video with optimized variable bitrate (VBR), which can compress the file size by up to 80% without visual quality loss, maintaining the original dimensions. What's more, advanced users can adjust video and audio parameters like output format, codec, resolution, frame rate to further shrink the size.
1. Click the Download button to install Cisdem Video Compressor.
 Free Download macOS 10.13 or later
2. Launch the software, and simply drag and drop video files to the main interface.
3. Select video compression options.
For a quick compression, move to the bottom left to select a compression percentage, the valid range is from 20% to 90%, smaller value compresses more.
*The predicted file size a range because it uses variable birtate control to ensure efficient compression and high video quality.
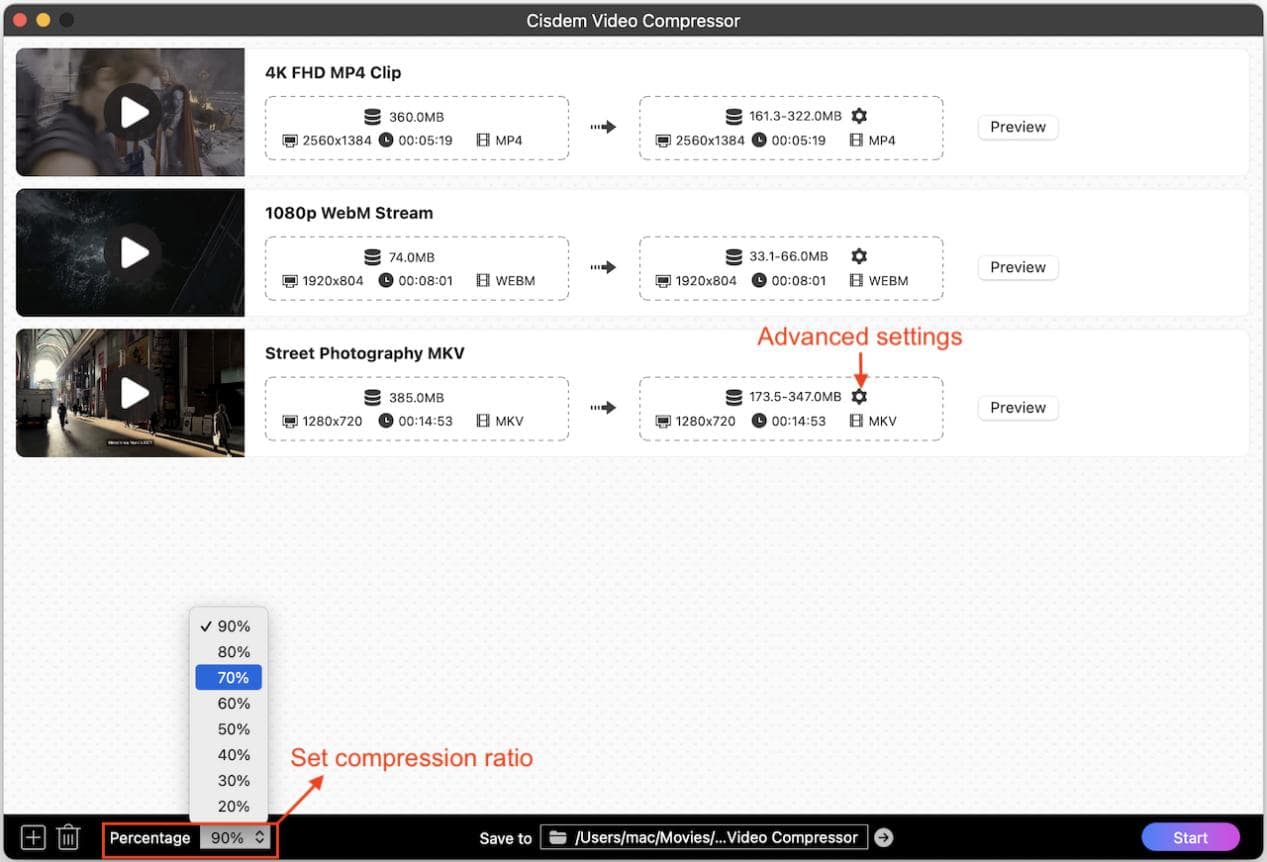
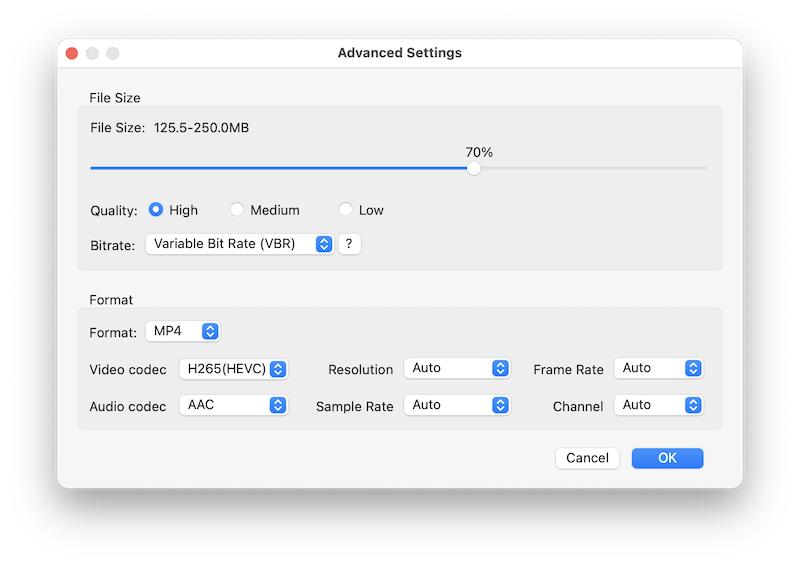
To custom the compression methods, click the gear icon to open the Advanced Settings window. Here you can change bitrate control method to CBR, set a more precise compression percentage and adjust output video and audio settings.
4. Click the Preview button to preview the first 20 seconds of the video to make sure you like the result quality.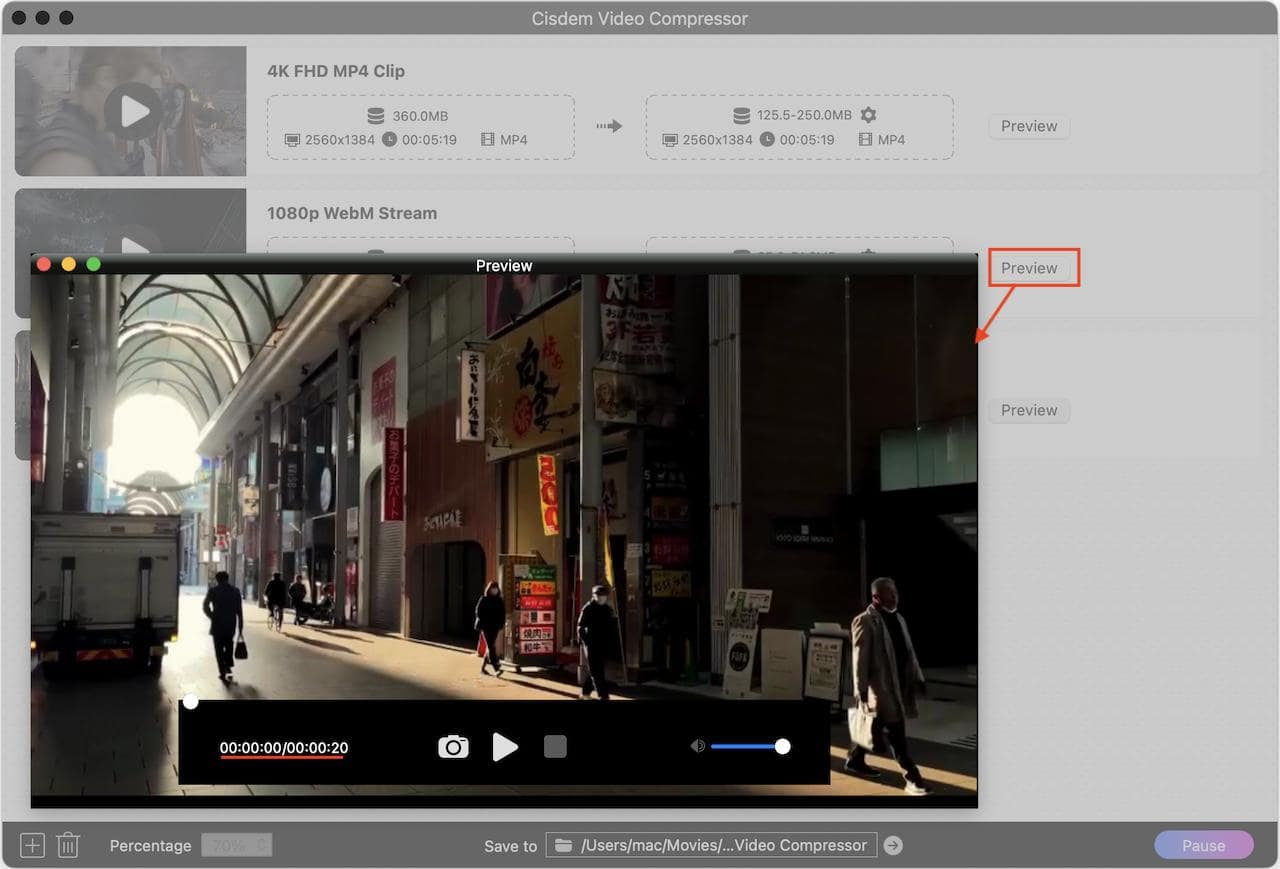
5. Click the “File > Save Compress Folder to” to specify the save location for compressed videos. Then click the Start button to start compressing the videos on Mac.
When the compression is complete, click on the Blue check icon to quickly locate the video in Finder.
 Free Download macOS 10.13 or later
This section introduces 2 ways to compress videos online without extra software installation. It will take more time to upload and download the videos.
As one of the best video hosting platforms, Vimeo can process an uploaded video to different qualities and resolutions for easy sharing and streaming. And it allows the video uploader to download these video files.
Unlike other online video compressors, there are no video size limits for free users. But free plans only allow two videos per month, with a total lifetime limit of 25 videos.
So if you need to compress a large video file and don’t mind certain quality loss, try uploading to Vimeo.

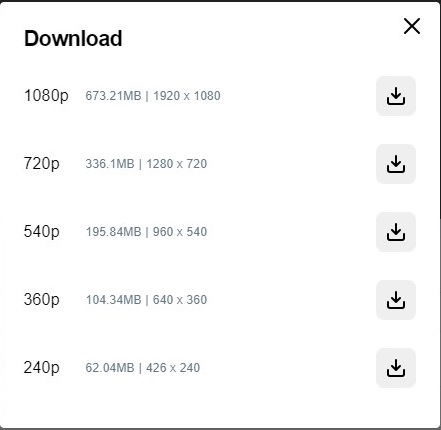
Tip: You can click the Share button to change the privacy setting from Public to Private, so only you can view it.
Freeconvert.com is the most popular video compressor site that allows users to compress videos online by setting target compression ratio or file size.
It limits each file size up to 1 GB and 5 minutes. Free users get 20 compression minutes per day. It also provides upgraded plans starting at $12.99 per month to get rid of these limitations.

More online video compressors for Mac:
MP4 in H.264 is widely used for effective compression and high compatibility. HEVC (H.265) can reduce video size 20 to 50% more than H.264, but it’s not supported on Mac before 10.13.
Use a compression tool that allows you to specify a target file size, such as Cisdem Video Compressor and FreeConvert. If the video file size is close to the email limit, say, 30 MB, you can also utilize the “Share to Email” feature in iMovie. You can find detailed steps in how to compress video for email guide.
HandBrake is a free video transcoder available for macOS 10.13 and Windows. While it's not a dedicated compression program, it offers presets like 'Fast 720p30' for smaller file and customizable settings for smaller file size. You can learn more details in how to compress video with HandBrake on Windows guide.

Jenny is a technology editor who has been blogging since she was a student. Since joining Cisdem, she focuses on writing articles about video software and how-to guides. She loves exploring new tools and techniques.

