Google Photos is good if you want to store photos and video files. It uses good encryption technology to keep your data safe. But, this thing won’t prevent a snooping coworker with access to your phone to viewing your photos. If to add an extra layer of protection, you love put a lock on your Google Photos.
This article will show you how to lock Google Photos on phones and computers in two way, help you protect your photos from unauthorized accessing.
 GET IT ONGoogle Play
 Download on theApp Store
 Free Download Windows 11/10/8/7
 Free Download macOS 10.12 or later
There are two ways to protect the photos and videos in your Google Photos.
One method isn’t necessarily better than the other. Both can safeguard your privacy. Method 1 provides overall protection, while method 2 offers selective locking. You can choose the method that best suits your needs or even use a combination of both.
You can easily put a lock on your Google Photos using an app lock like Cisdem AppCrypt (or simply AppCrypt). This app lock is available on Android, iOS, iPadOS, Windows, and macOS. Once set up, it protects all photos and videos in your Google Photos. With its auto re-lock feature, there is a balance between security and convenience. Below is how to set it up.
1. Install Cisdem AppCrypt.
2. When you open it for the first time, set a 4- or 6-digit password or a pattern.
![]()
3. In the App Lock tab, use the search box to find Google Photos and toggle the switch next to it to the on position.
![]()
It’s that easy.
Now Google Photos is locked. When you or anyone else taps its icon to open it, it won’t launch, and a screen will appear instead. You can unlock Google Photos by entering your password or pattern on this screen.
![]()
Google Photos will be automatically re-locked after it has been unlocked for a period selected by you, for example, 10 minutes.
In addition to this app, you can use AppCrypt to lock other apps on your device.
1. Install AppCrypt
2. In the App Lock tab, tap Add / Remove at the bottom of the screen.
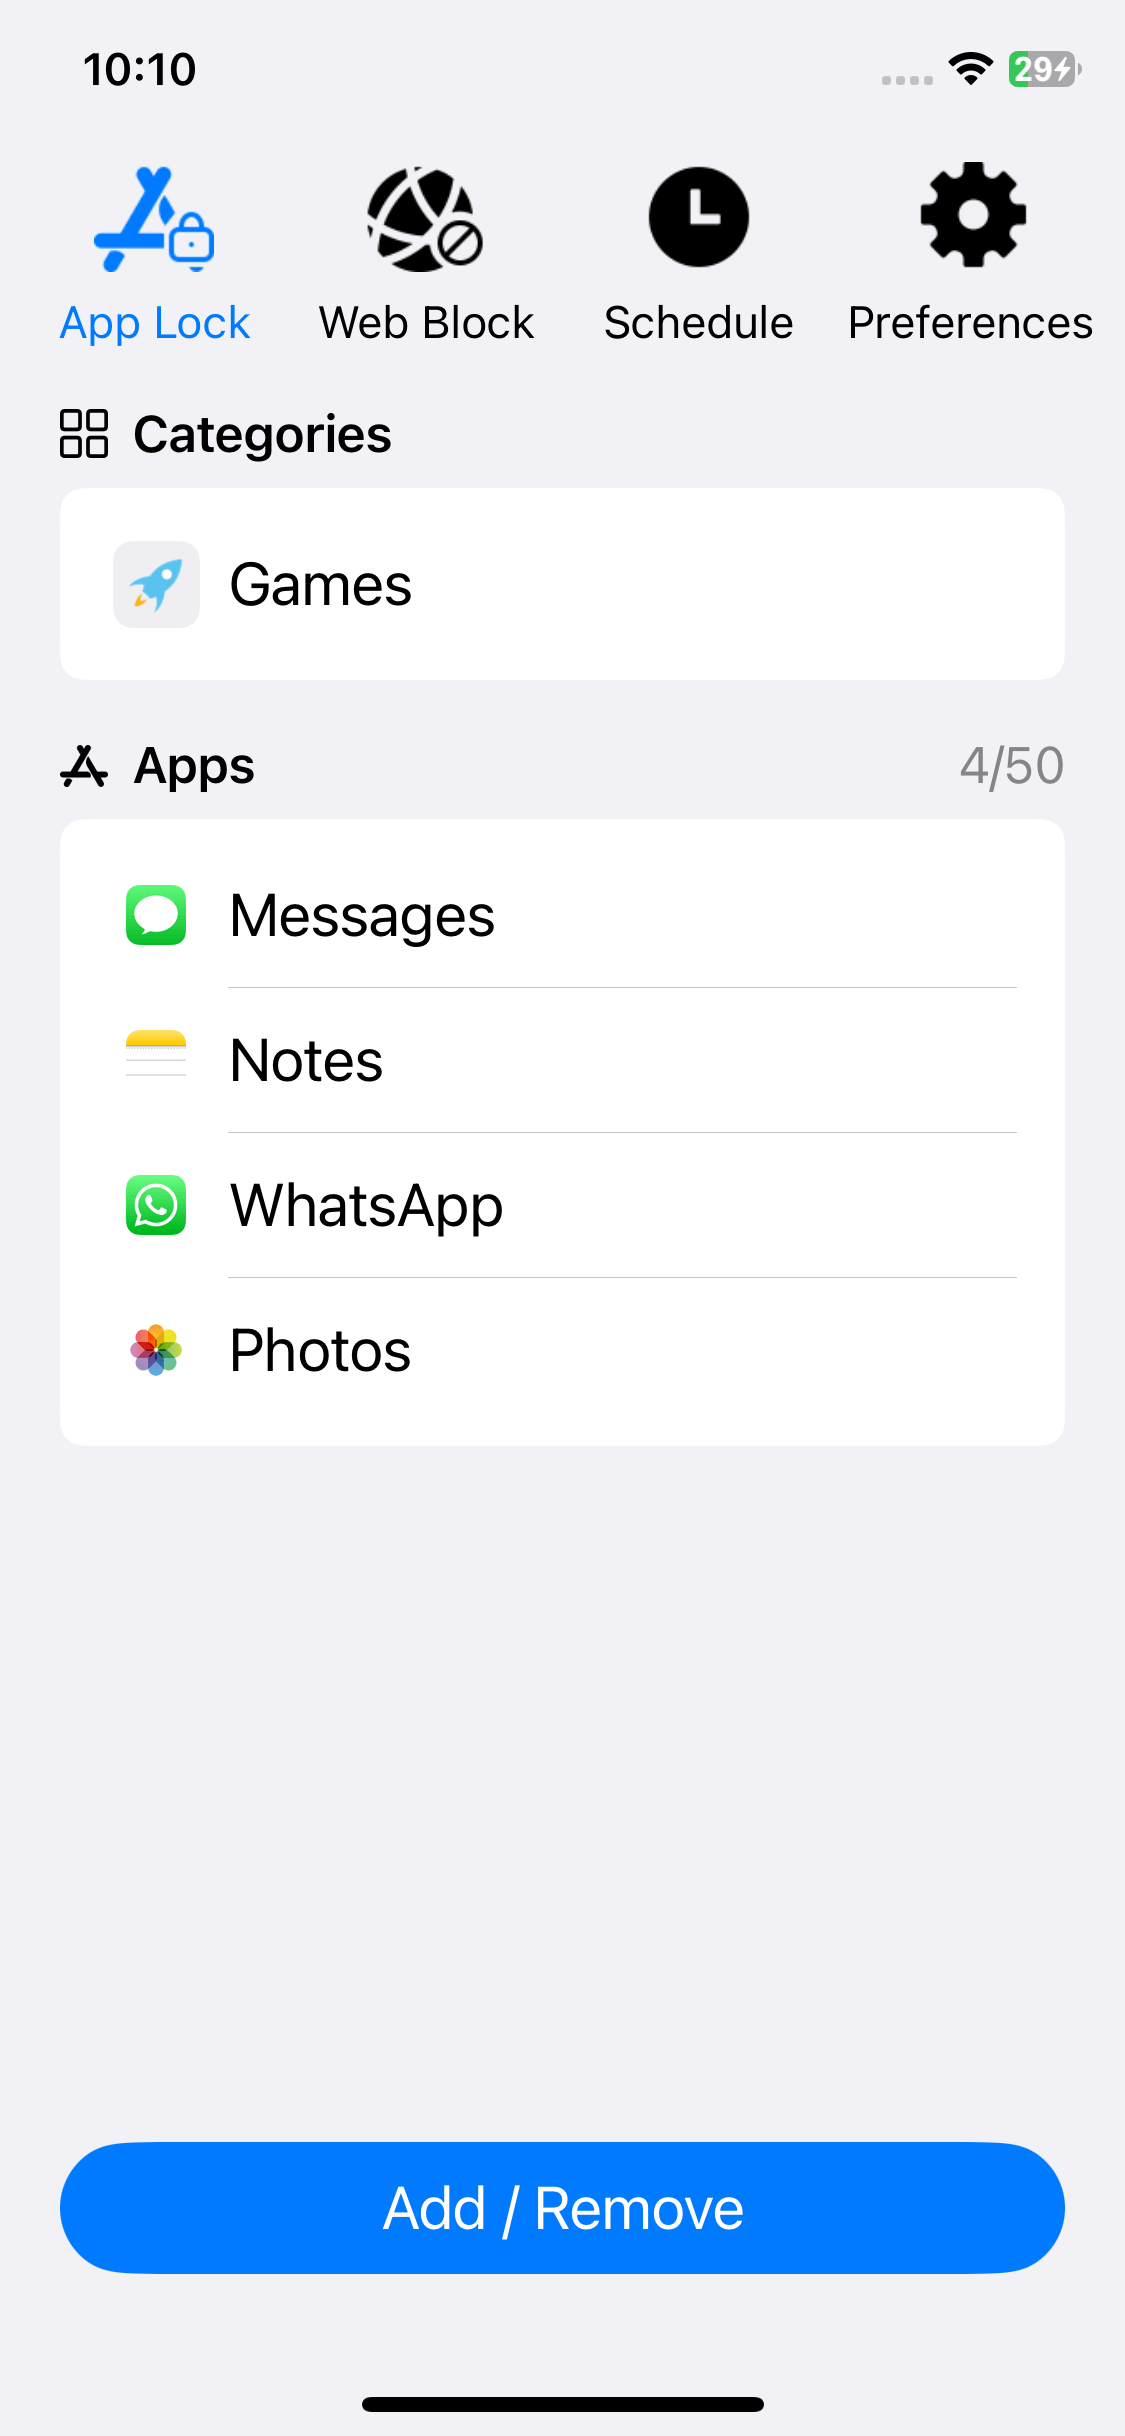
3. Search for Google Photos and then select it. Tap Done.
4. In the Preferences tab, tap Notifications. On the screen that appears, turn on Notification and then Notification unlock. Set a 4- or 6-digit password when prompted.
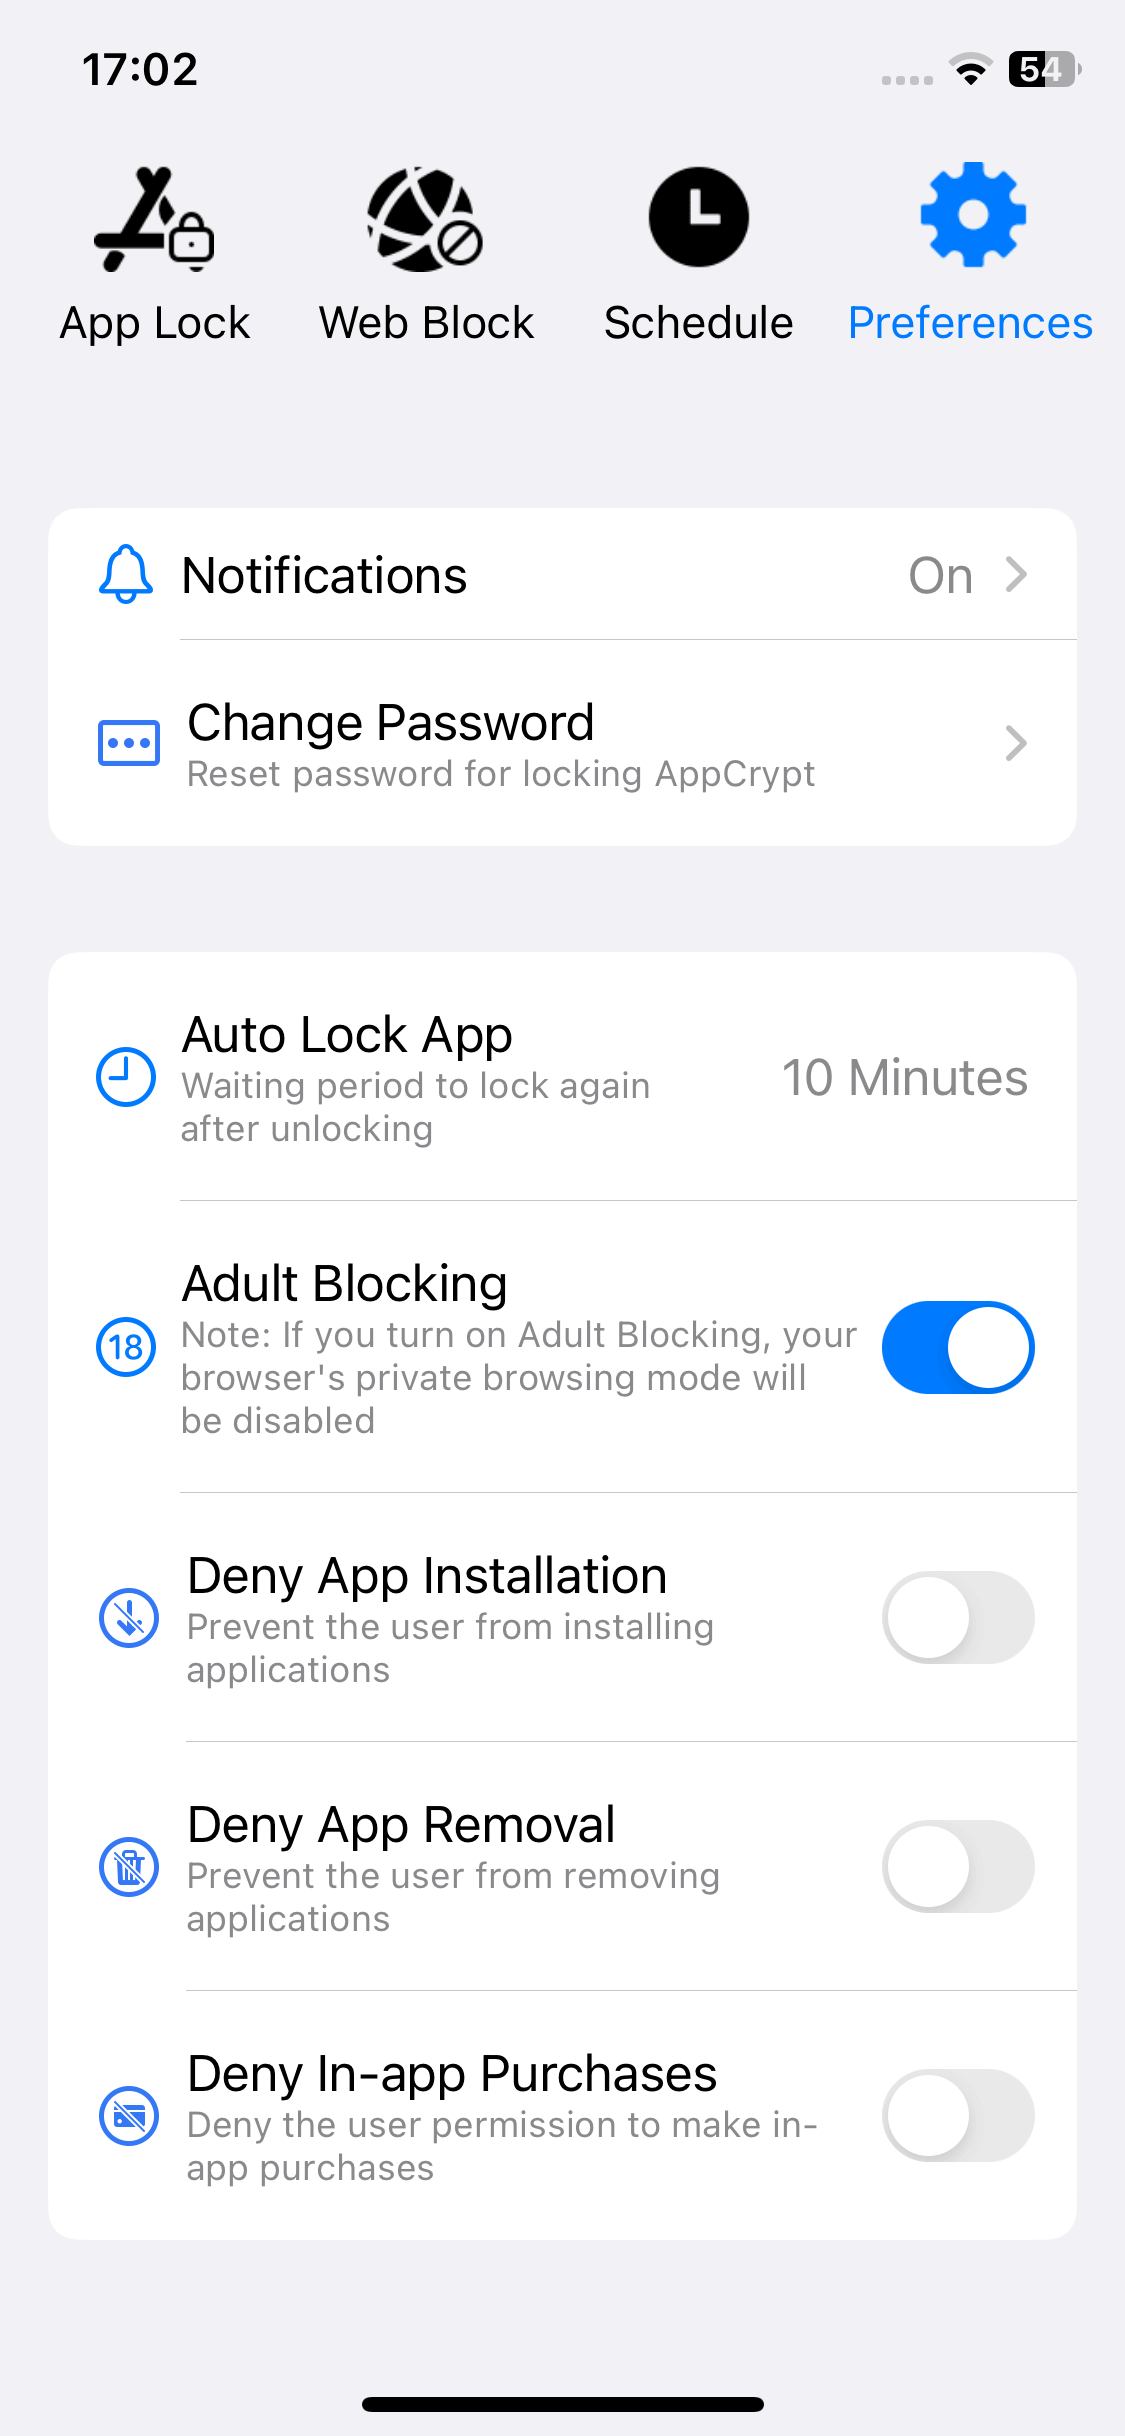
When you or someone else tries to open Google Photos, a message will appear indicating that the app is locked. Below this message, there is an Unlock button. Only those who know the password can do the unlocking.
After remaining unlocked for a user-selected period, Google Photos will be automatically locked again.
Google Photos has a number of privacy and security features. Locked Folder is one of them, which is available for the mobile apps and the web app (photos.google.com). With it, you can lock the personal or sensitive pictures and videos in your Google Photos.
The Locked Folder feature works in almost the same way on Android, iOS, and iPadOS devices. The following steps use an Android phone as an example to show you how to set up and use this feature in the Google Photos app.
1. Open your Google Photos app.
2. In the Photos tab, select the photos and videos that you want to protect, and several options will appear at the bottom. Swipe right to find and tap the Move to Locked Folder option.
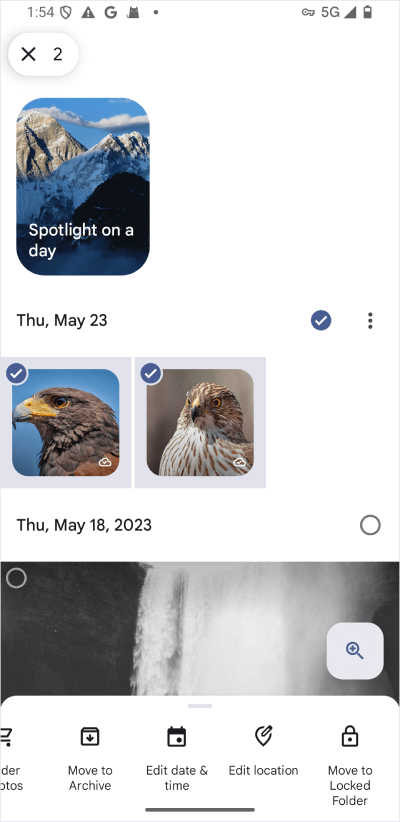
3. In the Move to Locked Folder message that appears, tap Move.
Now the items of your choice are locked and hidden in Locked Folder. They won’t appear in the Photos tab, search results, albums or memories.
Here’s how to access items in Locked Folder. Go to the Collections tab, scroll down to find and tap Locked. A message will appear, telling you that you can use your device’s screen lock option to unlock the folder. Just use your PIN, pattern, password or passcode, fingerprint or Touch ID, or face recognition or Face ID to do the unlocking. Once it’s unlocked, you can see the items within it.
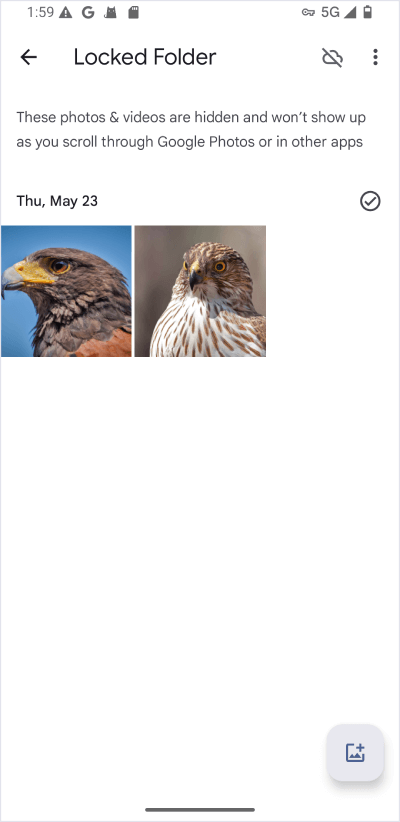
Note: The only way to unlock Locked Folder is to use your screen lock option.
In addition to selecting items for locking in the Photos tab, you can do it within the Locked Folder. Just tap the image icon in the bottom right corner.
If you don’t want to lock some photos and videos anymore, select them and then tap Move at the bottom of the screen. These items will be visible again.
In addition, you can choose to back up your Locked Folder or not. For more information, please see this article by Google.
When you use Google Photos by visiting photos.google.com in a browser on your computer or phone, the Locked Folder feature is also available.
1. On photos.google.com, click Photos on the left.
2. Select the items you’d like to protect.
3. Click the three dots in the top right corner of the screen and then choose Move to Locked Folder.
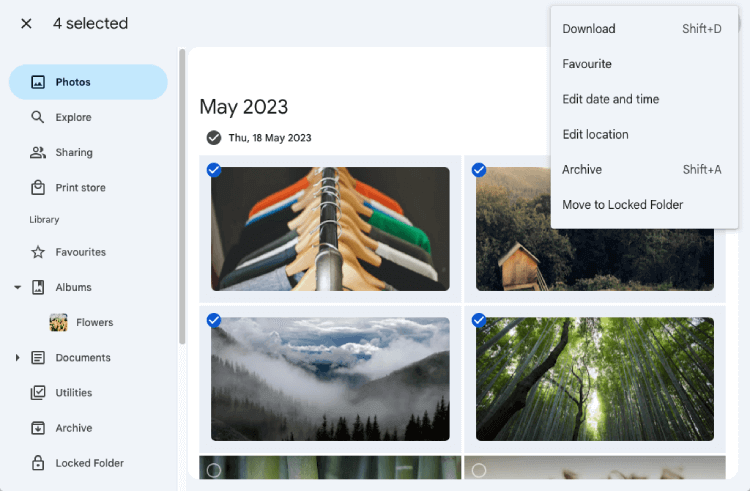
4. In the message that shows up, click Move.
To open Locked Folder, select it on the left, in the page that opens up, enter your Google account password, and click Next.
Note that if you have set up Locked Folder in the mobile app and added items to it but haven’t turned on backup for Locked Folder, you won’t able to see these items in the Locked Folder on photos.google.com. For more about how the Locked Folder feature works, I recommend reading the article mentioned above.
Google Photos wants to be a safe home for your photo files and video files. It uses good encryption technology to have security and also offered features like Locked Folder in its mobile and web apps. You can add a good layer of security by locking the app on your device. This article talks about how to lock Google Photos in detail, having both the built-in method and a third-party one. It has step-by-step instructions and helpful details, helping you easily get your digital memories protected.

Norah Hayes likes to share her tips on how to improve focus and stay motivated at work. She believes it is essential to eliminate all online distractions during work hours.

