The Guided Access feature is good. You can use it to limit your iPhone or iPad to a single app. This can prevent a children from playing with your stuff or make your device not that distracting. This article will discuss Guided Access on Mac and show you how to do it there.
No, Mac doesn’t have a Guided Access feature.
The good news is you can still do guided access on a Mac. While the method used doesn’t mimic what Guide Access does on a mobile device, it lets you allow access to only one app, helping protect important apps and minimize distractions. Below are the details.
This method uses Cisdem AppCrypt, an app lock and website blocker rolled into one. With its Allowlist mode, you can easily allow access to only one or multiple specific apps. Although this method can serve as an alternative to Guided Access, it doesn’t disable features. Below are the step-by-step instructions.
1. Download and install AppCrypt.
 Free Download macOS 10.12 or later
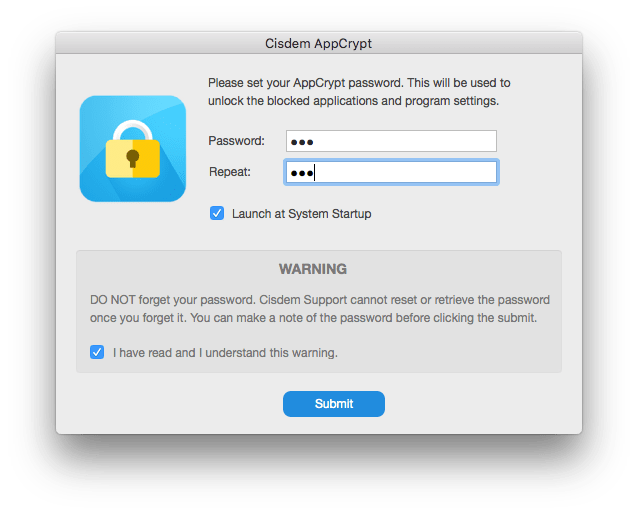
2. The first time you launch it, you’ll be prompted to set a password. It’s recommended to choose a strong password.
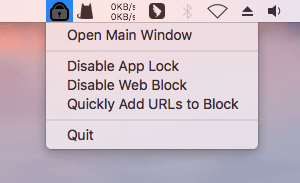
1. Click the AppCrypt icon in the menu bar and choose Open Main Window.
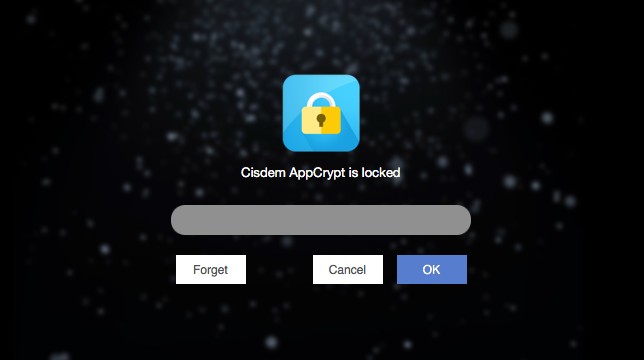
2. Enter the password to access the main window.
3. In the App Lock tab, turn on Switch to Allowlist.
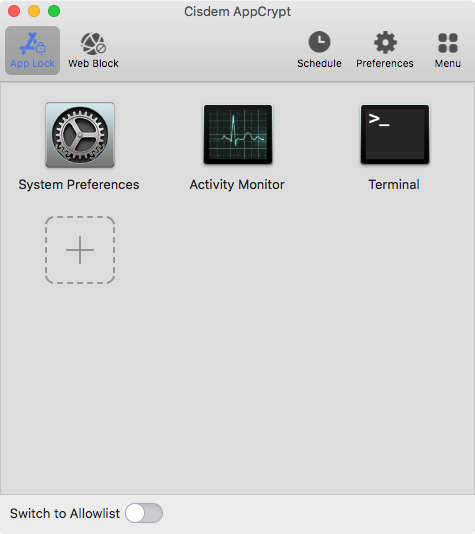
4. Click the big Add icon. In the Applications folder that appears, select the app you want to permit access to, and click Open.
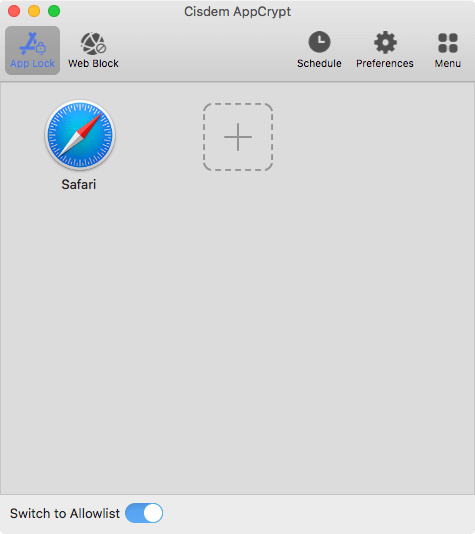
Now guided access starts. Access to other apps will be blocked immediately, while access to the added app remains unrestricted.
When you or someone else tries to open a restricted app, a screen will appear, showing a message indicating that access is not available and a password entry field. Only those who know the password can access restricted apps.

Tip: If you are using this method for yourself to reduce distractions and want to make the restrictions difficult to bypass, you can ask someone else, like a family member or friend, to set the password for you.
Note: However, guided access using this method can’t restrict the Finder (including the Trash). Luckily, if someone tries to open a file in Finder using a restricted app, it won’t open.
1. Enter the password to open AppCrypt’s main window.
2. Turn off Switch to Allowlist.
Alternatively, just quit AppCrypt. This requires the password too.
Now access to all apps becomes unrestricted.
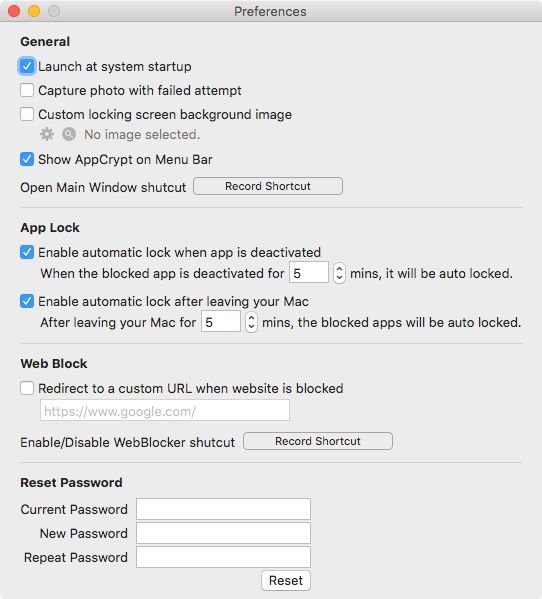
In AppCrypt’s Preferences, go to the App Lock section. Enable the option that automatically re-lock apps (including AppCrypt itself) after a period of inactivity and specify a period, such as 1 minute.
This makes sure that the main window will be quickly locked again after you finish configuring settings, preventing others from bypassing restrictions by turning off Switch to Allowlist.
AppCrypt’s website blocking feature has a similar mode that allows access to only certain websites. If you are a parent who lets your children use school-related websites on your Mac, you can use this together with guided access to create focused environment for study.

Here are some common use cases for the discussed method.
If you need a way to lock your Mac to a certain app, Guided Access can be the ideal solution. But this feature is not available on Mac. Luckily, there’s a third-party option. While this solution may not be a perfect alternative to Guided Access, it offers some benefits that this feature provides. Depending on your specific needs, it can still be very helpful.

Norah Hayes likes to share her tips on how to improve focus and stay motivated at work. She believes it is essential to eliminate all online distractions during work hours.

