When it comes to audio compression, disambiguation is necessary because it can refer to different things. First, it can refer specifically to audio coding schemes used to export original sonic information to digital audio files as we know, like MP3, WAV, AAC, etc., mainly categorized into lossy and lossless compression.
Then there is audio file compression, which is to further reduce the file size of the digital file for better sending, streaming, or storage management purposes, and involves various techniques including audio coding. And that's what we're talking about here.
So how to compress your audio files? This guide will show you the 3 best methods to make your audio files smaller without compromising quality.
 Free Download Windows 11/10/8/7
 Free Download macOS 10.13 or later
Audio file compression is a process that removes redundant data from the original audio file, resulting in a smaller file size. Most audio compression tools achieve compression by
Use one or a combination of these techniques to compress different types of your audio and achieve more compression without making a mess of the original sound quality.
Dedicated compressors can compress audio files with optimized algorithms and ensure a balance between file size and fidelity.
Cisdem Video Compressor is a professional program designed for compressing audio and video files on Windows and Mac. It's recommended for anyone looking for precise and quality-assured compression, allowing you to decide how and how much you want to compress your media files.
This audio compressor supports almost all input audio formats and can process batches of files super fast. It offers a simple mode that allows users to compress by setting a percentage and desired file size, also a custom mode to adjust the compression method and configure output parameters. Also, you can see the estimated output file size and preview how the audio would sound like after compression, which ensures a satisfactory result without any hassle.
Step 1. Install Cisdem Video Compressor
 Free Download Windows 11/10/8/7
 Free Download macOS 10.13 or later
Step 2. Add audio files
Run the compressor, then drag and drop your audio files to the interface. Alternatively, click the "+" button in the bottom left to browse and import files to the app.
Step 3. Set a compression level
Click the "Percentage" drop-down list to set a percent of the target size for all files, valid range is from 20% to 90%, lower number means higher compression and smaller output file size.
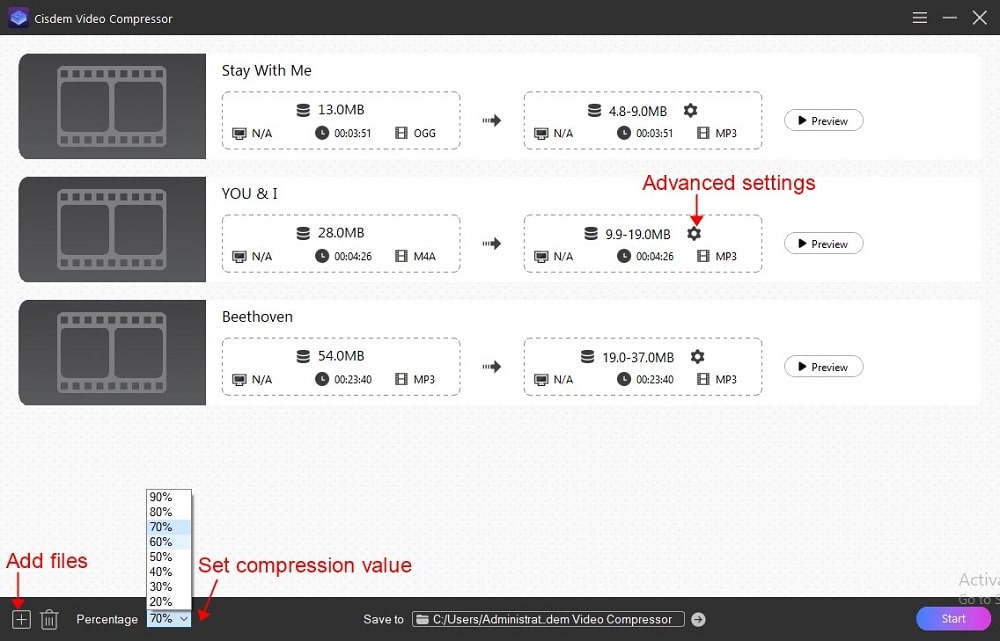
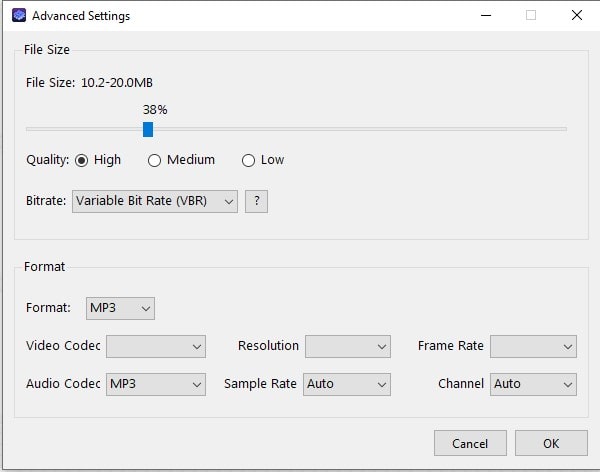
Pro tip: if you want to compress the audio track more precisely, click the gear-icon to adjust the compression method in a new window. Here you can change the quality level (High, Medium or Low), bitrate mode (VBR or CBR), as well as the format (MP3, WMA), codec, sample rate and channel count of the output audio.
Step 4. Preview and Start Compression
Click the "Preview" button to hear how it would sound after compression based on your settings.
If satisfied, just click the "Start" button in the lower right corner to begin compressing the audio files for free.
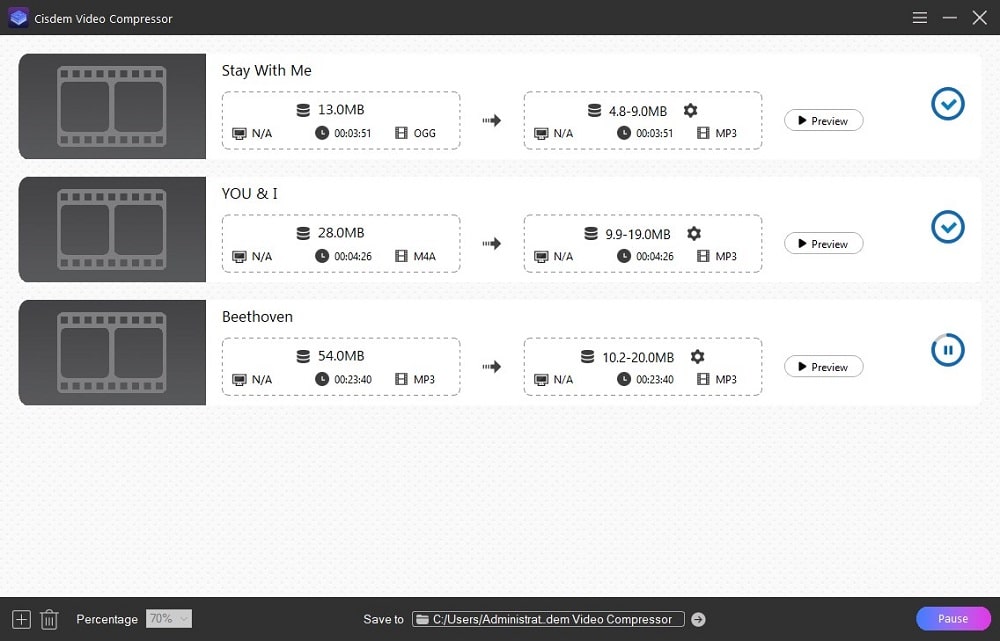
After the compression is finished, you can click the check icon![]() to quickly find the compressed file.
to quickly find the compressed file.
Cisdem Audio Compressor compresses audio files to MP3 format by default for reasons. MP3 is the most ubiquitous audio format, highly compatible with all devices, players and social media platforms. With the optimized compression algorithms offered by Cisdem, the resulted MP3 can sound nearly the same as the original audio file, with a much more compact size.
Monkey's Audio is a completely free audio compressor for Windows 10/11, capable of compressing large WAV and AIFF audio to Ape format. This compression format can retain the original quality of the audio and decrease the size. It claims that there is absolutely no quality loss, the compressed file would sound perfect and can be decompressed.
However, its limited support for input and output formats can cause compatibility issues and also sacrifice a control over the compression level. It's recommended for compressing your music collections without quality loss, but may not for reducing file size for sending/streaming purposes.
1. Download the program from its official website monkeysaudio.com.
2. Launch the compressor, click "Add Files" button on the toolbar to import audio files into the app.
3. Choose a compression mode by clicking the second button, from "Normal" to "Insane", the higher the degree, the smaller the output file. But the difference is not significant in my experience.
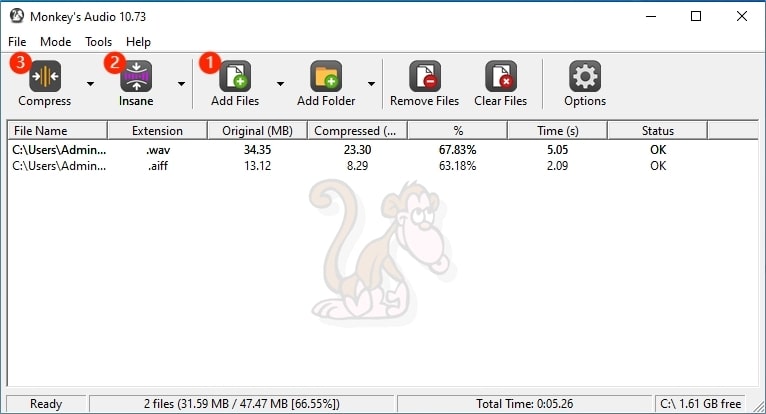
4. Click the Compress button to start compressing the files immediately. It will display the compressed file size and save the output files to the same directory as the source files.
Professional audio editing software such as Audacity and Adobe Audition allow users to compress audio files by re-encoding and offer advanced compression tools. But they are not as efficient as dedicated compressors in terms of batch compression.
Here we will focus on Audacity, the most popular free and open-source audio editor, available for Windows and Mac. Audacity supports a wide range of input and output formats such as MP3, ALAC, Opus, Ogg Vorbis and more. It's not a dedicated compressor and doesn't allow you to set a compression level, so you'll need to get to know the parameters of the source file to set a lower bitrate value to compress it.
1. Download Audacity at audacityteam.org.
2. Open the software, drag and drop the audio file you want to compress.
3. Go to "File" menu and select "Export Audio".
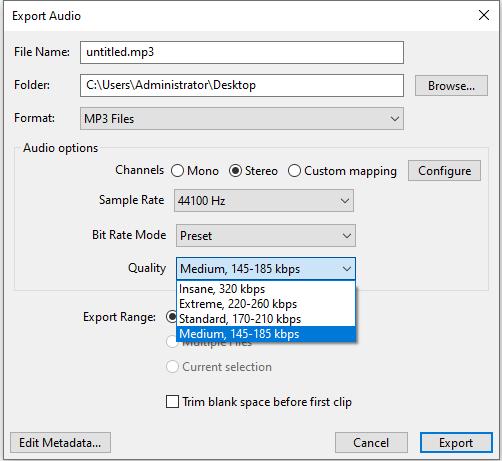
4. Choose a desired output format like MP3 from the "Format" list.
5. In the Audio options section, select a quality lower than the original audio file.
6. Click "Browse" to specify an output directory.
7. Click "Export" to start the compression process.
8. Locate the compressed audio in the specified folder to check the file size.
For advanced users, Audacity provides a Compressor tool to reduce the dynamic range of audio through compression settings including threshold, attack and release times, ratio and noise floor. You can access it by clicking Effect > Volume and Compression> Compressor.
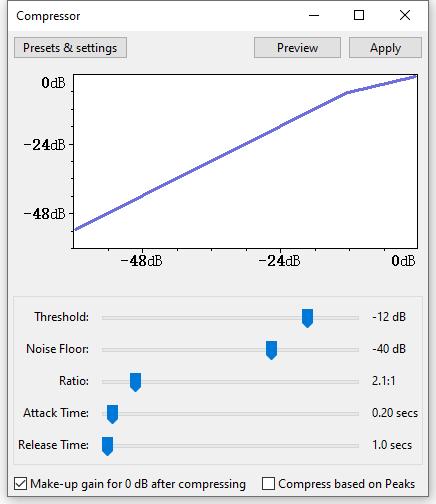
You can learn more at: https://manual.audacityteam.org/man/compressor.html.
Want to compress without software? Use browser-based tools to compress audio files online conveniently, available on desktop and mobile devices. But most online tools are ad-supported and limit the file size you can upload.
XConvert offers a free online audio compressor that lets you compress MP3, WMA, AAC and other popular audio files by reducing the bitrate. For the convenience of users, it displays the bitrate of the source audio when uploaded. Optionally, you can also trim the audio file and adjust channels and sample rate.
However, when you compress multiple files simultaneously, this online compressor doesn't allow individual settings, you can only compress all the files to the same bitrate and format.
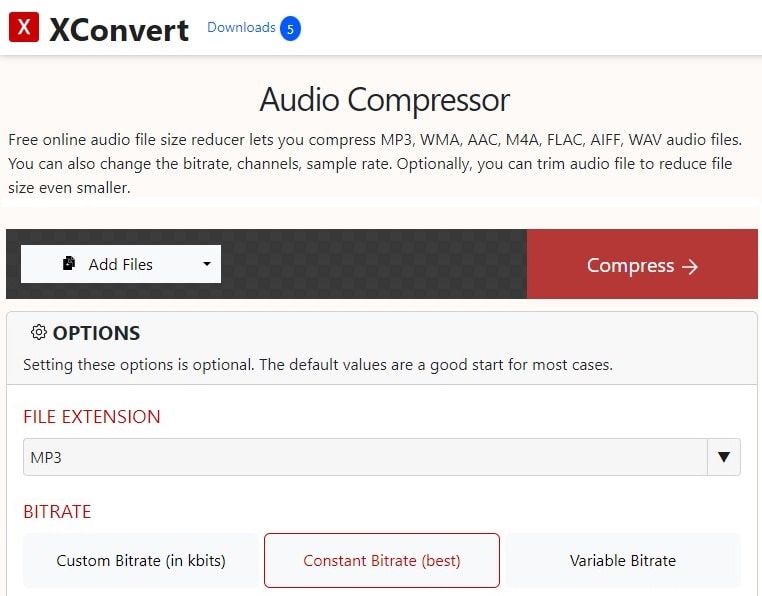
1. Go to https://www.xconvert.com/audio-compressor on any web browser.
2. Click "Add Files" to upload your audio files to the website.
3. When uploaded, select an output format from the "File Extension" list, and set a bitrate value lower than the original file.
Note: When compressing to MP3, 128k is the lowest standard you should consider for music files, or the output audio quality may be barely tolerable.
4. Click "Compress" to start submitting and compressing the files, and it will take you to a new tab of downloadable files.
5. When completed, download the compressed audio files to your device or save to Dropbox.
Aconvert.com is another free online audio compressor that works completely different from Xconvert. It's very straightforward to use, compressing various audio files by reducing the bitrate in percent and outputting in the original format. It also supports mass processing, but it can't output with a correct filename, which can cause problems. The maximum file size is 200 MB.
1. Visit https://www.aconvert.com/audio/compress/.
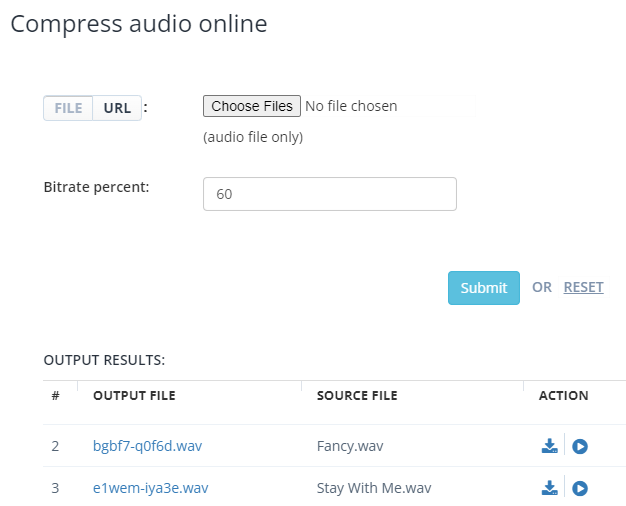
2. Click the "Choose Files" button to upload audio files from your local drive.
3. Set percent of audio bitrate, ranging from 1 to 100, lower number indicates higher compression ratio and smaller output file.
4. Click "Submit" to start the compression process.
5. When finished, go to the Output Results section, right-click (tap and hold if you're using on mobile) on the output file and select "Save link as" to save it locally.
Above are detailed steps on how to compress audio files using 5 different tools. Overall, dedicated compression software offers more control over the compression. But which one is best depends on the content, format and intended use of your audio files. Is the audio a music file or a recorded spoken words? What you're willing to compromise? Ask yourself before you compress, choose the right tool, and start shrinking your audio now.
Below are some frequently asked questions and suggestions.
Not helping at all. If you compress audio files using Winrar or 7-zip, neither the file size nor the quality will change, it may squeeze by one percent or so.
Use a pro audio compressor like Cisdem, which allows you to control the exact output file size. Most email and social platforms limit the size of audio files users can send, for instance, 25 MB attachment limit on Gmail and 16 MB message limit on WhatsApp. Adjust the compression level settings in the software to achieve the target size.
Do not reduce the bitrate too much, and use CBR instead of VBR to ensure minimal loss of fidelity. If your music file is in lossless format, use Monkey's Audio to compress to Ape format or use Cisdem to compress to MP3 at 320 kbps, which should make the quality degradation imperceptible.

Jenny is a technology editor who has been blogging since she was a student. Since joining Cisdem, she focuses on writing articles about video software and how-to guides. She loves exploring new tools and techniques.

