Google services is popular now. We save files in Google Drive, back up precious photos, videos in Google Photos, receive and send emails through Gmail. They make our life and work easier. Google provides 15GB of free storage space for each user. However, this space may be filled up over time. When Google storage space is insufficient, it will affect our normal use. For example, you cannot upload new files to Google Drive, Google Photos, send/receive messages, etc. This article will tell you how to free up Google storage easily and quickly.
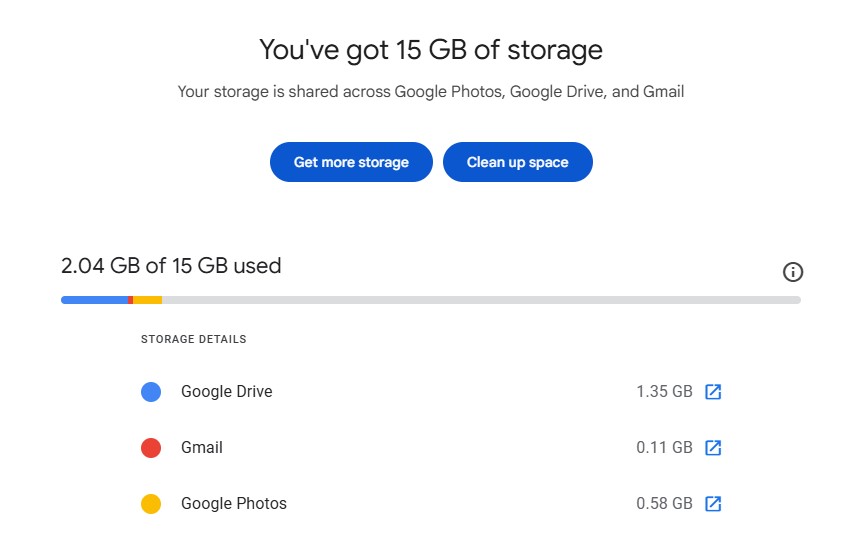
Before you free up space on your Google storage, first you can check how much space it has left. Google allow you to quickly view your current storage usage of Google Drive, Google Photos, and Gmail in Google One. Go to https://one.google.com/storage. Sign in with your Google account. On this page, you can view the storage details.
Google Drive is one of the Google services that let users store, access, and share files online. It supports documents, photos, audios, videos, archives, and many other types of files. If you are running low on Google storage, there is a good chance that Google Drive is taking up too much space. Here are 2 effective ways to free up Google Drive storage.
Duplicate files can waste a lot of valuable storage space and are useless, so cleaning them out is the best way to free up space. Google Drive does not provide a built-in duplicate file detection feature, you can use a third-party tool, such as Cisdem Duplicate Finder. With it, you can delete all kinds of duplicate files in Google Drive easily and quickly. It allows you to preview duplicate files before deleting them.
Step 1. Download and install Google Drive app on your computer. Sign in with your account. Follow the prompts to complete the setup. Then you can see the Google Drive in your Windows File Explorer/Mac Finder.
Step 2. Download and install Cisdem Duplicate Finder.
 Free Download Windows 11/10/8/7
 Free Download macOS 10.11 or later
Step 3. Open it. Click the plus icon. Select the My Drive folder in Google Drive. Click Scan.
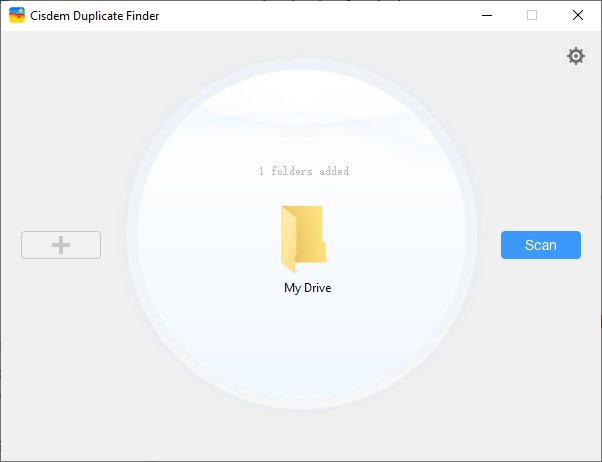
Step 4. Wait for the scan to complete. It will show you all found Google Drive duplicate files in the result window.
This tool automatically selects all but one file for deletion in each set of duplicate files. Also, you can use the selection rules to help you with bulk selection.
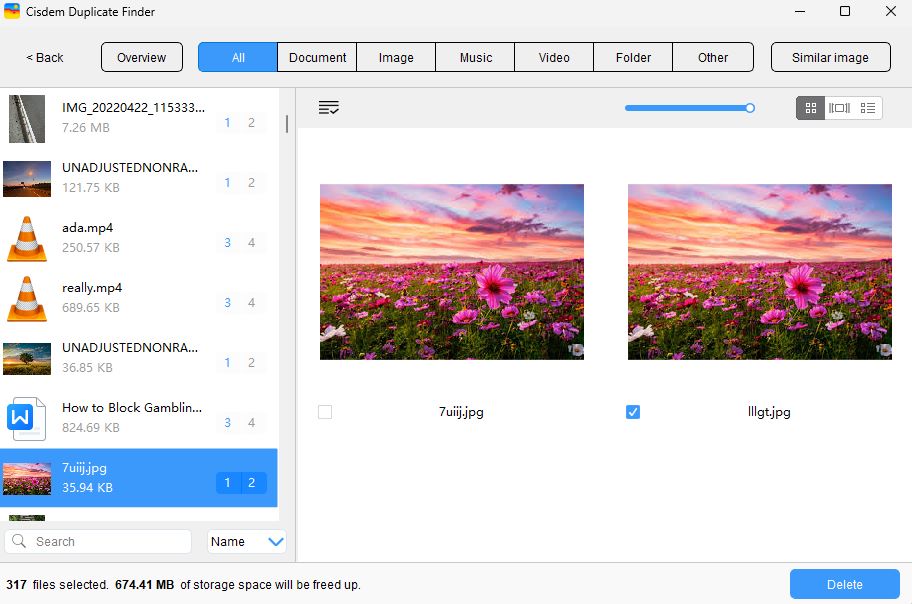
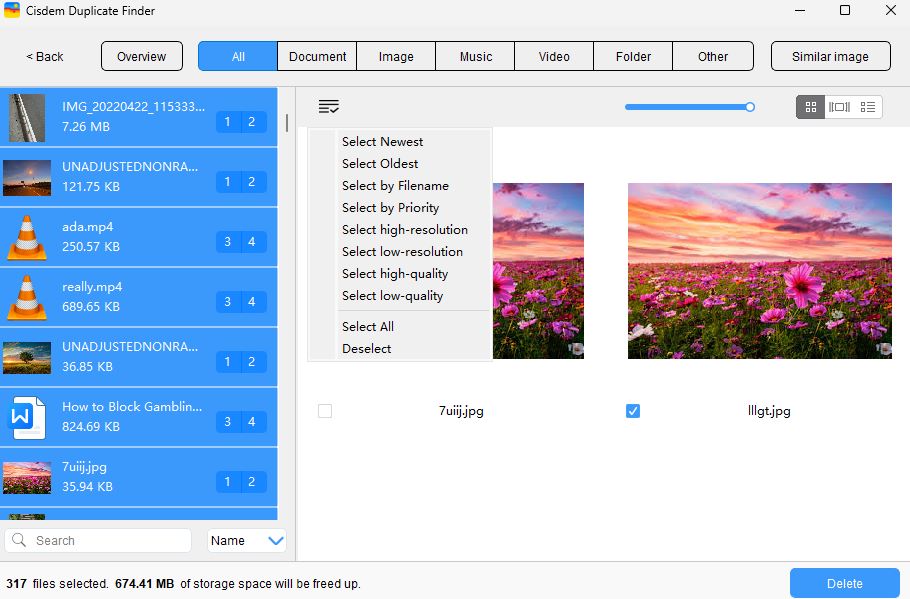
Step 5. Click Delete to free up storage space in Google Drive.
Now the duplicate files in Google Drive are moved to Trash. They will be completely deleted after 30 days.
You can free up a lot of space in Google Drive by deleting some large and unnecessary files. Below are steps:
Step 1. Go to Google's Storage manager website on your browser: https://one.google.com/storage/management. Sign in with your Google account.
Step 2. Under Clean up suggested items, click Large files.
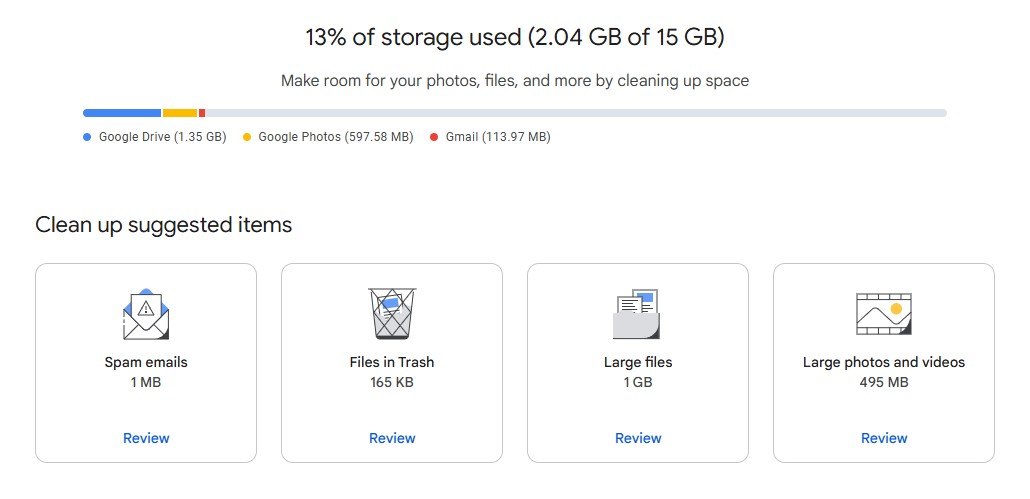
Step 3. Check the large file list.
Step 4. Select the unwanted files. Click on Delete in the upper right corner.
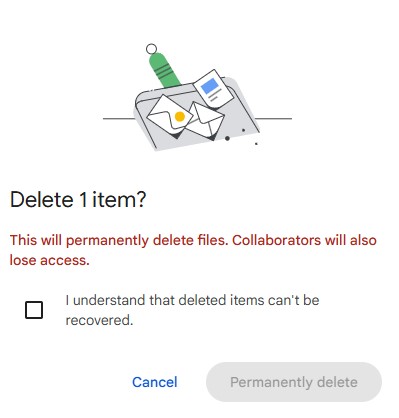
Step 5. Check the box next to “I understand that deleted items can't be recovered”. Click Permanently delete.
Google Photos is a cloud storage service that helps users back up and manage photos and videos. After using it for a long time, photos and videos can take up much space. Here are 2 easy ways to free up Google Photos storage.
When importing or syncing photos to Google Photos, many duplicate or near-duplicate photos may be generated. Cisdem Duplicate Finder helps free up Google Storage by removing duplicates in Google Drive, it also helps find and eliminate duplicate photos in Google Photos.
Step 1. Go to https://takeout.google.com/settings/takeout on your browser. Sign in with your Google account.
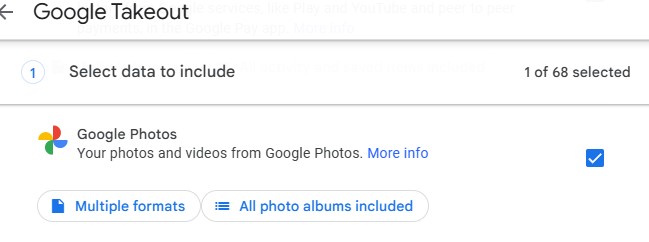
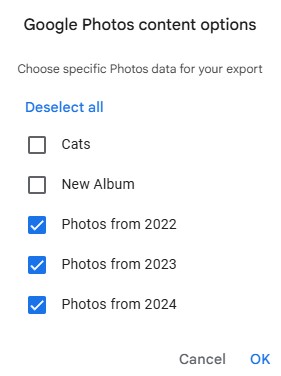
Step 2. Click Deselect all. Then scroll down to find Google Photos. Select it. Click on All photo albums included under it.
Only select the year albums such as Photos from 2024, Photos from 2023. Click OK.
Step 3. Scroll down the window and click Next step. Select Send download link via email under Destination. Then click Create export.
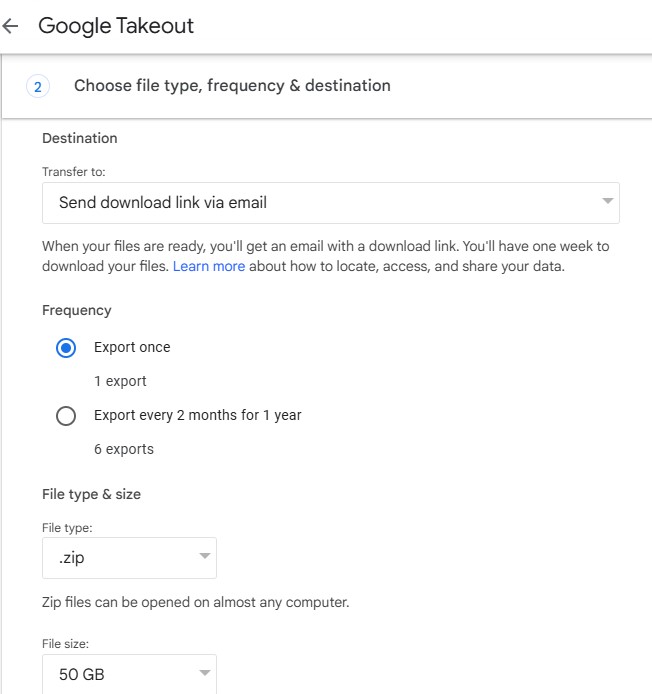
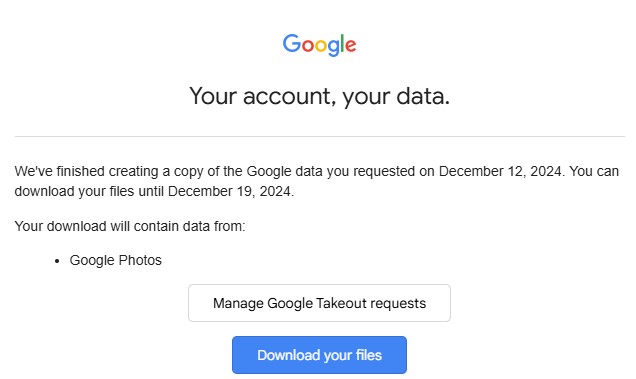
Step 4. Open the email you received. Click Download your files. Then unzip the ZIP file on your computer. Then you’ll find a folder named Takeout on your computer. All your Google photos are in this folder.
Step 5. Install Cisdem Duplicate Finder on your PC or Mac.
 Free Download Windows 11/10/8/7
 Free Download macOS 10.11 or later
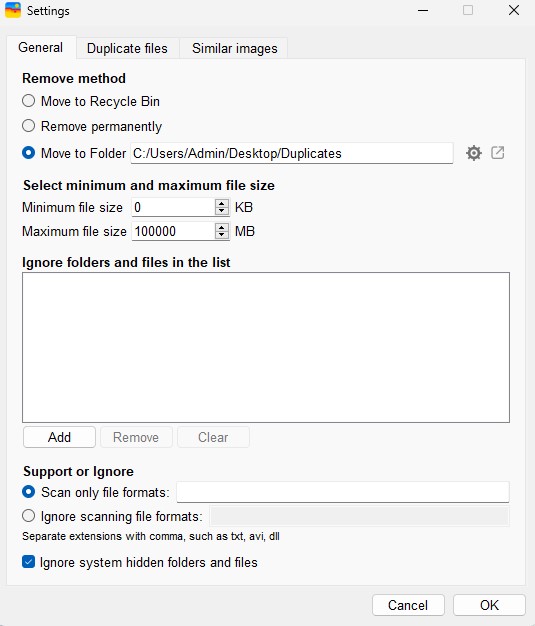
Step 6. Open Cisdem Duplicate Finder. Click Settings in the upper right corner. Click General. Select Move to Folder. Click the gear icon next to it. It allows you to choose where you want to store the deleted duplicate files. Create a new folder and name it Duplicates. Then select this folder.
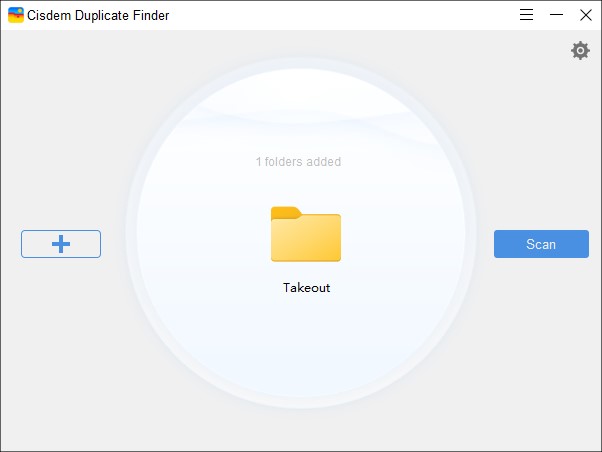
Step 7. Go back to the main window. Click the plus icon. Add the Takeout folder to scan.
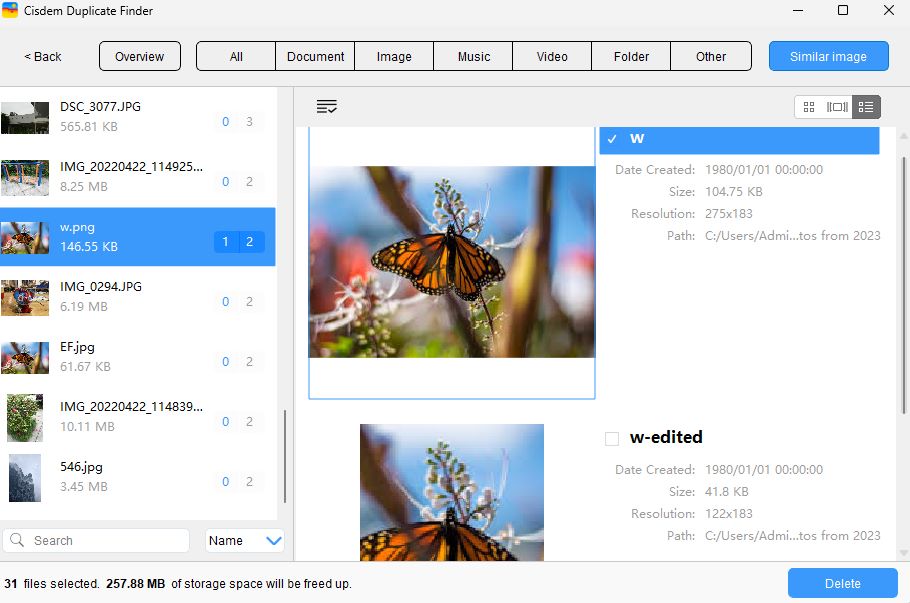
Step 8. View the found exact duplicate photos (regardless of filenames) under the Image tab and near-duplicate photos under the Similar image tab. View duplicate videos under the Video tab.
Step 9. Check the selected duplicate photos and videos. Click Delete in the bottom right corner.
Step 10. Go to https://photos.google.com/ on your browser. Click Album > Create album. Open the created new album. Drag the Duplicates folder on your computer into the album.
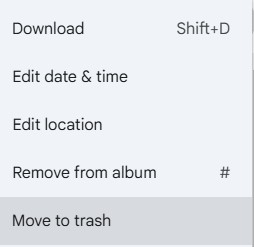
Step 11. Control select all photos and videos in this album. Click the 3-dot icon in the upper right corner. Click Move to Trash to free up Google storage.
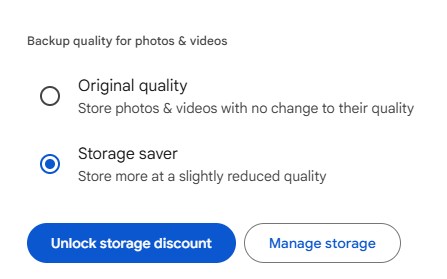
Google Photos provides two storage modes: Original quality and Storage saver mode. Using the Storage saver mode, Google Photos can compress the quality of existing photos and videos in it, thereby freeing up a lot of Google storage space. The specific steps are as follows:
Step 1. Open the Google Photos website: https://photos.google.com. Sign in.
Step 2. Click Settings in the upper right corner.
Step 3. Select the Storage saver mode. Then click on Manage storage under it.
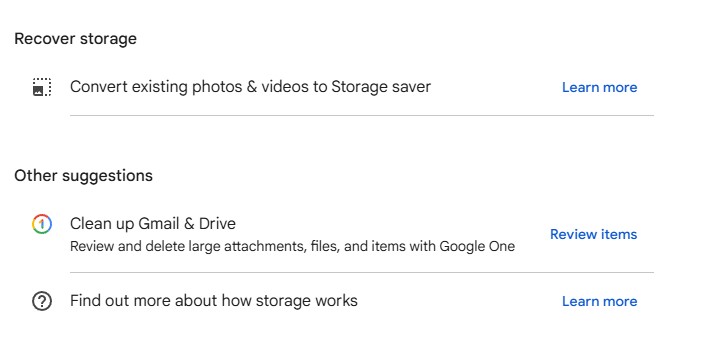
Step 4. Scroll down the Manage storage window. Find the Recover storage option. Click Learn more next to it.
Step 5. On the pop-up window, check the box next to “I understand that compressing my existing photos & videos cannot be undone”. Then click the Compress existing photos & videos button.
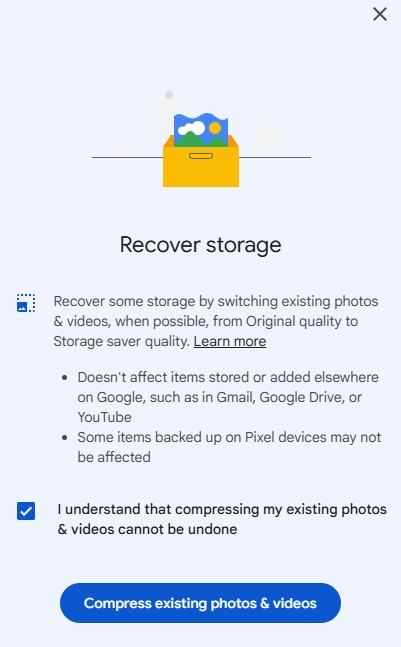
After the compression is complete, you will see that the Google storage is freed up.
Over time, your Gmail mailbox may store a lot of old messages and attachments, which can take up a lot of Google storage space.
Emails with large attachments often take up the most storage space in Gmail. You can quickly find and delete these emails by following the steps below:
Step 1. Open Gmail in a browser and log in to your account.
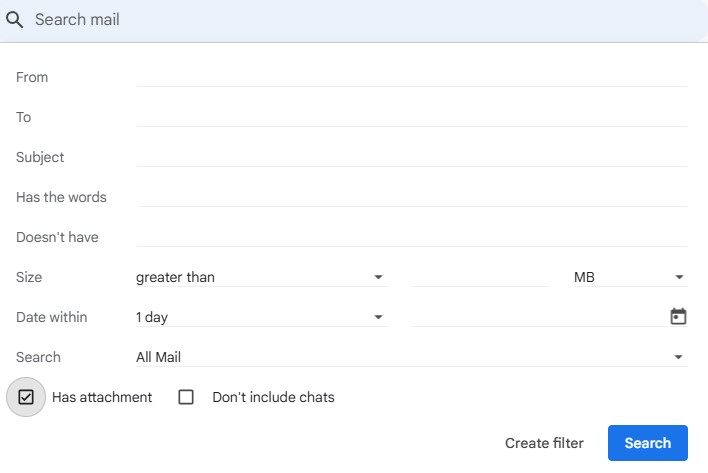
Step 2. Click on Show search options (the three sliders on the right side of the bar).
Step 3. Check the box next to Has attachment.
Step 4. Search for mails greater than 10 MB, or other sizes according to your needs.
Step 5. Click the Search button.
Step 6. Browse the search results and identify the emails you no longer need.
Step 7. Check the unwanted emails and click the Trash icon at the top of the page.
Step 8. Go to the Trash folder. Click Empty Trash now to permanently delete all the emails and free up Google storage.

Finding and cleaning up old emails that you no longer need can also free up some Google storage.
Step 1. Log in to Gmail.
Step 2. Search for old emails by typing in before: YYYY/MM/DD in the search box. For example, before: 2024/11/01.

Step 3. Press Enter.
Step 4. Click the Select all box in the upper left corner.
Step 5. Manually deselect some emails that you may still need.
Step 6. Click the Trash icon to move the old emails to the Trash.
Step 7. Empty the Trash.
When your Google storage is full, there are two ways to get more storage space. One is to upgrade your cloud storage. The other is to free up Google storage. The former costs $1.99 per month to get 100 GB of storage space, while the latter is free and easy to operate. This article introduces 6 ways on how to free up Google Storage easily and quickly. Hope it helps.

With a passion for tech and writing, Sarah joined Cisdem, where she focuses on creating articles about using utility tools to enhance file management and simplify contact management.

