Being the default file manager on Mac, Finder is responsible for the overall user management of files, disks, and network volumes. But its abilities extend beyond that. Mac users can also apply Finder for launching other applications, accessing external media, getting file information, etc.
We can’t imagine how inconvenient your work on Mac would be if such a critical utility is not responding. But sometimes frozen Mac Finder really occurs unexpectedly. Why does Finder on Mac keep freezing? Many potential reasons are there: system errors, low storage, third-party interference, program glitches and so on. If you are obsessed with the Finder not responding on Mac issue, here are 8 proven methods for your option.
Mac Finder Not Responding Leads To Data Loss? Restore!
- Compatible with macOS 10.9 to the latest
- Support scanning system disk on M1, M2 and T2 devices
- Restore 200+ types of file (graphics, videos, audios, documents, archives, emails, raw files, etc.)
- Repair corrupted or unplayable videos
- Retrieve data from both internal drive and external sources, both performing well
- Optimized entry for quick scanning of other storage volumes
- Navigate to wanted files quickly by filter tools incl. keyword, file size, date created and date modified
- Quick access to specific folders: Trash, Desktop, Documents, Downloads, Photos
- Preview options before recovery
- Recovered files saved to local drive or cloud
 Free Download macOS 10.9 or later
Solution 1: Restart and Boot Mac in Safe Mode
When Mac Finder stops responding, the first thing you are supposed to do is restart the Mac. If a refresh start won’t work, try to boot up your computer in Safe Mode. To access Safe Mode, steps vary between an Intel-based Mac and an Apple silicon M1/M2 Mac.
For M1/M2 Macs:
- Press and hold Power button until the Startup disks and Options appear.
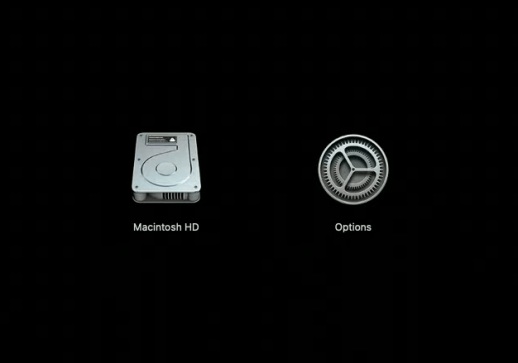
- Place your mouse on the Macintosh HD icon.
- Hold down Shift key > click “Continue in Safe Mode”.
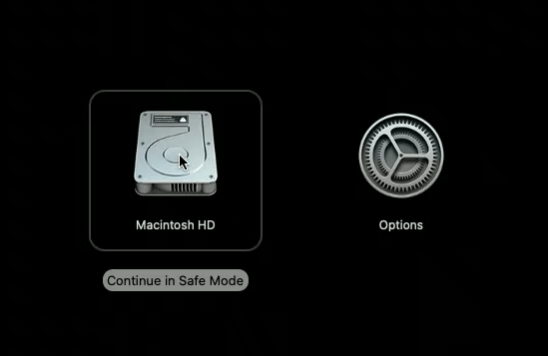
- Sign in with your user account to boot the computer into Safe Mode.
For Intel Macs:
- Restart Mac by pressing Power button.
- Hold on Shift key as soon as your Mac is booting.
- Release Shift until you see the login window. Now you can see it’s labeled at the top right corner of the screen with 2 red words “Safe Boot”.
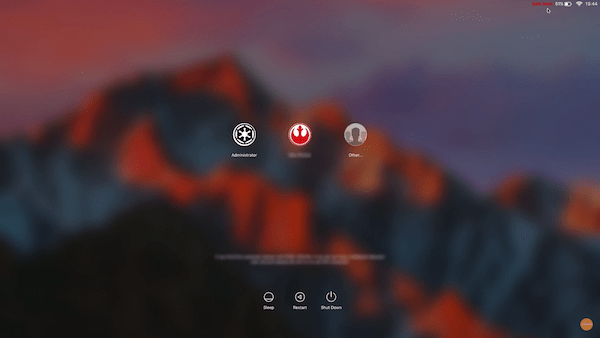
- Log in your account to enter Safe Mode.
After booting Mac in Safe Mode, go to check if Mac Finder is working properly.
Solution 2: Log out & Log back into Mac
If rebooting Mac is not workable for the unresponsive Finder, log out and log back into Mac can be your next practice. This will terminate all running processes and initiate them again when you log in back. Follow up the steps below:
- Click on Apple logo from the upper menu bar on Mac screen.
- Select “Log Out”.
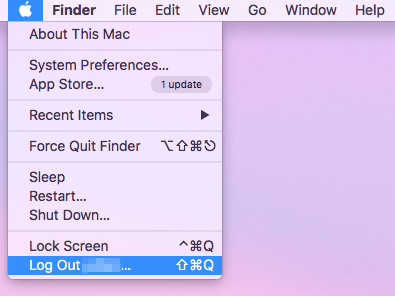
- Enter your Mac user password to log back in.
Solution 3: Relaunch Finder on Mac
Relaunching Finder is another practical fix to deal with macOS Finder not responding. We’ve got 3 methods to relaunch Finder, which will be explored one by one.
Method 1: Force quit Finder with Task Manager
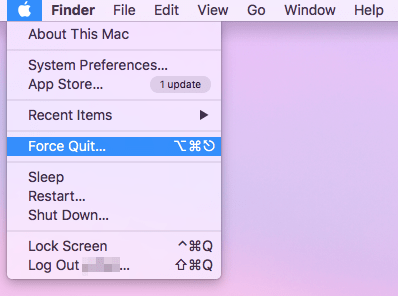
- Open Task Manager window by clicking on Apple logo and then choosing “Force Quit”. You can also press down the keyboard shortcut: Command + Option (Alt) + Esc simultaneously alternatively.
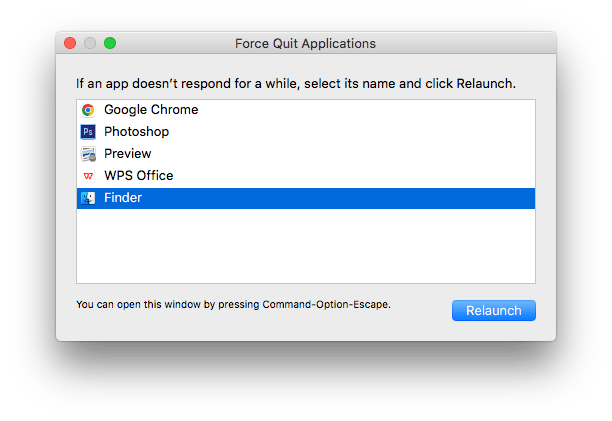
- From the list, select Finder > click on “Relaunch” button.
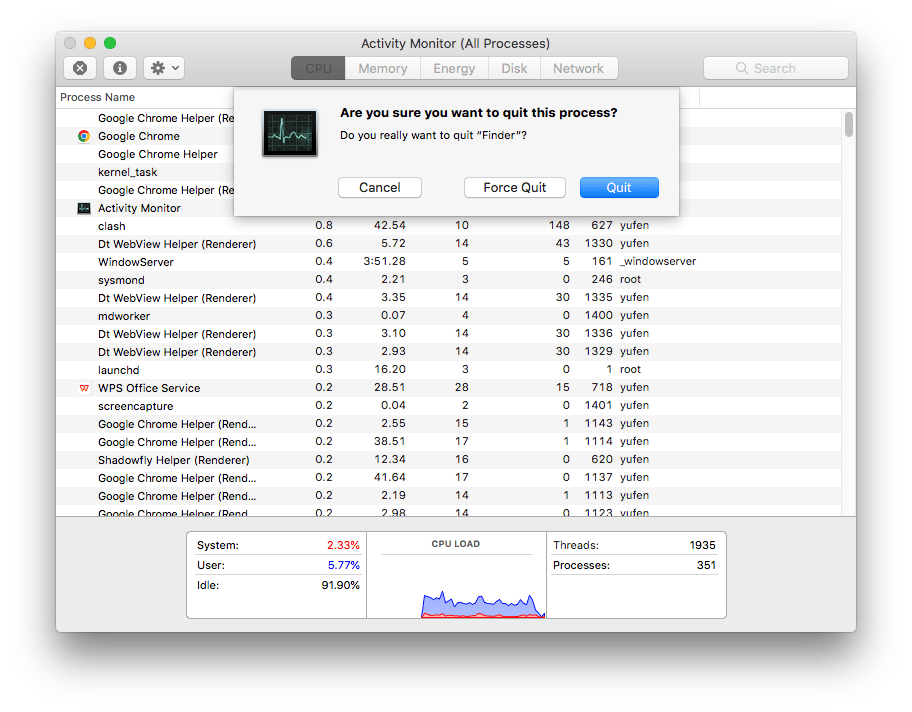
Method 2: Relaunch Finder via Activity Monitor
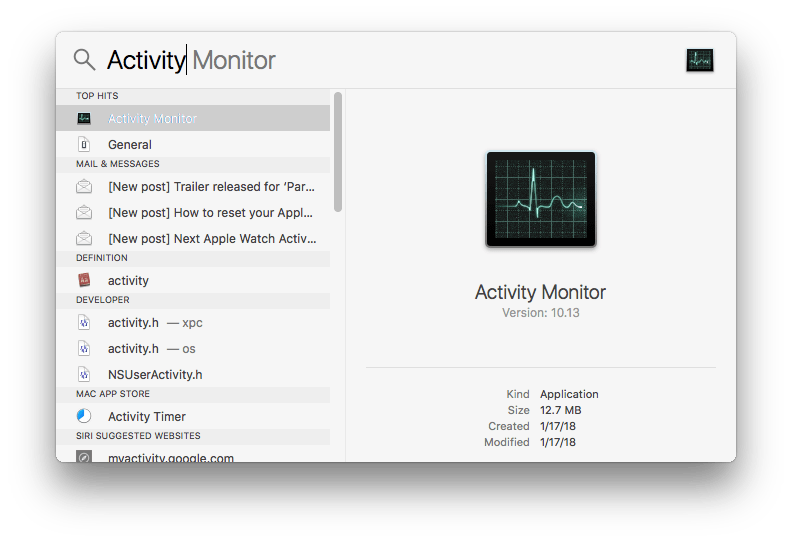
- Open Activity Monitor through Spotlight or Launchpad.
- Locate and click on Finder in the list of all active processes > click the X icon at the top left corner.
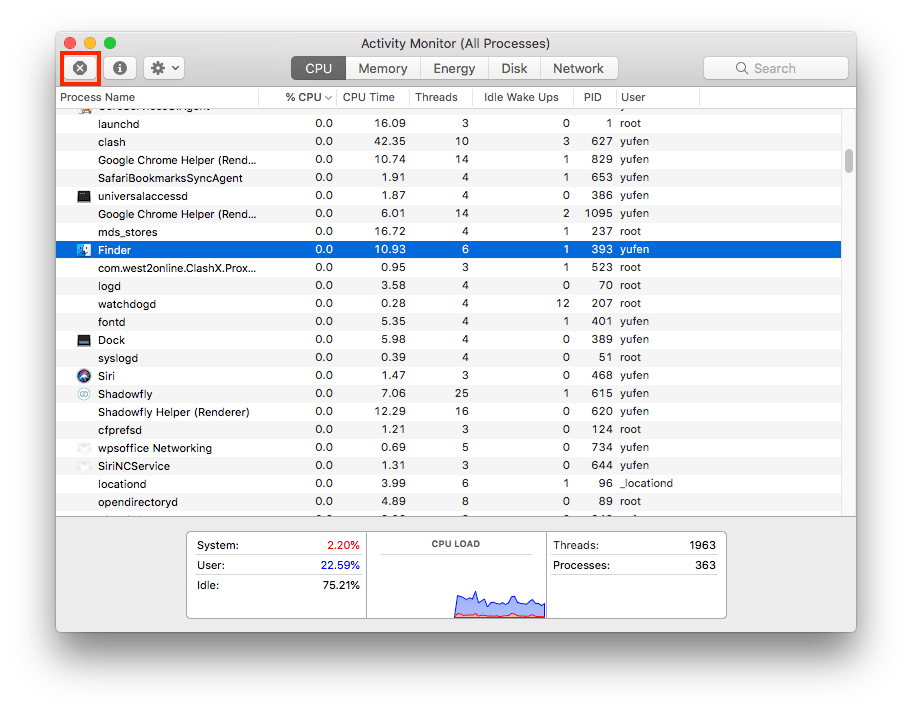
- On the pop-up window, choose “Force Quit” or “Quit” button.
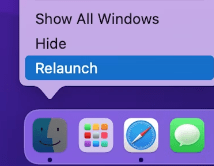
Method 3: Relaunch Finder by Dock
- Right-click on Finder icon in the Dock while pressing down Option (Alt) key.
- Select “Relaunch” option.
Solution 4: Power Cycle Mac
Functioning as a forced reset, power cycling your computer can also erase glitches that might result in Finder not responding on Mac to some extent. This is how to do it.
- Log out of your account as in Solution 2.
- Shut down your Mac.
- Unplug the power cable and all connected peripherals.
- Wait for around 5 minutes.
- Turn on your Mac again and log into your user to check if Finder is back to normal.
Solution 5: Check & Clear Storage Space
A freezing Finder can also come out when your Mac has low storage space. Insufficient storage space will influence the program performance, causing unresponsive Finder or Finder keeping crashing. So check the available storage on your Mac hard disk by going to Apple menu > About This Mac > Storage.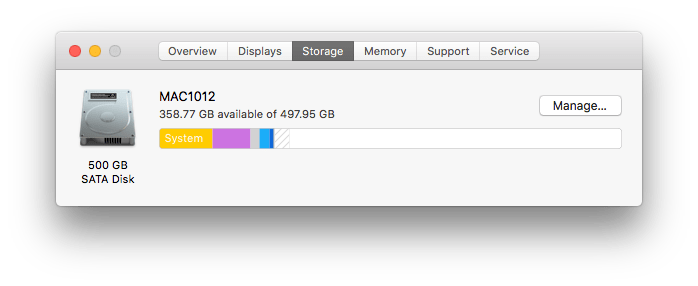
In case free storage is found to be nearly in shortage, click on the “Manage...” button to clean up unnecessary and useless files saved on your Mac.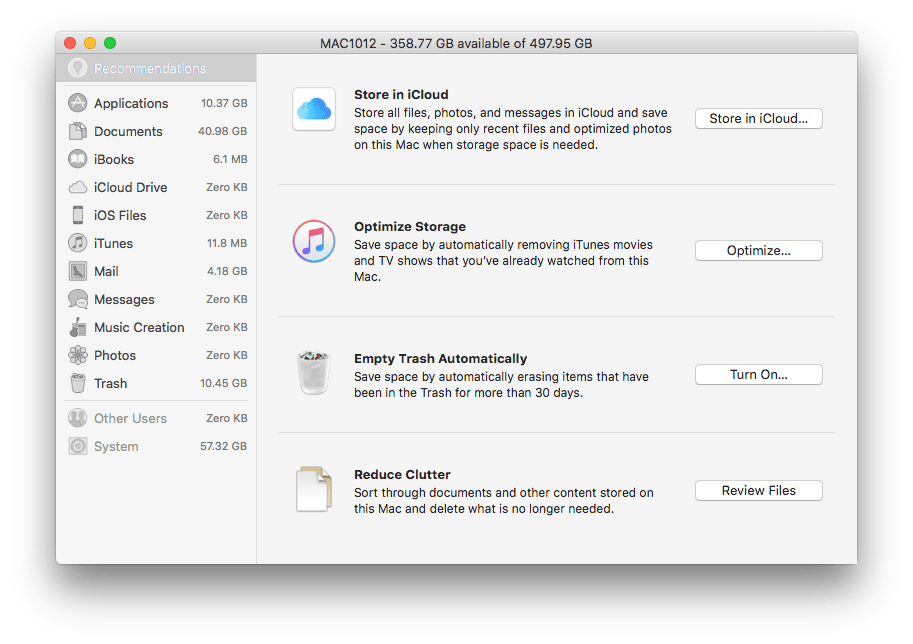
You are allowed to transfer a part of data considered important into an external storage device. It is suggested to remain at least 20GB of free space for normal macOS system running.
Solution 6: Remove Corrupted Finder Preferences File
A corrupted preferences file is also a factor that possibly leads to Apple Mac Finder not responding. On macOS system, the preferences file of an application is referred as plist file. To solve Finder problem, you need to delete such damaged Finder plist files and reset preferences. In general, we use Finder itself to fulfill these tasks. But since Finder works improperly now, we have figured out 2 other ways for you to delete Finder preferences.
Method 1: Use Terminal
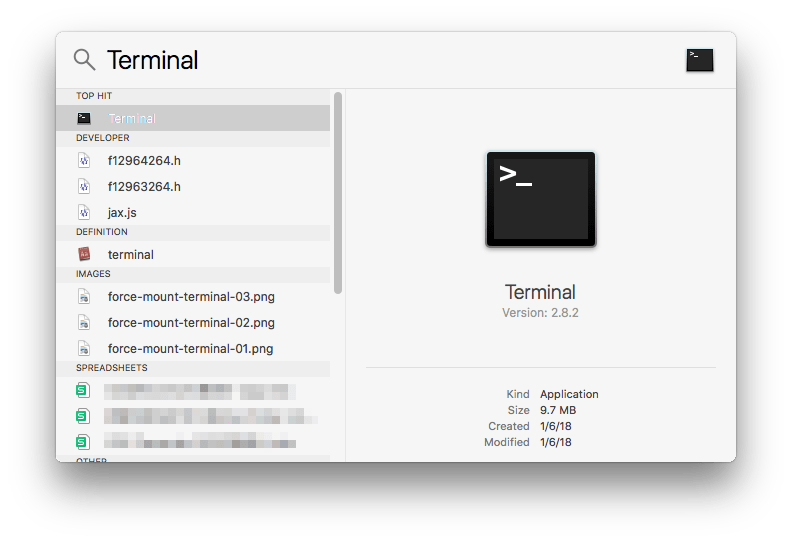
- Launch Terminal via Spotlight search.
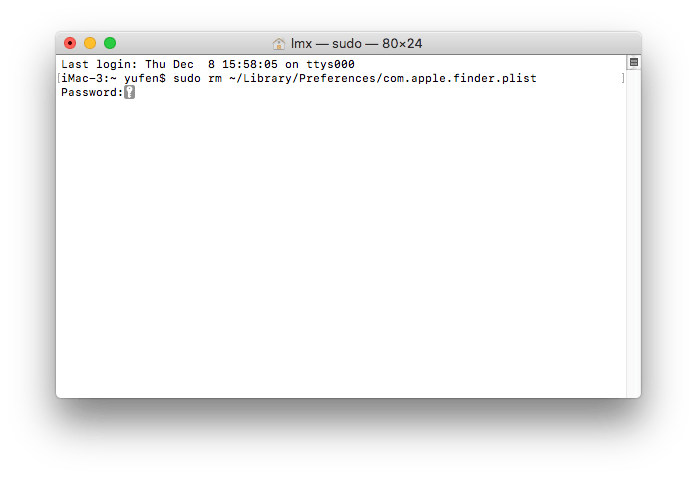
- Copy and paste the command line: “sudo rm ~/Library/Preferences/com.apple.finder.plist” onto Terminal > press Enter. This command will move the corrupted plist file from library folder to the Trash.
- Enter your admin password.
- Exit Terminal.
- Restart your Mac and try to launch Finder.
Method 2: Go to Finder plist folder
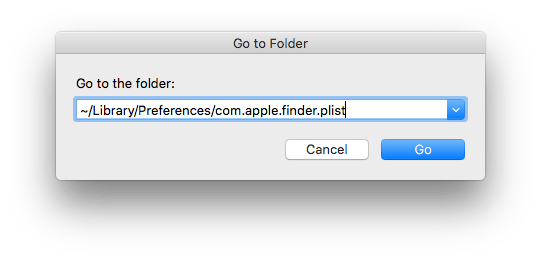
- Press Command + Shift + G at the same time.
- In the pop-up window, enter “~/Library/Preferences/com.apple.finder.plist” > select “Go” button.
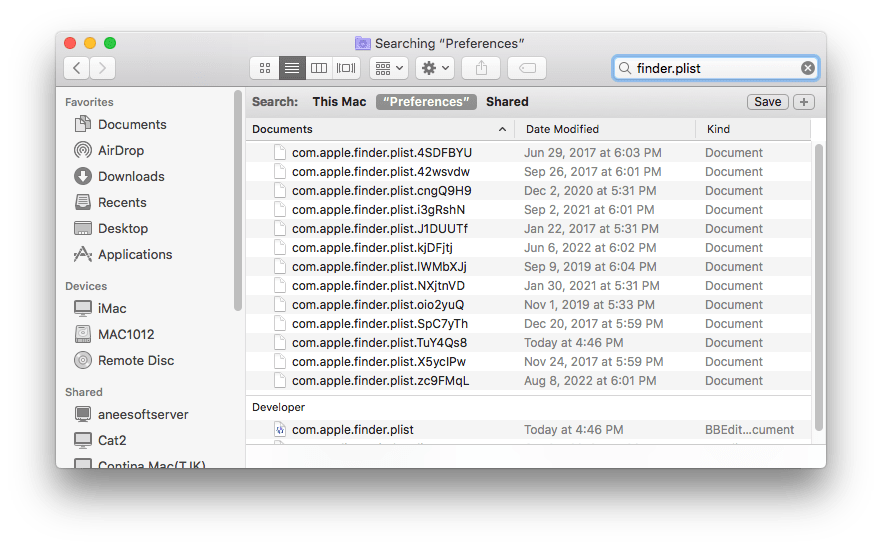
- Specify com.apple.finder.plist > remove it.
- Finally restart your Mac and check whether Finder not working correctly has been fixed.
Solution 7: Check if Spotlight is Indexing
In addition, your non-responsive Finder on Mac can result from the Spotlight under indexing. To confirm whether Spotlight is indexing, see below for the tutorial.
- Launch Spotlight by clicking on the search icon at the top status menu bar.
- Input any keyword into the Spotlight search box.
- A blue progress bar will show up under the search box if Spotlight is indexing.

- Wait for the indexing process to finish, and then go to check if Finder is responding.
Solution 8: Reset Mac to Factory Settings
If none of the above solutions fixed the issue, as a last resort, reset your Mac to default factory settings. Before resetting, you’d better sign out of any apps you have licenses for on Mac. Indeed remember to find some way to back up and save all your important files as everything on computer will get removed after resetting. Either a cloud-based storage or an external hard drive is feasible. Once you’re all done with that, let’s start to factory reset your Mac to get Finder working again.
- Go to Apple icon > select “Shut Down”. Make sure your Mac is completely shut down before continuing.
- Power on your Mac while holding Command + R until the macOS Utilities pops up.
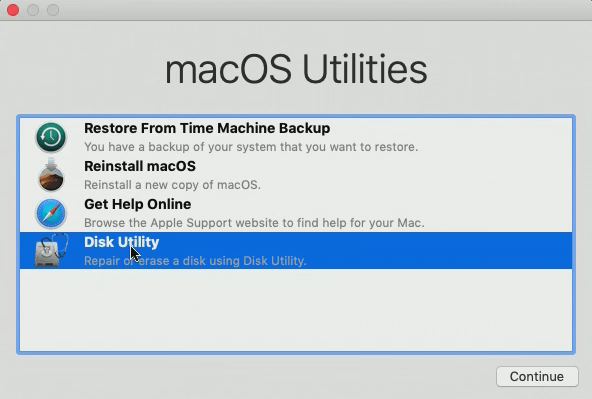
- Click on Disk Utility > Continue.
- Choose your main hard drive named Macintosh HD > click Erase tab at the top.
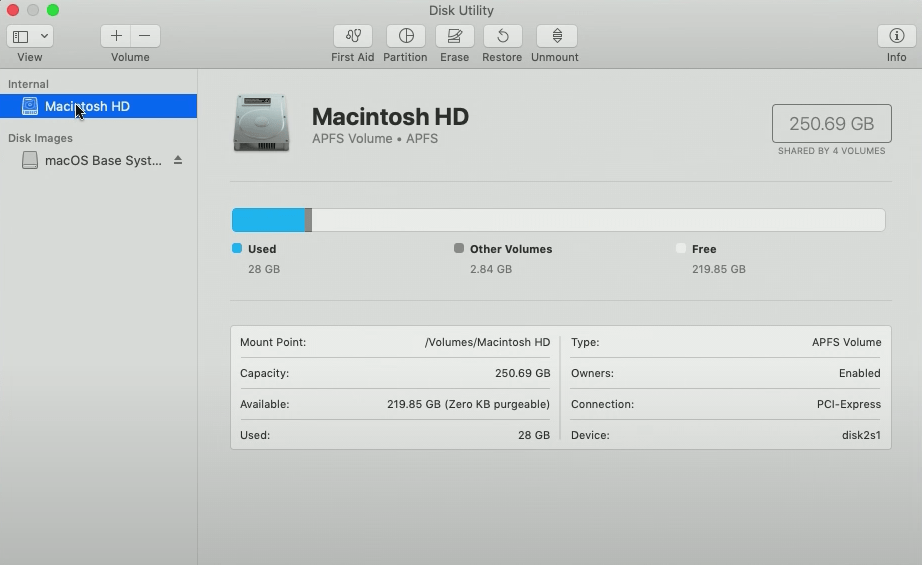
- Ensure that the format is APFS or Mac OS Extended (Journaled) > click on Erase button.

- This step will vary in time depending on how full your hard drive is. Click Done after erase process completed.

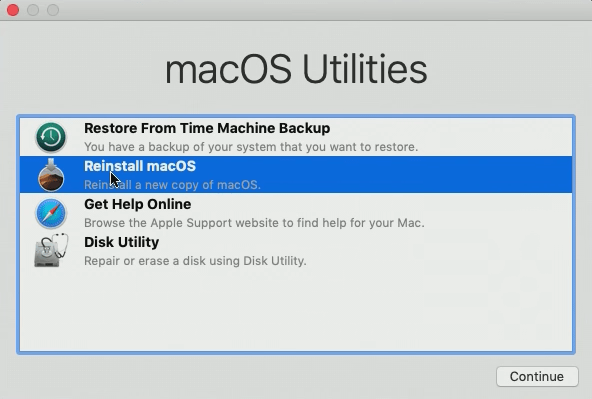
- Exit Disk Utility > select Reinstall macOS > Continue.
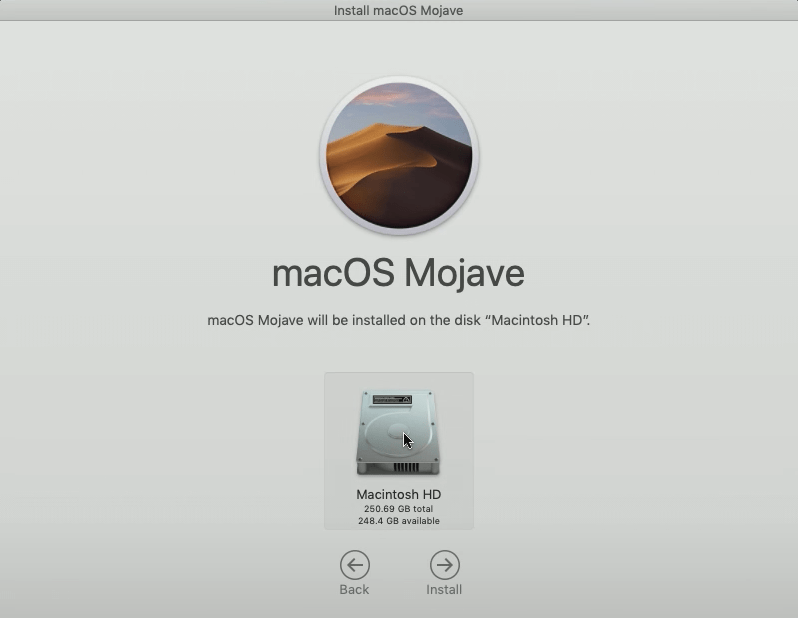
- Follow the prompts through the Setup Assistant to restore the factory resetting.
Bonus Tip: How to Recover Files from Finder on Mac?
There is a high possibility that Mac Finder not responding issue causes files to lost or disappear from Finder accidentally. For data loss on Mac due to the misbehaved Finder, a premium third-party data recovery software comes to the rescue. Here Cisdem Data Recovery for Mac could be your top priority.
Your lost files in Finder might be documents, pictures, videos, audios, applications or any other data saved or downloaded from a variety of platforms. Whatever, Cisdem Data Recovery is capable of tackling virtually any data loss obstacles users may encounter.
As following is the easy-to-follow guide on how to recover data from Finder on Mac.
- Download, install and run this software on your Mac.
 Free Download macOS 10.9 or later
 - Select and scan a drive.
Choose Disk Data Recovery mode > choose the internal Mac hard drive that stored your Finder files > click on “Search for lost files” button to start the scanning.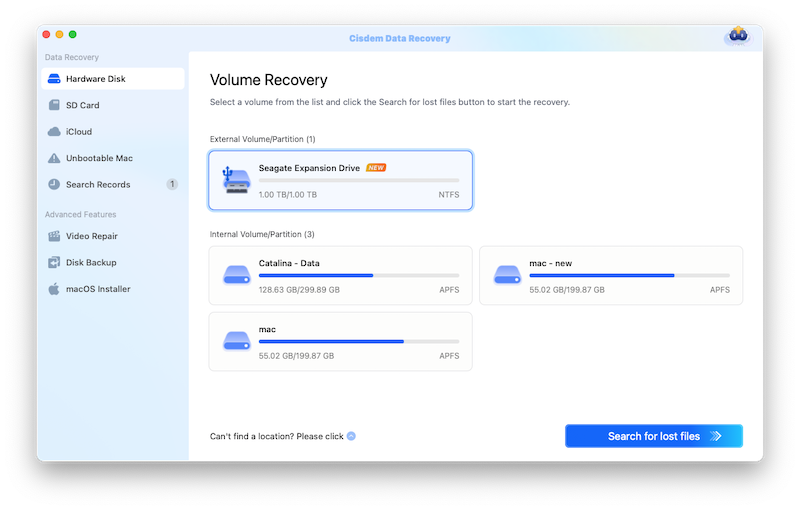
- Locate your lost files from Finder.
This dedicated program will find most lost files on your Mac Finder through both quick scan and deep scan. All recoverable items will be classified into different file types. Preview them and find the files you wish to recover.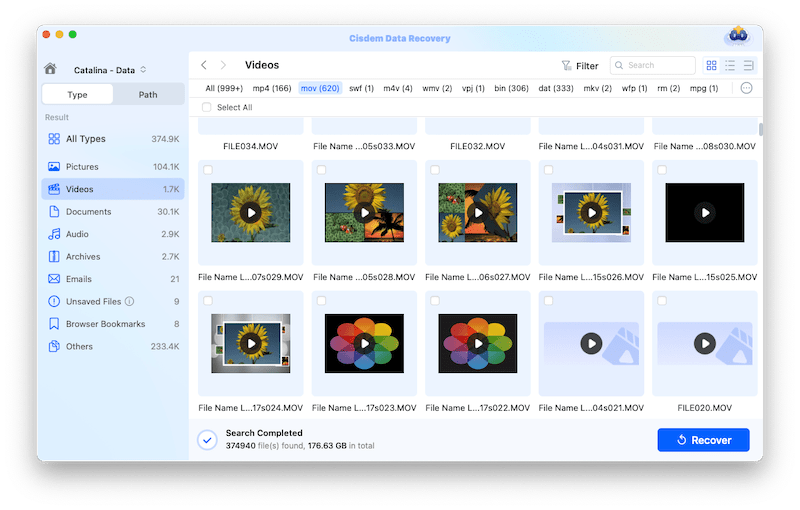
- Recover the files from Finder.
Select the wanted files and click “Recover” to restore them back. Finally they will appear in Mac Finder again.

Connie Yu has been a columnist in the field of data recovery since 2011. She studied a lot of data loss situations and tested repeatedly to find a feasible solution tailored for each case. And her solutions are always updated to fix problems from the newest systems, devices and apps.
Loved the article, share!
 Free Download macOS 10.9 or later


 Free Download macOS 10.9 or later


