
How to Compress a Video on Windows 10/11 with High Quality (Inc. Free)
 963
963
 0
0


Recently, I tried to upload a 718MB, 9-minute video to Instagram on Windows computer, but Instagram requires that videos up to 10 minutes should not exceed 650MB. I found that many messaging apps, such as WhatsApp, Skype, Discord, etc., also have video size limits. So, I started my research on how to compress a video on Windows 10 or Windows 11, specifically focusing on techniques to shrink GB to MB and retain good quality.
 Cisdem Video Compressor
Best Video Compressor for Windows 10/11
- Cover almost all compression methods
- Compress videos for Twitter, Facebook, Email, Discord, WhatsApp, or any platforms
- Compress MP4, AVI, MKV, WMV, MOV, M4V, WEBM, etc. videos (300+ input format supported)
- Also downsize audio files
- Keep high visual quality
- Offer batch, unlimited, and fast compression
- Estimate the file size after compression
- Preview the compressed video
 Free Download Windows 10 or later
Video file I used in test
Here are the parameters of the test file.
| Format | Size | Video bitrate | Audio bitrate | Resolution |
|---|---|---|---|---|
| MP4 (x264, aac) | 718MB | 6724kbps | 132kbps | 1920*1080p |
I also show below the video size and other parameters after compression using each method, but this does not mean that the smaller the size, the better the compression. Video compression involves complex techniques and different parameters. Therefore, it is not possible to compare compression results based on output file size alone.
Choose the right way to decrease video size in Windows 10/11
This article introduces 5 ways.
Generally, the video is compressed by tweaking bitrate or re-encoding. The former can compress the video to the maximum, while the latter can use more advanced encoders to reduce video size while keeping high quality.
If you care about video quality, choose way 1 (use Cisdem Video Compressor), way 2 (use Handbrake), and way 4 (use Shotcut). And of the 3 ways, I vote for Cisdem concerning ease of use, professionalism, and stability.
If you want to compress a video on Windows significantly, you can choose any other way except way 3 (use Photos Legacy). Way 3 only reduces the resolution and does not allow manual output of parameters, and the resulting file tends to be larger. Way 5 (use Invideo) is free to use online without installing software, but your initial video must be < 800MB.
How to Compress Videos in Bulk on Windows with Video Compression Software
If you're in need of a dedicated program to compress a video on Windows 10/11 easily, look no further than Cisdem Video Compressor. Thanks to its state-of-the-art compression techniques and efficient codecs, it can quickly reduce video size on Windows without compromising quality.
Free Download Windows 10 or later
How does Cisdem Video Compressor for Windows 10/11 benefit you?
Provide various compression methods: It allows you to directly adjust the compression percentage or manually customizing properties like bitrate, resolution, frame rate, and target format (audio/video codecs), among others.
Support any video, regardless of format, resolution, or size: It supports 300+ input and 11 output video/audio formats. Also shrink 8K, 4K, 1080p, and large videos to tiny size.
Preview: Quickly generate the first 20 seconds of compressed videos. For large videos, you don't need to wait a long time for the compression to finish before you can see how well it's working.
High-speed compression: With hardware acceleration, the speed is extremely fast even when downsizing multiple or big videos at the same time.
High-quality retained: To the naked eye, the compressed video looks almost indistinguishable from the original.
Instructions on how to compress a video on Windows with Cisdem Video Compressor:
Step 1. Add large video files.
Launch Cisdem Video Compressor on PC. Drag and drop one or more videos to be compressed into the software interface.
Step 2. Apply individual or combined compression methods.
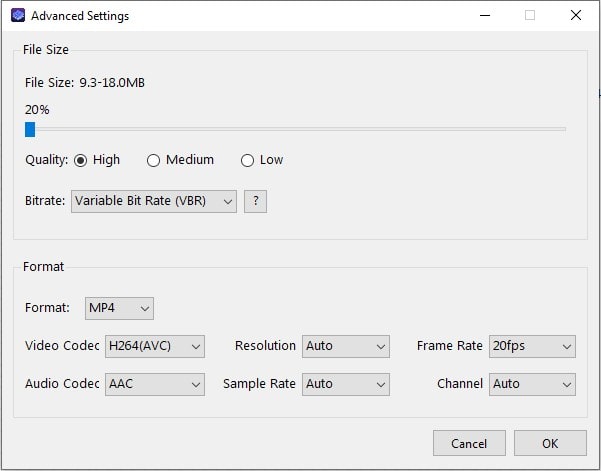
Click the gear wheel icon to bring up the “Advanced Settings” window.
There are three methods I recommend to use for video compression:
Method one - simplest, smallest file size
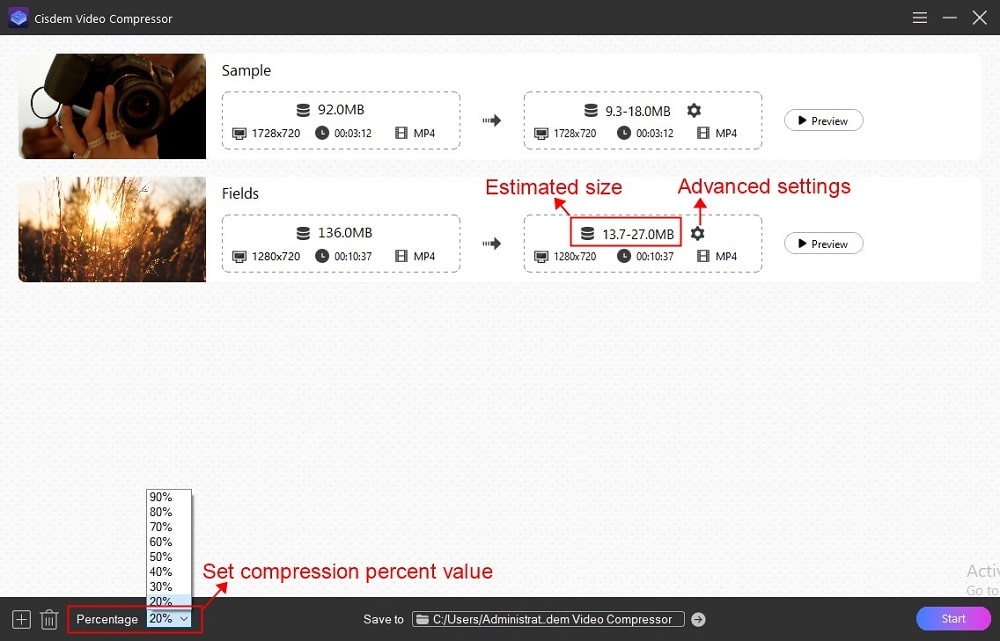
In the “File Size” area, adjust the percentage by dragging the slider. The smaller the value, the higher the compression rate. The software will give an estimate. CBR has a predetermined file size, whereas VBR offers a flexible range.
In my tests, the first percentage I set was 50% and the bitrate was "Variable Bit Rate (VBR)". I also tried 20% to see how much the file would be compressed.
Note: VBR dynamically adjusts the bitrate according to the complexity of the image. For the same file size, VBR provides better quality than CBR. For the same quality, VBR has a smaller file size than CBR.
Method two - highest quality possible
Go to the “Format” section. If the video is in MP4 (H264) format, select “H265 (HEVC)” or “AV1” as the video codec.
Click "OK".
Note: H265 and AV1 are more efficient encoders than H264. At the same quality, H265 and AV1 have smaller video files.
Method three - quickest
This way is actually equivalent to way one, just you don't have to open the “Advanced Settings” window.
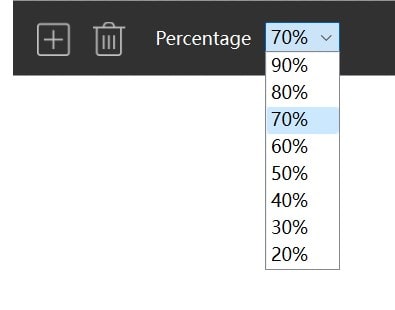
If you're looking to compress videos on Windows instantly with one click, pick the compression percentage directly from the main interface, ranging from 20% to 90%.
Step 3. If needed, preview before compression.
Click "Preview" to see if the compression result satisfies you.
Step 4. Start making video smaller on Windows.
Select the location to save your output files. Once you're ready to compress the video, click on the "Start" button positioned at the bottom right corner.
Output result:
| Format | Size | Video bitrate | Resolution |
|---|---|---|---|
| MP4 (H264, keep 50%) | 315MB | 3027kbps | 1920*1080p |
| MP4 (H264, keep 20%) | 106MB | 1019kbps | 1920*1080p |
| MP4 (HEVC) | 596MB | 5727kbps | 1920*1080p |
| MP4 (AV1) | 551MB | 5295kbps | 1920*1080p |
How to Compress a Video on Windows PC Using Handbrake
Handbrake, a well-established open-source program, has made a name for itself in the video transcoding and DVD ripping field. It can also be regarded as video compression software, which shrinks video size by choosing a more efficient encoder or by adjusting the constant quality. You can compress videos to MP4, MKV and WEBM. Unfortunately, the transcoding speed is very slow, it took me 1-2 hours to finish compressing 2 videos.
Here’s a guide to reduce video size on Windows 10/11 with Handbrake:
- Download an appropriate version of Handbrake from https://handbrake.fr/downloads.php, then install it.
- Install .NET Desktop Runtime if Handbrake fail to run on your PC.
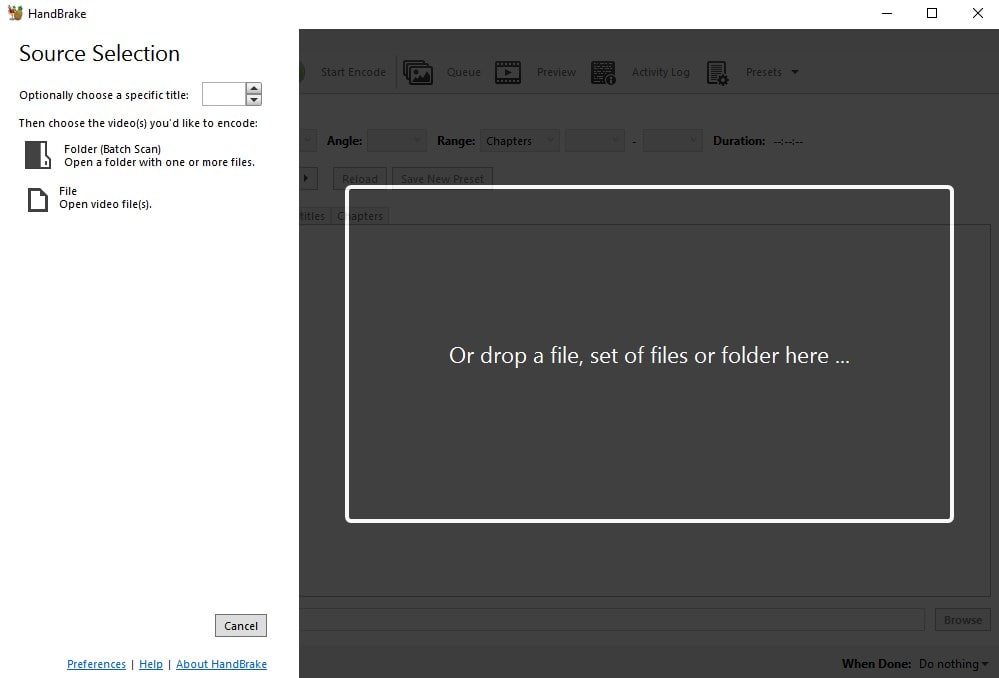
- After the Handbrake is kicked off, Click “File” on the left side of the screen to import any video you desire to compress.
![]()
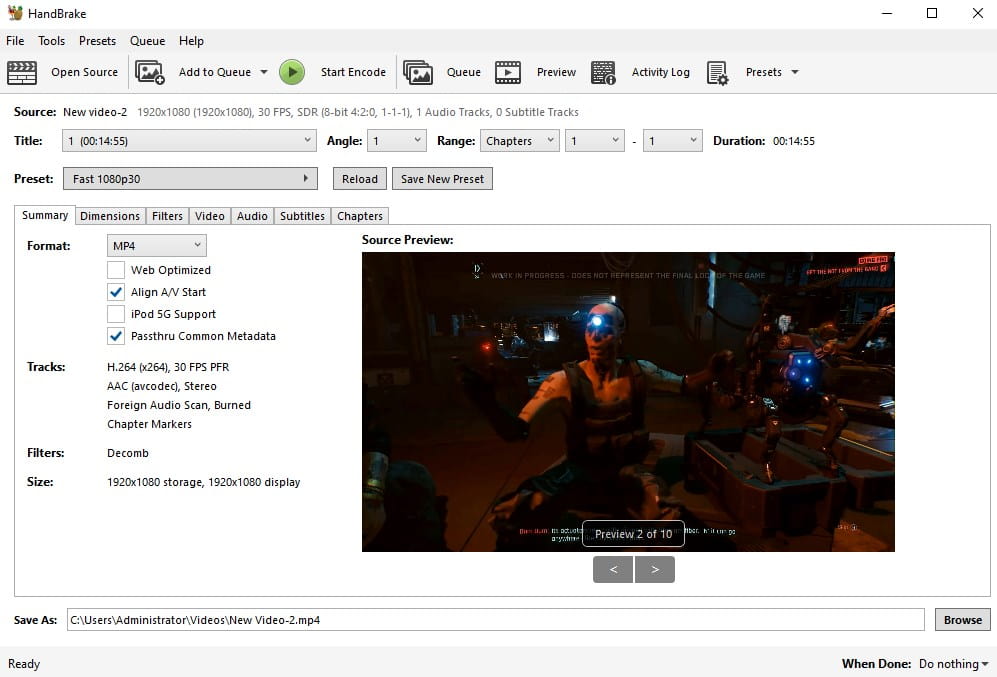
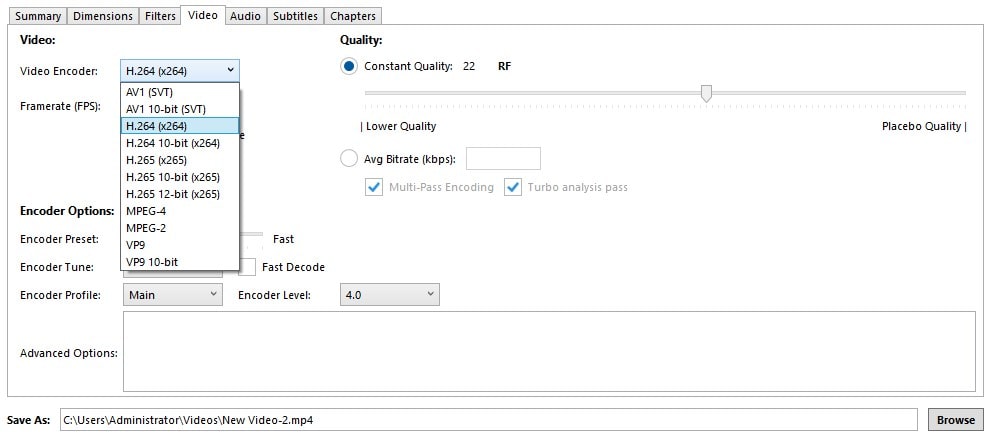
- Go to the “Video” tab.
![]()
- Turn the video encoder into AV1 or H.265.
![]()
- Change the file name or storage path at the bottom, or it will overwrite the original video.
- Press “Start Encode” at the top of the interface.
Output result:
| Format | Size | Video bitrate | Audio bitrate | Resolution |
|---|---|---|---|---|
| MP4 (HEVC) | 308MB | 2875kbps | 163kbps | 1920*1080p |
| MP4 (AV1) | 420MB | 3929kbps | 163kbps | 1920*1080p |
Besides video transcoding, Handbrake offers some other settings to help you compress videos on Windows:
- Lower 1080p video to 720p30, 576p25, or 480p30
- Convert 1080p 60FPS to 1080p 30FPS
- In the “Video” tab, lower the constant quality or average bitrate
How to Compress a Video on Windows via Microsoft Video Editor
Photos Legacy (or old Photos on Windows 10) can reduce file size by converting 1080p to 720p or 540p. But not all videos are supported, here's what I got from my tests:
- Video formats not supported: WEBM, TS, FLV, RMVB, F4V, VOB;
- When adding 4K, 8K, and very large size (e.g. 3GB) videos, you need to wait a longer time;
- If it is HEVC file, you have to install Microsoft HEVC Video Extension to read the file.
The fact that Photos Legacy accepts your video is the first requirement for use, but that's not enough. The software cannot adjust the bitrate, its default output bitrate is high. To compress a video on Windows 10 or Windows 11, provided that your video bitrate is about 6-8MB. If it's below 4MB, it's likely that the exported 720p video is bigger than 1080p.
Having clarified the requirements for importing videos, let's see how it works next.
- Launch Photos Legacy.
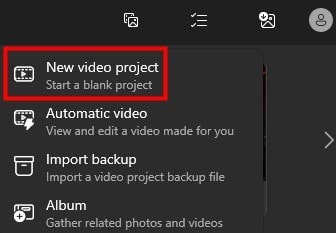
The newly introduced Photos app simplifies the functionality including removing the ability to lower the resolution, you'll need to head to the Microsoft Store and install Microsoft Photos Legacy. If you haven't upgraded, use old Photos directly. - In the upper right toolbar, click on the media icon, then choose “New video project”.
![]()
- Name your video and hit “OK”.
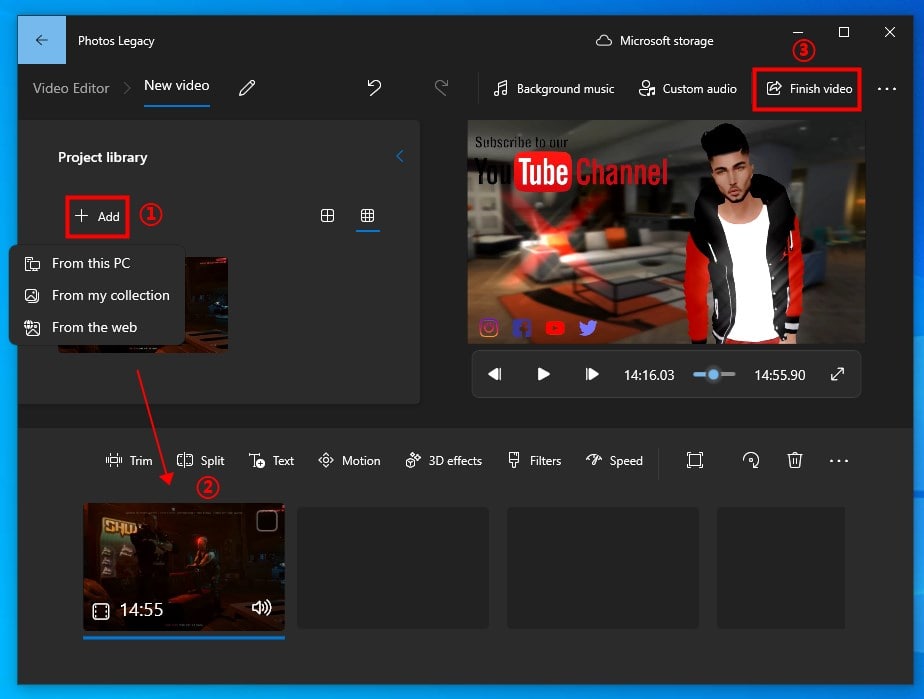
- Add the video from the PC, your collection, or the web.
- Drag and drop the video to the timeline.
- Click “Finish video”.
![]()
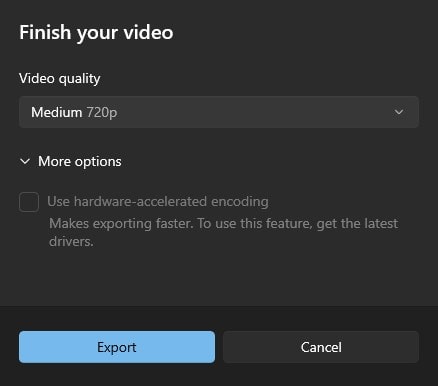
- Select “Medium 720p” or “Low 540p (smallest file size)”.
If the video is 1080p or above, it is not recommended to select 540p, otherwise the quality will be damaged more seriously. - Click “More options” and check the “Use hardware-accelerated encoding” box.
Hardware acceleration helped me boost compression speed by almost 30 minutes. It's just that not every PC supports it. - Click “Export” to make a video file smaller on Windows.
![]()
Output result:
| Format | Size | Video bitrate | Audio bitrate | Resolution |
|---|---|---|---|---|
| MP4 (H264) | 422MB | 3950kbps | 132kbps | 1280*720p |
How to Compress a Video File on Windows PC in Shotcut
Shotcut is an open source video editing software that also supports a variety of compression methods, but the most iconic is to reduce video file size through Constant Rate Factor (CRF).
Note: The CRF value is between 0 and 51, with a default value of 23. Setting a higher CRF value can compress the video. If you don't want to have a noticeable negative impact on the output video quality, a reasonable CRF can't be more than 28.
Here are steps on how to use Shotcut to compress a video on Windows:
- Download and install Shotcut app from https://shotcut.org/download/.
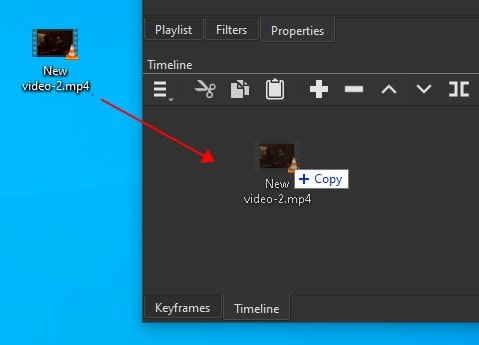
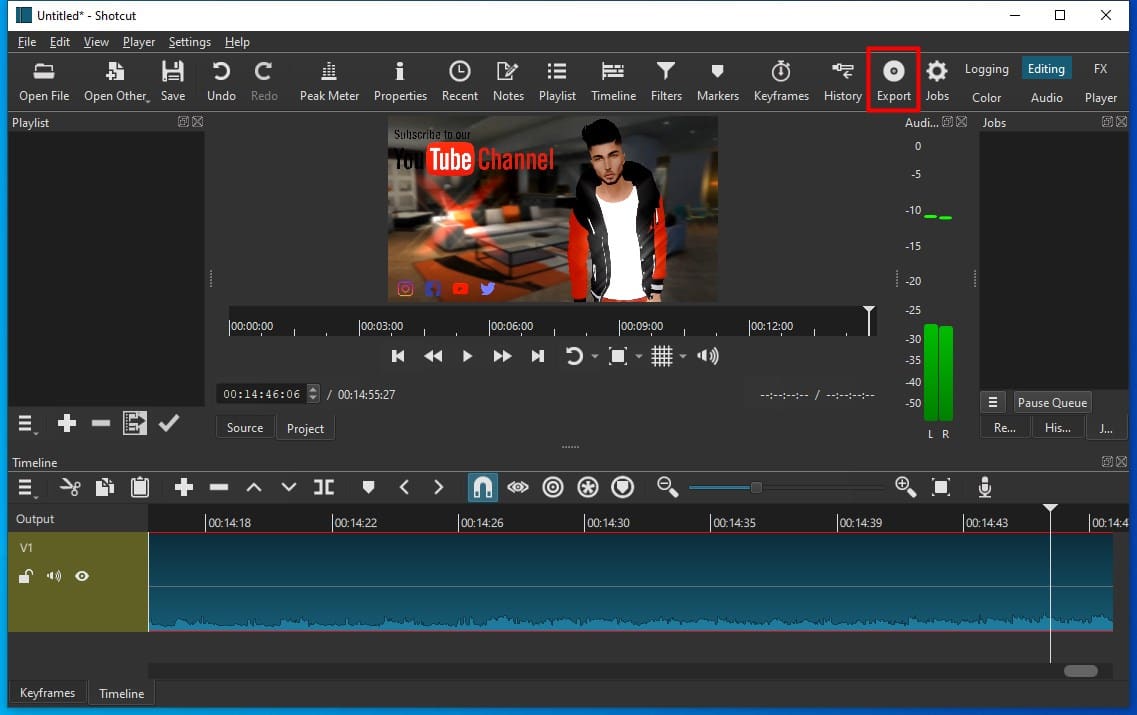
- Open Shotcut. Drag and drop the video straightly into the timeline.
![]()
- Click on “Export” in the toolbar.
![]()
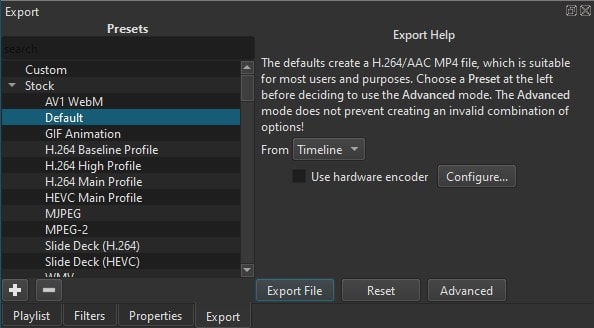
- In the “Export” window, keep the default format (H264/AAC MP4), and click “Advanced” on the right side of the window.
![]()
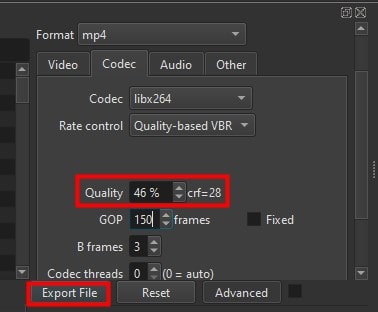
- Switch to the “Codec” tab.
- Reduce the quality percentage from 55% to 46%. The CRF value at this point is exactly 28.
![]()
- Click “Export File”.
Output result:
| Format | Size | Video bitrate | Audio bitrate | Resolution |
|---|---|---|---|---|
| MP4 (H264, default option) | 419MB | 3920kbps | 313kbps | 1920*1080p |
| MP4 (H264, change CRF to 28) | 277MB | 2592kbps | 313kbps | 1920*1080p |
Most YouTube vloggers recommend selecting the default format and then exporting directly, which can potentially lead to larger files. The reason is the same as using Photos Legacy:
- The default format has a resolution of 1920*1080, frames of 30/sec, sample rate of 48Hz, and no mention of video bitrate. If your original video already has low values for these parameters, converting it will only increase the video size;
- If your system doesn't support 7th-gen or above NVENC GPU, the output video using hardware acceleration can be up to 3 times larger than the one using a software encoder.
How to Compress a Video on Windows with Online Video Compressor
Free online video compressors for Windows impose limits on the size, duration, etc. of uploaded videos. Invideo stands out from them due to its intuitive interface, high compression rate, and relatively few limits. The biggest drawback is that uploaded videos cannot exceed 800MB.
However, since online services require an Internet connection and videos may be stored on a server, they are not as fast, stable and secure as video compression software.
Below are how to reduce video size on Windows 10 or 11 with Invideo.
- Visit the website - https://invideo.io/tools/compress/video-compressor/ in your browser.
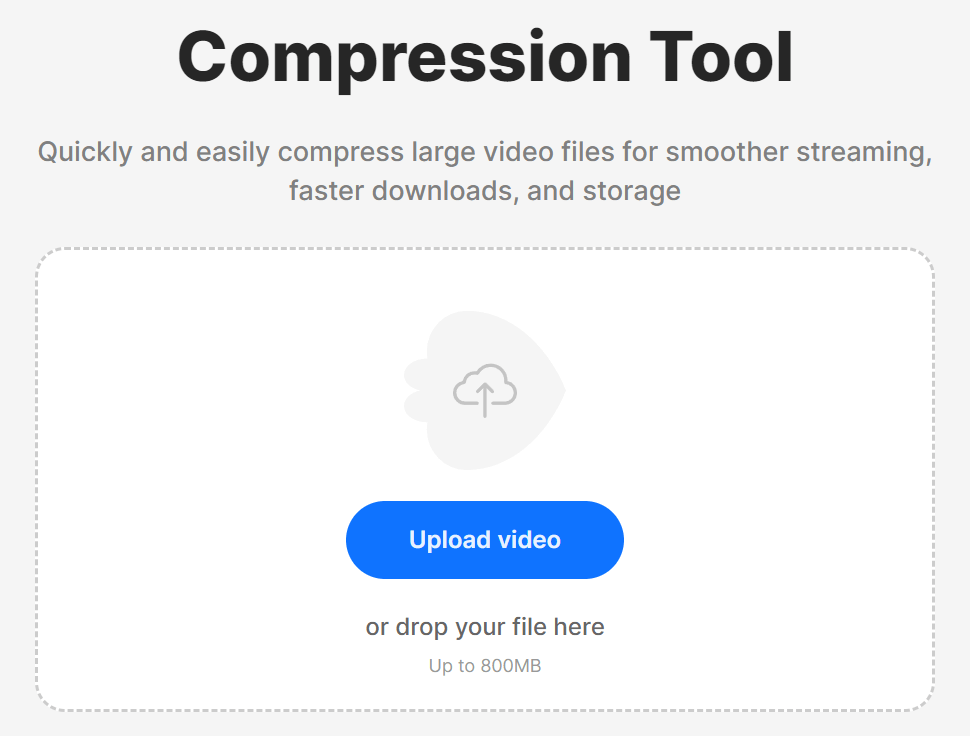
- Click the blue “Compress Your Video” button.
![]()
- Upload a large video file from your Windows PC.
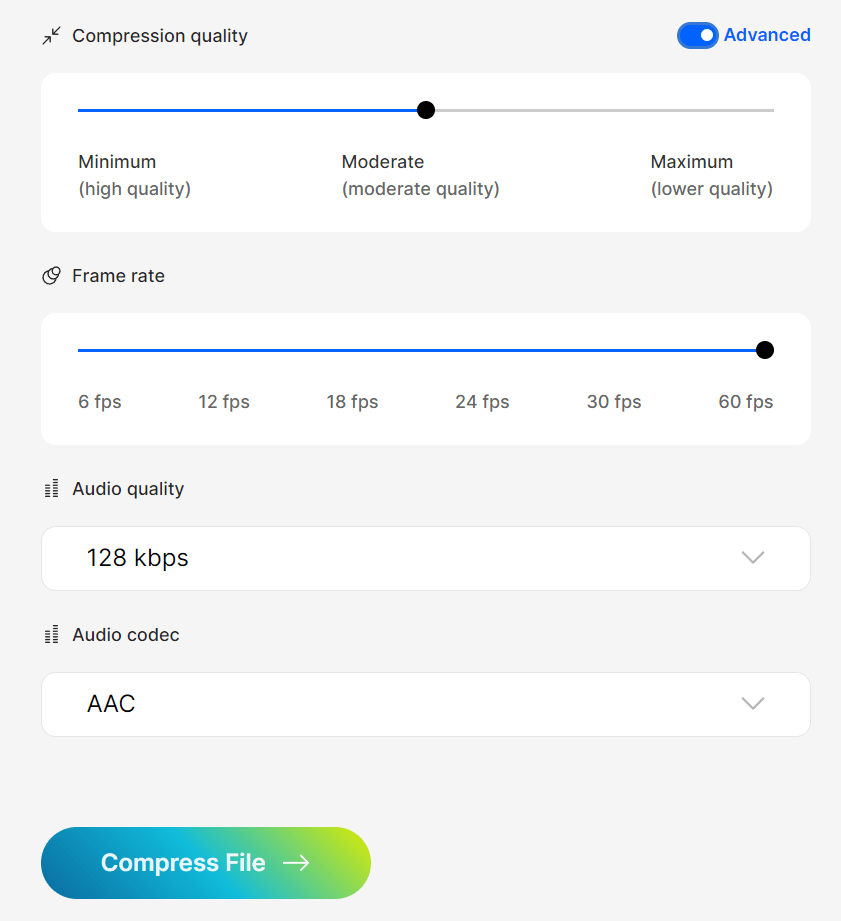
- Adjust the compression settings to suit your individual needs.
For example, you can change the compression and audio quality. Additionally, enable the “Advanced” button, set the frame rate and audio codec. I kept the default setting, which is to select the “Moderate” quality for compression. - Hit “Compress File”.
![]()
- Download the compressed file.
![]()
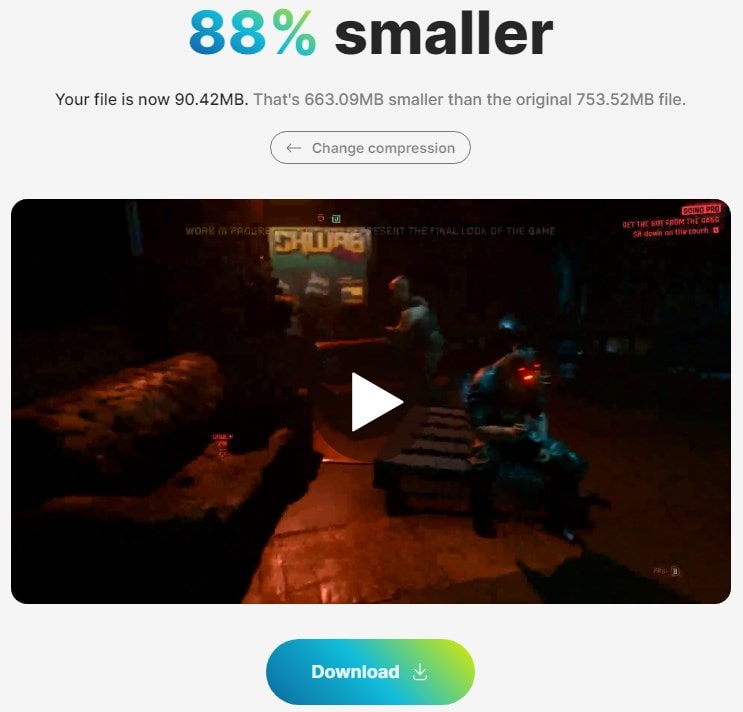
Output result:
| Format | Size | Video bitrate | Audio bitrate | Resolution |
|---|---|---|---|---|
| MP4 (H264, choose moderate quality) | 85.1MB | 784kbps | 128kbps | 1920*1080p |
I've tested many other tools as well and here are the most popular ones with their limitations of the free version.
freeconvert.com: Up to 1GB file size and 5 minutes file duration
compress.media.io: File size not more than 500MB
videobolt.net: limited to 10-minute uploads
clideo.com: Maximum file size is 500MB
videocandy.com: Insert a watermark
onlineconverter.com: File cannot exceed 200MB
More Tips for Video Compression:
1. Compress a large video to a ZIP file
Just want to successfully send a video to someone on messaging apps, and the size of your video is close to the limit but slightly over? For example, Signal's maximum video size limit is 100MB, and your video is 105MB, try to zip it.
On Windows 10: right-click the video, select “Send to” > “Compressed (zipped) folder”.
On Windows 11: right-click your file and choose “Compress to ZIP file”.
2. Trim a large video to smaller size
If you want to upload your video to short-form video platforms such as TikTok and Snapchat (which have limitations on video length as well as size), or just want to save the video highlights, trim it at the beginning or end. Photos, Photos Legacy, and Shotcut can do that for you.
3. Reduce video size in Windows with VLC
VLC is a free cross-platform video player and transcoder. It can downsize video by manually changing the video output format, codec, bitrate, and frame rate.
Note: The computer's native video player - Windows Media Player does not support video compression. It’s used to open videos, music, pictures, etc., sync them to other devices and burn them to data CD/DVD, or audio CD.
4. Resize a video for email on windows 10 or 11
The most common email providers for Windows users are Outlook and Gmail, which limit video attachments to 33MB and 25MB, respectively. For more details, read https://www.cisdem.com/resource/how-to-compress-video-for-email.html.

Jenny is a technology editor who has been blogging since she was a student. Since joining Cisdem, she focuses on writing articles about video software and how-to guides. She loves exploring new tools and techniques.

Ryan Li is a senior developer at Cisdem. Since joining the company in 2017, he has led the development of Cisdem Video Converter and now serves as the editorial advisor for all articles related to Video Converter.