rm is one of the most efficient commands to remove specified files or directories, across different devices like Linux, macOS, Windows. But when you run this command on you computer by mistake, it can sometimes be tricky to undo and recover the files after rm.
On different devices, the options to recover rm files will be different. This guide will walk you through the steps on how to recover files after rm and ensure the deleted file can be opened without error.
 Free Download Windows 11/10/8/7
 Free Download macOS 10.9 or later
rm is the short term of remove, it deletes files by removing its reference to a file or directory, you can add options like -r, -i, -f, -v, -d. It won’t move the deleted files to recycle bin on your computer, it permanently deletes the files and you won’t be able to restore from trash bin.
It is not in the recycle bin, then where do the files deleted with rm command go? It is still on the drive where it was originally stored, it just becomes invisible, because the system marks this space as available to add new data. If there is new data written, and right into this space on your device, the rm deleted file will be gone forever.
Yes, but it can be only recovered before it is overwritten by other new data. Therefore, stop adding new data to your computer immediately, operations like updating system, running apps, transferring files, editing files, browsing websites will write a large amount of new data to your device. The more data you add to your device, the less possible you are able to recover the rm deleted files. So, action faster.
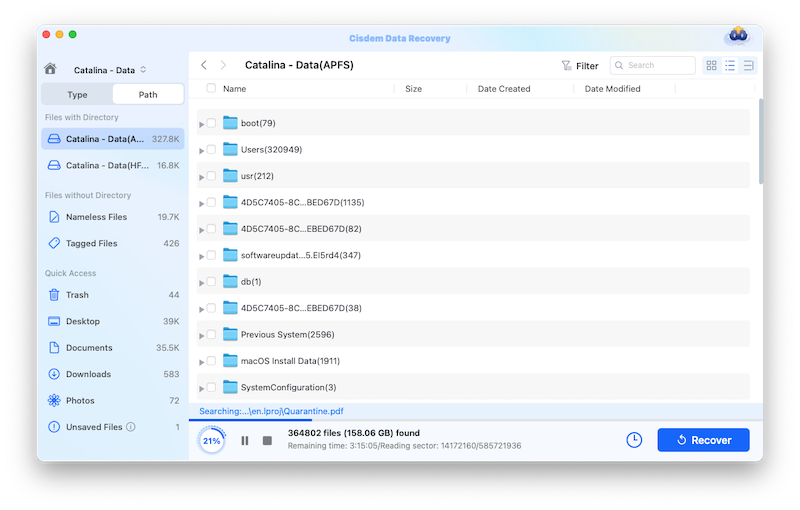
Restoring a file after rm can be a challenge, the solution for different operating systems would vary, this is where Cisdem Data Recovery comes into play.
It is a robust data recovering program, equipping with diverse feature options such as hard drive recovery, SD Card recovery, crashed PC/Mac recovery, Linux recovery and NAS recovery. This app is reliable and efficient to restore 1000+ types of files under various data loss situations: deletion, formatting, corruption, missing, system crash, etc.
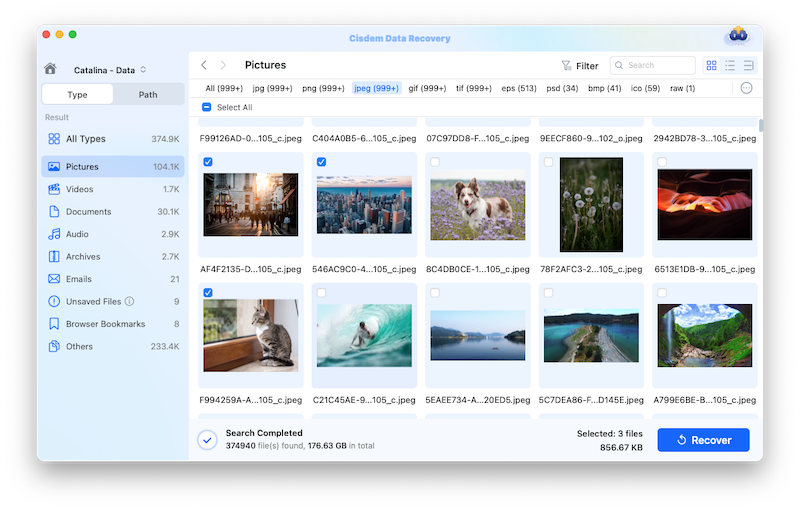
Cisdem also provides the ability to repair damaged files like video, photo or office documents, which saves you from the trouble of unable to open a file after recovery. Cisdem Data Recovery focus a lot on recovery rate and speed. It does the scanning and digging thoroughly to find a lost file, assists in discovering files quickly with a filter tool. The Preview feature is prominent, users can check the found files by viewing thumbnails or reading full file with defaulted readers, the preview loads quickly and it will be highly efficient to recover those wanted without error.
Cisdem supports both Windows and macOS, also offers free trial, with the paid plans starting with one-month plan, which is good for those want to recover lost files in a pinch.
 Free Download Windows 11/10/8/7
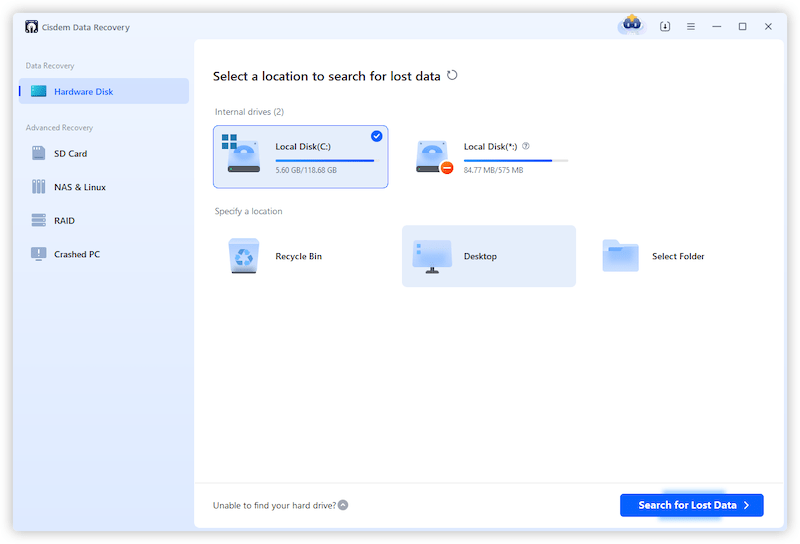
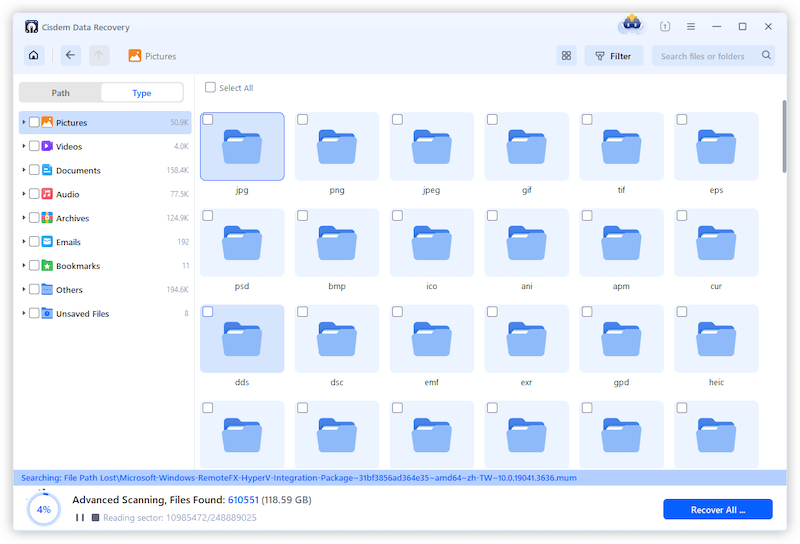
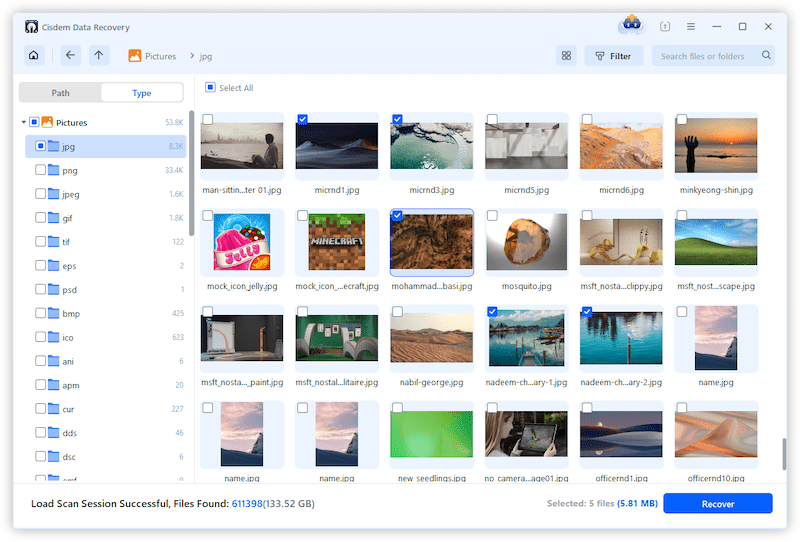
 Free Download macOS 10.9 or later
 Free Download Windows 11/10/8/7
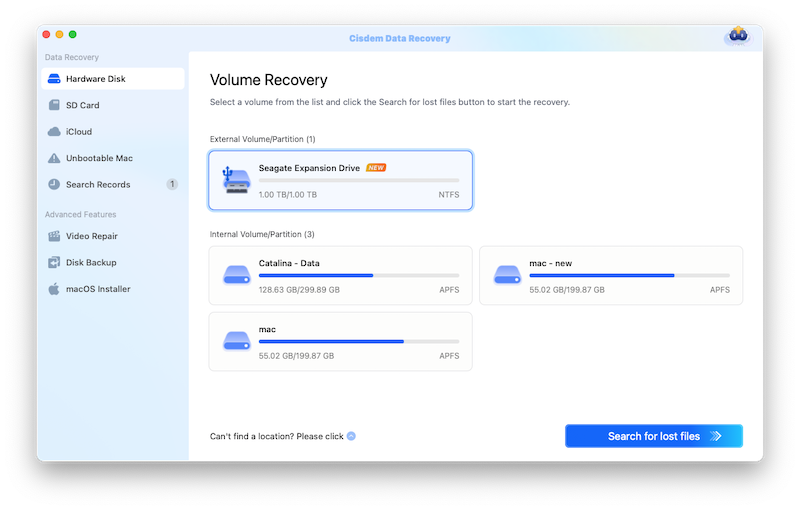
Linux doesn’t allow undoing rm, which makes the situation a little tricky. If you are looking for a free solution to recover a rm file on Linux, because you are still in doubt with 3rd data recovery apps like Cisdem, there are 2 ways for you.
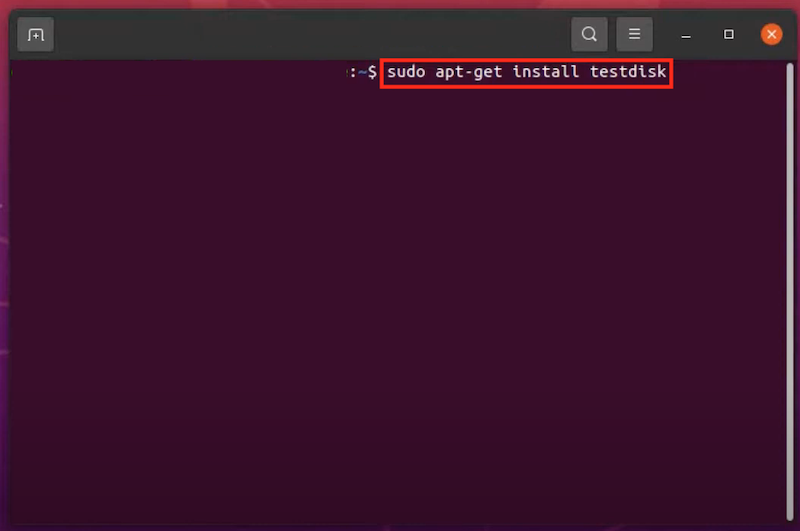
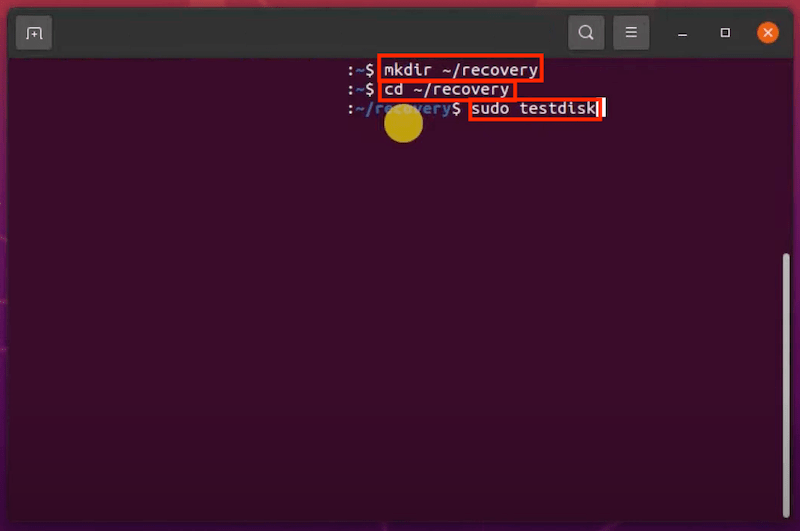
TestDisk is a free data recovery application available on Linux, Windows, macOS and other operating systems. It runs in a shell to recover deleted files, especially lost partitions and unbootable disks. The latest version is 7.2, which was released in Feb 22nd, 2024. If you don’t have a backup of the deleted files, you can follow up the steps:
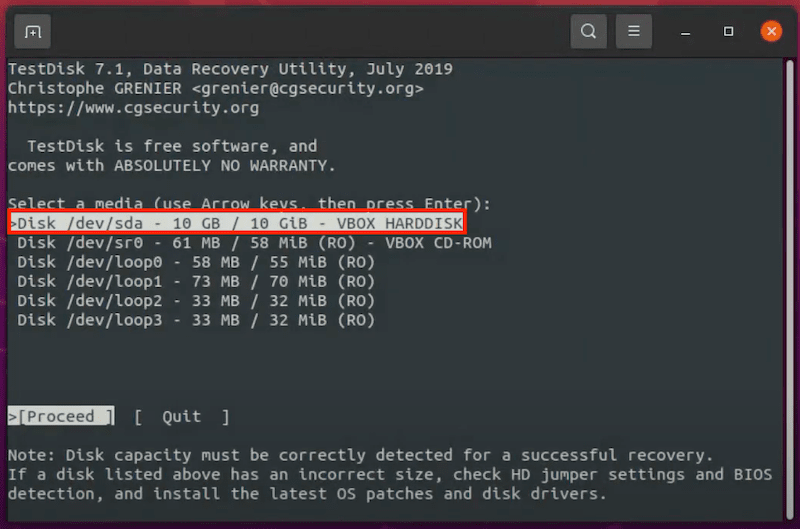
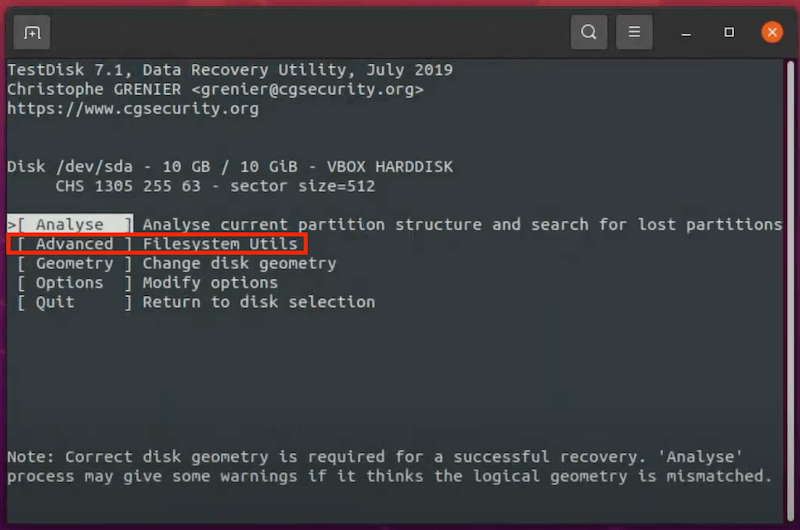
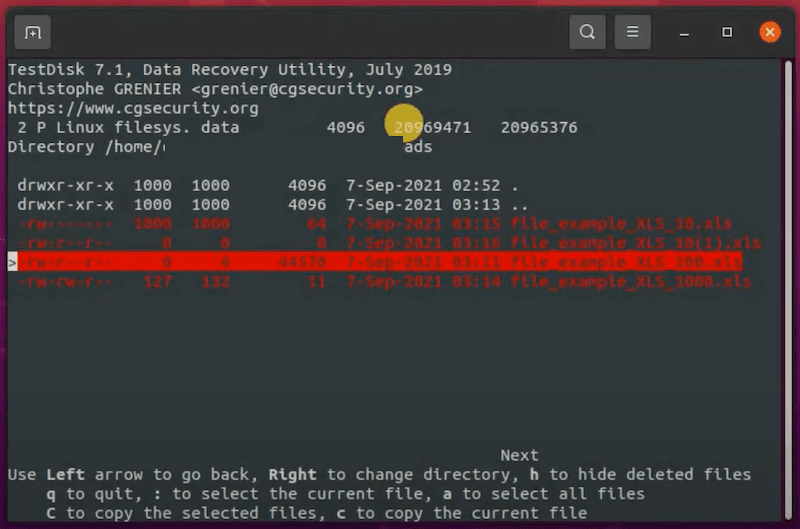
If you’ve backed up your Linux files using a command or backup tool, before the files are deleted with rm, it will be much easier to get them back. Just check back the backup location or storage device, then transfer them to a wanted path. It is always smart to backup your files.
Mac users can also delete a file with rm command in Terminal, and the process to recover a file after rm is easier than that on a Linux. If you want to restore a deleted file and not using a piece of software, there are 2 ways as well.
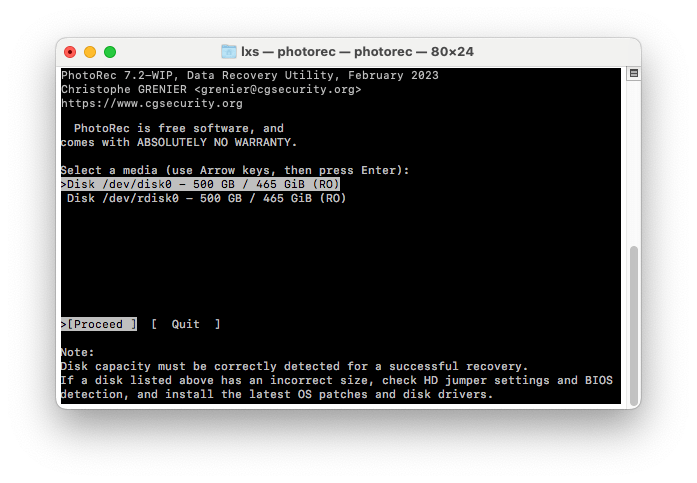
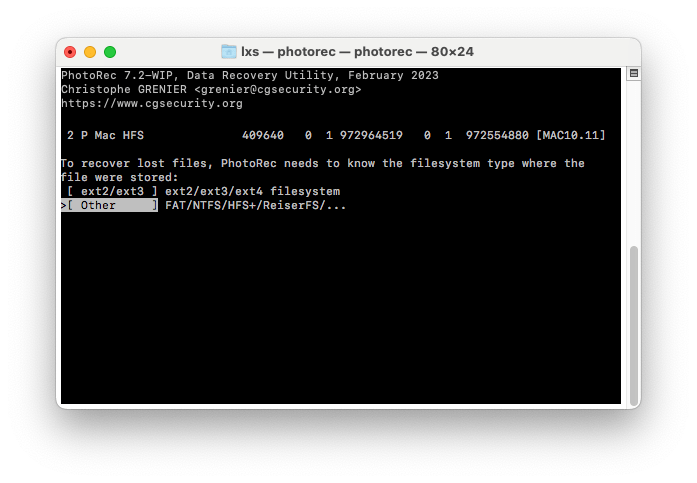
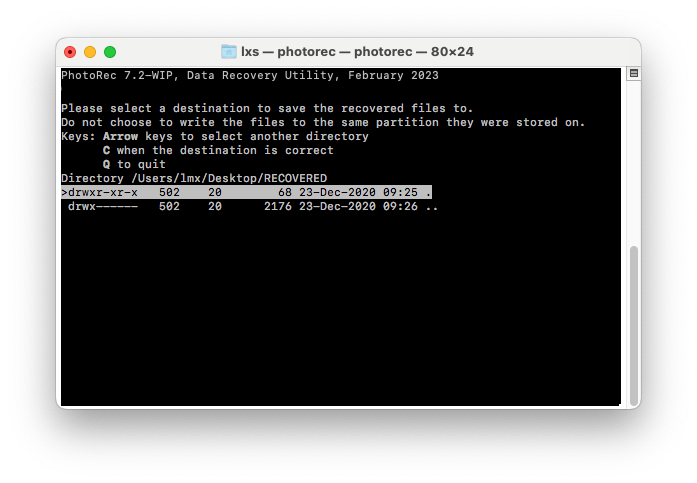
PhotoRec, same as TestDisk, is another free data recovery program from cgsecurity. The application name might make users think it supports photo recovery only. It is not, and it supports more files than TestDisk, including videos, photos, documents, archives and so on. Even, it works on damaged or reformatted disks.
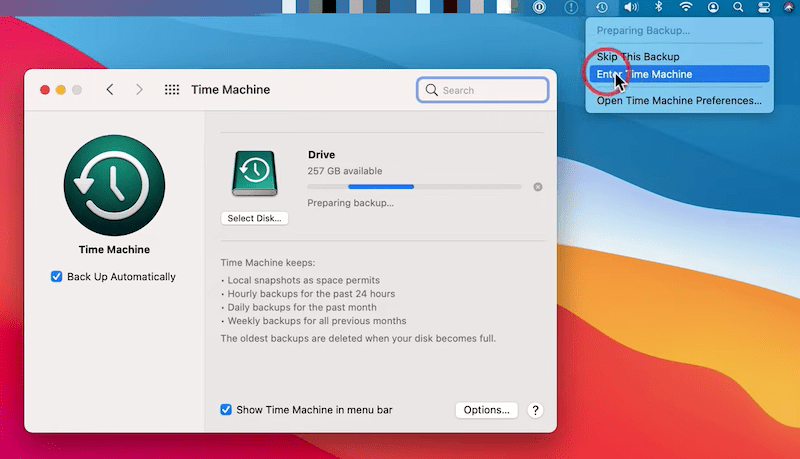
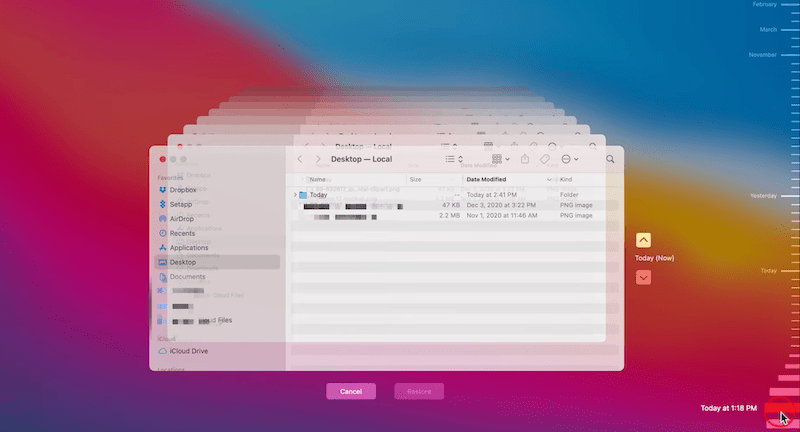
If you’ve enabled Time Machine backup on your Mac, the process to recover rm files will be very easy, all you need to do is enter Time Machine and restore the files from your backup.
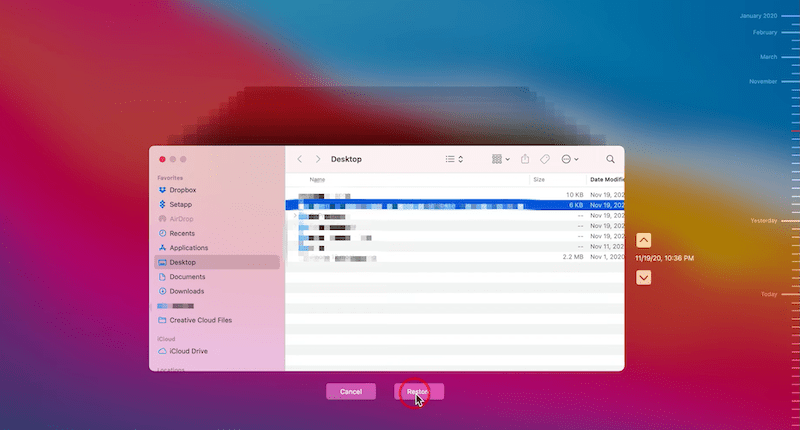
For Windows users who want to recover files deleted with rm, we will also look at 2 ways. The first one is applicable to the situation that you don’t have a backup, while the second is helpful when you have a backup.
Windows File Recovery is a free Windows application to restore documents, videos, photos or others from both internal and external storage devices. It doesn’t have a graphic user interface, you have to enter commands and use arrows on your keyboard to perform the recovery. It is safe and free to use, but the recovery rate will vary in different case, basically lower than those paid ones.
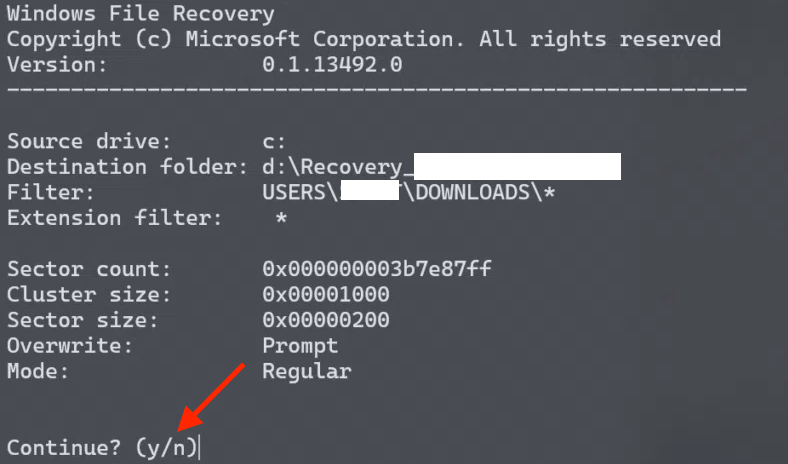
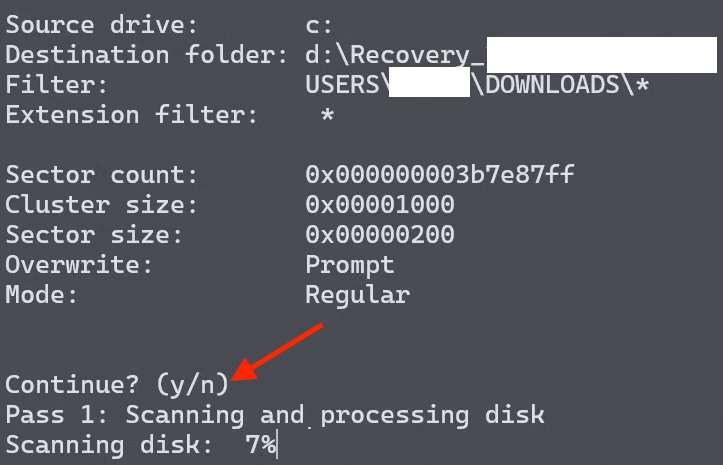
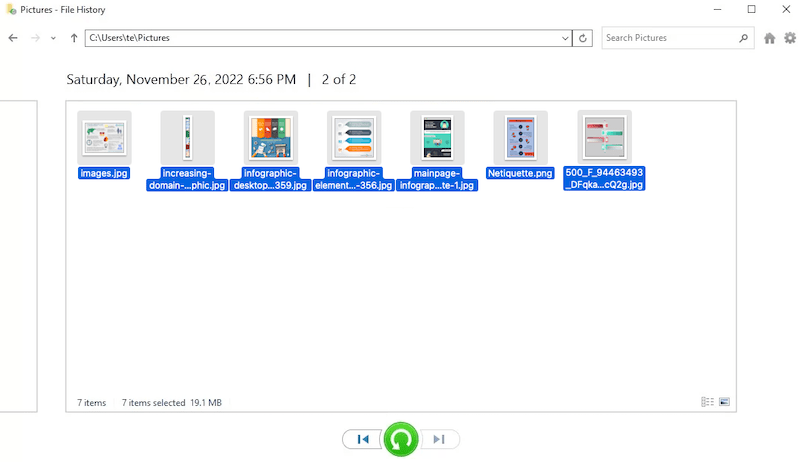
File History is considered as one of the best Windows built in tools, it continuously and automatically backs up specific folders to an external hard drive, so you will be able to recover a deleted file after rm from a previous version of the file. It works similarly to Time Machine on Mac.
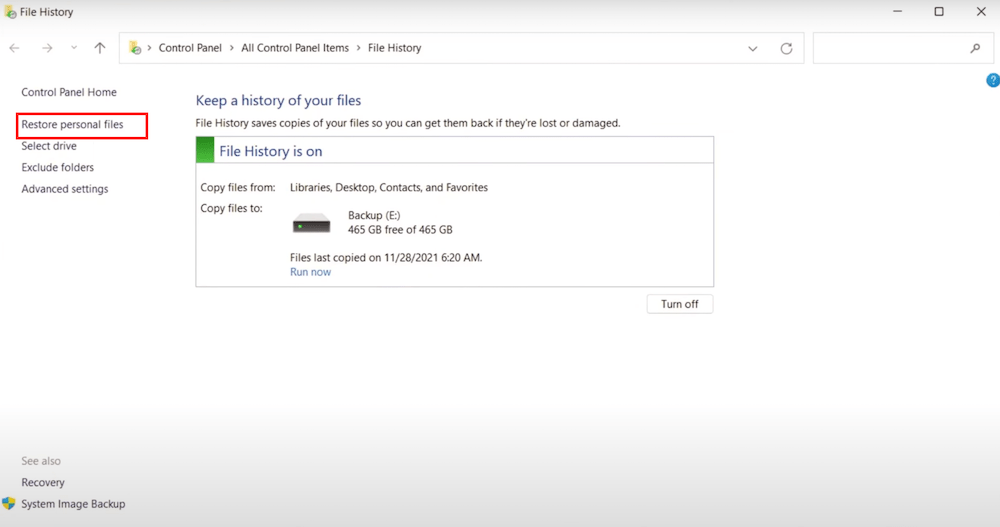
There may be other ways to recover a file after rm, however, it is not guaranteed that all the rm deleted files can be recovered. We recommend running Cisdem data recovery for the file retrieval. All of us should hopefully have no such data loss, but it’s a reminder of backing up files onto an external storage device.

Zoey shows a great interest in what she does. Although not long with Cisdem, she has possessed a professional understanding of data recovery.

